Mortal Shell II Three Currencies Explained: Gloom vs Glimpse vs Coin
Gloom, Glimpse, Coin -- three currencies, three completely different jobs. Stop burning the wrong one at the wrong machine with this breakdown.
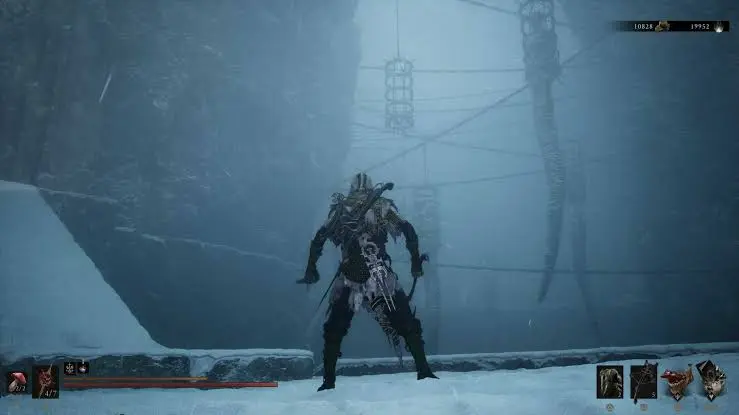
Mortal Shell II Three Currencies Explained: Gloom vs Glimpse vs Coin
Mortal Shell II runs three currencies that new players constantly conflate, and the confusion is expensive. Gloom looks like a crafting material but behaves like experience. Glimpse hides behind Shell progression. Coin is the obvious money. Get them mixed up and you will sit at a Beacon wondering why your sword will not upgrade, or hoard Gloom you should have spent before a death. This guide separates all three, explains the two-currency system feeding each Shell’s skill tree, and covers the Tarforge materials that are not currencies at all.
Table of Contents
- Preparation: Why New Players Mix Up Gloom, Glimpse, and Coin
- Core Walkthrough: What Each Currency Does and Where It Comes From
- Important Notes: Death-Loss Matrix, the Mether’s Breath Tax, and the Post-Patch Glimpse Economy
- Rewards and Easter Eggs: Reliable Sources for Each Currency
Preparation: Why New Players Mix Up Gloom, Glimpse, and Coin
The HUD lists Coin and Gloom side by side, and both look like tradable counters. Glimpse does not appear in that HUD summary because it is spent at a specific NPC rather than a menu — which is exactly why players miss it. The rule of thumb: if it is spent at a Beacon, it is Gloom; if it is spent at Zhirelle (the Shellkeeper in Marrow Keep) or via the Beacon’s Level Up option, it is Glimpse; if it is spent at a machine or a shop, it is Coin.
A second trap is thinking Glimpse and Shell Points are the same thing. They are not. Shell Points are earned by leveling the Harbinger with Gloom (one per level, shared across every Shell) and buy the perks on your inhabited Shell. Glimpse instead raises Bond Tier, which decides which perk tiers are even available. Glimpse gates; Shell Points fill.
Core Walkthrough: What Each Currency Does and Where It Comes From
1 Gloom: The Souls-like Currency You Lose on Death
Gloom is your leveling currency. Spend it at any Beacon to strengthen the Harbinger in one pass: Health, Shell Health, Base Damage, Shell Ability Damage, and Critical Damage. The leveling screen also lists your Shell Points.
Death rule: Gloom is lost on death and recovered from your bloodstain, exactly like Souls currency. Die again before picking it up and it is gone for good. The biggest early mistake is carrying a huge unspent Gloom stack into a risky fight. Spend it, then fight.
Hidden tax: Mether’s Breath (fast-travel, extracted via the Glimpse siphon at Marrow Keep) costs the Gloom you are holding to return to Marrow Keep. If you are farming, bank your levels before you travel.
2 Glimpse: The Finite Shell-Bond Resource Spent at Zhirelle or Any Beacon
Glimpse grew your Shells — and, as of the Week 1 Update (Aug 29), that sentence has a much softer ending. You spend Glimpse with the Shellkeeper (Zhirelle in Marrow Keep, or the Level Up option at any Beacon) to raise a Shell’s Bond Tier, which runs from I to IV. Each tier improves Shell Health on Revive and Revive Efficiency, unlocks a new band of abilities you can buy with Shell Points, and reveals more of that Shell’s Memories. Genessa is the exception: her Bond Tier is raised by speaking with Genessa herself in Marrow Keep rather than through the Shellkeeper.
The launch economy treated every Glimpse as a one-way door: hard caps per playthrough, no refunds, enough to bond roughly two Shells and no more. The Aug 29 update removed the single-run hard caps on Glimpses (and Tarcores), adjusted reward tables, and added the Mether’s Severance respec item, which refunds every Glimpse invested in a Shell in full when you hand it to Zhirelle. Pre-order and DLC buyers received a resource compensation for the same rework. Net effect: fully upgrading everything in one playthrough is now a realistic goal instead of an NG+ promise. Glimpses are still committed when spent — you collect them the same way — but they are no longer permanently misspent. Full loop in the respec guide.
Where it comes from: Glimpse appears as vertical white wisps near Beacons, Corrupted Gates, and Dungeons, and is gathered from chests, cleansing Corrupted Beacons, and certain NPC interactions such as the Grisha Pup in Mushroom Village. Because it is consumed into a permanent Bond Tier rather than carried as a droppable pile, Glimpse is not lost on death the way Gloom is — it is a persistent, committed upgrade resource.
3 Coin: The Flexible Money for the Tarforge and Merchants
Coin is the workhorse. At the Tarforge it pairs with Ventrium for weapon upgrades and is the only cost when tempering a Tarstone (reported around 100 Coin per temper). Merchants want Coin for materials and consumables; The Collector sells Thoracium for 5,000 Coin (night only). Selling gear and treasures you will never use is the fastest way to keep Coin flowing.
| Currency | Spent at | Lost on death? | Primary job |
|---|---|---|---|
| Gloom | Any Beacon | Yes (reclaim from bloodstain) | Level the Harbinger |
| Glimpse | Zhirelle / any Beacon (Level Up) | No (persistent, committed to Bond Tier) | Raise Shell Bond Tier / unlock perks |
| Coin | Tarforge + merchants | No | Upgrades + purchases |
4 The Tarforge Materials That Are Not Currencies
Four materials feed the Tarforge, and none of them is a currency you farm from mobs the way you farm Gloom:
| Material | Source | Note |
|---|---|---|
| Ventrium | Exploration (chests, side rooms, secret areas) | The common one; gates all weapon upgrades |
| Dorsalite | Night Mode finds | ”Chitinous carapace” lore drop |
| Laterite | Night Mode finds | ”Pieces of the Blessed Mether” |
| Thoracium | The Collector, 5,000 Coin, night only | The buyable one |
Weapon upgrades are not on the Beacon screen at all — they happen at the Tarforge run by Franz in Marrow Keep. Sidearm upgrades stay locked until you hand over the Obsidian Lathe (found in Martyr’s Tomb), and Tarstone upgrades need Etching Needles first. The day-one patch also changed smelting so it now costs Gloom instead of Coin.
Weapon upgrade cost curve (Ballistazooka / Forgotten Crossbow, GameTrek data):
| Tier | Cost |
|---|---|
| +1 to +2 | 1 Ventrium + 100 Coin |
| +3 | 3 Ventrium + 300 Coin |
| +4 | 6 Ventrium + 500 Coin |
| +5 | 9 Ventrium + 1,000 Coin |
| +6 | 12 Ventrium + 1,250 Coin |
| +7 | 1 Laterite + 2,000 Coin |
| +8 | 3 Laterite + 2,750 Coin |
The shape is the reliable takeaway: Ventrium runs out first and cost roughly triples across tiers, so push one weapon rather than spreading Ventrium thin.
Tarcores are farmable now (as of the Week 1 Update, Aug 29). The update introduced a new equipment type, Fragile Tarstones: they carry durability that drains as you use them, and when the durability is gone the stone shatters and yields 1 Tarcore. Combined with the removal of the per-run Tarcore hard cap, the material that gates Tarstone Tier 3/4 tempering went from “rationed” to “farmable.” Treat Tarcores like a consumable loop now — slot a Fragile stone, play, bank the cores — rather than a launch-week rarity to hoard.
5 Farming Coin With Proxima’s Extracted Specimens (Verified)
This is verified by GameRant. Proxima’s Collector skill, unlocked at Tier 3 Shell Bond, gives enemies a chance to drop Extracted Specimens on death. Those specimens sell to Merrick for 100 Coin each, with no farm limit. Collector II adds a 40% chance for one specimen; Collector III adds a 35% chance for three from a single kill. Proxima’s Biosampler active ability also harvests biosamples, reinforcing her as the only Shell that actively farms Coin. The best spot is the sheep pasture across the rope bridge from the Sunken Village Beacon in the Glutted Mire — nine sheep, reset and repeat. Night Mode raises drops further.
Important Notes: Death-Loss Matrix, the Mether’s Breath Tax, and the Post-Patch Glimpse Economy
- Gloom: lost on death, reclaimable from bloodstain; spend early, bank before Mether’s Breath travel.
- Glimpse: persistent and committed to Bond Tier; not a dropped-on-death currency like Gloom. As of the Week 1 Update (Aug 29) the single-run hard caps are gone and a Mether’s Severance reset refunds Glimpses in full — bond freely, re-plan when your main changes.
- Coin: not lost on death; it is banked progress.
- Mether’s Breath tax: returning to Marrow Keep costs the Gloom you hold. Level up first.
- One Shell Points pool: Shell Points are shared across all Shells, so you can refund and reassign perks freely without wasting Gloom-derived progress.
Rewards and Easter Eggs: Reliable Sources for Each Currency
| Currency | Reliable sources |
|---|---|
| Gloom | Mob kills, Gloom trees (hit them), boss deaths, bloodstain recovery |
| Glimpse | Chests, cleansing Corrupted Beacons, NPC interactions (Grisha Pup), white wisps near Beacons / Corrupted Gates / Dungeons |
| Coin | Selling unused gear and treasures, merchant trades, Extracted Specimens (Proxima), some boss drops |
| Ventrium | Exploration only — never in merchant stock per guide data |
| Thoracium | The Collector (5,000 Coin, night only) |
The deeper reward of understanding the split is efficiency: spend Gloom before you die, commit Glimpse to whoever your current wall demands — a Severance reset can move it later — and let Proxima’s Collector carry your Coin economy.
Frequently Asked Questions
What is the actual difference between Gloom and Glimpse?
Gloom levels the Harbinger at any Beacon and is lost on death (reclaim from your bloodstain). Glimpse raises a Shell's Bond Tier at Zhirelle or any Beacon, which unlocks higher ability tiers and Memories. Glimpse is a persistent, committed resource -- it is not dropped on death the way Gloom is. Note the Shellkeeper's name appears as both 'Zhirelle' (AltChar, Game8) and 'Zeril' (GamerFuzion review); treat them as the same NPC.
Does Gloom drop when you die?
Yes. Gloom behaves like a Souls currency: you lose what you carry and reclaim it from the bloodstain. Die again before recovering it and the Gloom is gone for good. Bank your levels at a Beacon before risky fast-travel, because Mether's Breath travel back to Marrow Keep costs the Gloom you are holding.
Where do I actually spend Coin?
At the Tarforge in Marrow Keep (weapon upgrades need Coin plus Ventrium; tempering a Tarstone costs Coin alone, around 100 per temper) and at merchants such as Merrick and The Collector. Coin is the flexible resource; sell gear and Extracted Specimens you will not use to keep it topped up.
Why was Glimpse so scarce at launch, and is it still?
At launch (2026-08-20) Glimpse was hard-capped per playthrough -- roughly two Shells' worth -- and unrefundable, so the game rationed it on purpose. As of the Week 1 Update (Aug 29) that is obsolete: the single-run hard caps on Glimpses and Tarcores were removed, reward tables were adjusted, and a Mether's Severance reset at Zhirelle now refunds invested Glimpses in full. A focused first run can fully upgrade everything. Glimpse is still not something you pick off mobs -- the collection route is unchanged; only the ceiling moved.
Can Proxima farm Coin with biosamples at Merrick?
Yes, this is verified. Proxima's Collector skill (reached at Tier 3 Shell Bond) gives enemies a chance to drop Extracted Specimens, which sell to Merrick for 100 Coin each with no cap. Collector II adds a 40% chance for one specimen; Collector III adds a 35% chance for three. The sheep pasture by the Sunken Village Beacon in the Glutted Mire is the go-to farm.
About the author

Editor-in-Chief
Jack Cao is the founder and Editor-in-Chief of GameGuidesBox. He has been writing practical game guides for over a decade, specializing in action RPGs, extraction shooters, and competitive FPS. Every guide he signs is playtested first-hand: his logged test time includes 47 hours across two Crimson Desert playthroughs with DPS verification, 180 hours building a full Windrose settlement, and 45 hours across six Yunyun Syndrome endings runs. Favorite games include Titanfall 2, Baldur's Gate 3, Metro, PUBG, and CS2.
You may also like
Mortal Shell II How to Respec: Mether's Severance Guide
Mether's Severance turns Mortal Shell II's Glimpse commits into a refundable loop. Here is the exact respec route via Merrick and Zhirelle, what the refund covers, and when it is worth spending Coin.
Mortal Shell II: Every Playable Shell, Ability Tree, and Unlock Location
Confused about which Shell to bond first? We mapped all the playable Shells — the eight permanent bodies plus prologue-only Harros — with their full ability trees and exact unlock routes.
Mortal Shell II All 44 Bosses: Locations, Beacons, and Drops Checklist
Struggling to track down every grotesque in Fainweald? We mapped all 44 boss encounters, their nearest Beacon, and exactly what each one drops. Click to unlock the full checklist.
Comments