Mortal Shell 2 Lazlo Overheat Crit Build: Axatana, Ballistazooka, and the Heat to Resolve Loop
Struggling to survive while still dealing damage in Mortal Shell 2? Lazlo's Overheat cycle turns his armor into a crit engine. Here is the verified 22-point allocation, Axatana and Ballistazooka Tarstone kit, and Heat management that peaks around level 35.
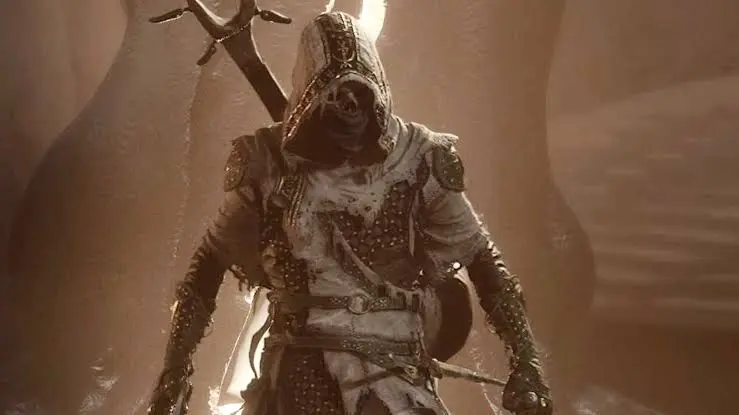
Mortal Shell 2 Lazlo Overheat Crit Build
Lazlo the Justicar is the wall. Highest base HP in the roster, a passive 10% Damage Reduction, and an armor that turns heat into a shockwave. The Overheat crit build rides that heat meter: you push Retribution into Overheat, unload Axatana light-combo crits while the meter is hot, then convert the falling meter into a Ballistazooka Fusillade burst. It is the strongest around level 35 and stays a comfortable, forgiving carry the whole game.
Table of Contents
- Gear and Unlock Route in the Royal Crypt of Mammon
- Step-by-Step Setup for the Overheat to Resolve Loop
- Heat Drain and Armor-Disable Misreads That Get You Punished
- Shell Unlock Reward and Endgame Weapon-Cap Payoffs
Gear and Unlock Route in the Royal Crypt of Mammon
- Required items: Axatana (main weapon), Ballistazooka (sidearm), Vatra’s Seal or Untarnished Seal, Common Moonshine (active item for Resolve recovery).
- Prerequisites: Lazlo is obtained in the Royal Crypt of Mammon, in the southwest area of the map. Defeat the Royal Crypt Mammoth boss (also referred to as Vellen, the High Lord of Mammon) in the tower, continue through the dungeon, and follow the torch-lit path to his shell after the memory.
- Recommended level/gear: This build is documented as a mid-game setup peaking around level 35. Allocate 22 Shell Points using the table below .
Lazlo’s two signature tools: Retribution (active: heats the armor and unleashes a shockwave; repeated use causes Overheat, a stronger shockwave that inflicts Burn but temporarily disables the armor) and Fortified Plate (passive: base 10% Damage Reduction while the armor is equipped).
Step-by-Step Setup for the Overheat to Resolve Loop
1 Clear the Royal Crypt and claim Lazlo
Location: Royal Crypt of Mammon, southwest map. Action: Defeat the crypt boss, push through to the torch-lit crypts, and interact with Lazlo’s shell to play his memory. Outcome: Lazlo becomes a permanent, instantly switchable Shell with the highest base HP in the game.
2 Spend the verified 22 Shell Points
| Ability | Level | Shell Points | Verified effect |
|---|---|---|---|
| Worthy Armor | 2 | 3 | Retribution costs 30% less Resolve |
| Warmed Up | 2 | 3 | Up to 30% more damage and +35% Resolve from melee as Heat Meter rises |
| Incandescence | 2 | 3 | When armor leaves cooldown, Heat Meter fills 35% |
| Inflamed | 2 | 3 | Heat Meter stops draining over time; Overheated shockwaves cost no Resolve and inflict 10 Burn stacks |
| Rush | 4 | 10 | +20% Critical Hit Chance when armor is on cooldown (plus Warp stacks) |
| Total | — | 22 | — |
The synergy: Worthy Armor makes Retribution cheap, Warmed Up pays that Resolve back through fast Axatana hits, Inflamed stops the meter bleeding so Overheat sustains, and Rush plus Incandescence hand you crit chance and a fast Heat refill the moment the armor cools.
3 Slot the Tarstone kit on Axatana and Ballistazooka
Location: Tarforge in Marrow Keep (Temper Tarstones with the Etching Needles installed).
| Slot | Tarstone | Verified role |
|---|---|---|
| Axatana (Infusion) | Duality Stone | Light Attack combo strikes twice, doubling crit and Resolve generation during Overheat |
| Axatana (Infusion) | Voltaic Crown | Adds a Lightning infusion to melee attacks |
| Axatana (Ability) | Acolyte’s Stone | Resolve-powered Charged Light Attack with bonus Critical Chance and Critical Damage (finisher) |
| Ballistazooka (Combat) | Rupturing Stone | Critical shots deal additional Break Damage |
| Ballistazooka (Infusion) | Emberseed Stone | Projectiles permanently inflict Burn |
| Ballistazooka (Ability) | Fusillade Stone | Consumes Resolve to fire consecutive shots with increased Critical Chance |
| Support | Deadeye Stone | Improves Ballistazooka Critical Damage |
| Support | Headman’s Stone | Improves Axatana Critical Damage |
| Support | Marksman’s Stone | Improves Ballistazooka Critical Hit Chance |
| Support | Auspicious Stone | Improves Axatana Critical Hit Chance |
4 Run the core combat cycle
Location: Any encounter. Action: Open with Retribution to build Heat. Push into Overheat, then unleash Axatana’s rapid Light combo. Duality Stone doubles every hit, Rush grants crit chance, and Warmed Up refunds Resolve. As the Heat Meter begins to fall, swap to Ballistazooka and fire Fusillade Stone to convert leftover Resolve into a ranged crit burst. Use Rupturing Stone to add Break Damage on crits so you can also set up stagger windows. Outcome: A self-sustaining loop where melee heat feeds ranged burst, and crit chance stays high across both weapon phases.
5 Boss-specific tips
Use Retribution shockwaves to pressure the Break gauge while Fortified Plate absorbs mistakes. During Overheat, stay aggressive with Axatana because Inflamed keeps the meter from draining and makes shockwaves free. When the armor disables, Rush’s crit chance and the Ballistazooka burst cover the window until Incandescence refills the meter. Do not dump all Resolve into Acolyte’s Stone before Retribution and Fusillade are set up.
Heat Drain and Armor-Disable Misreads That Get You Punished
- Overheat disables the armor on purpose. That is the designed trade, not a bug. Plan the Ballistazooka phase for that window instead of panicking.
- Spending Resolve out of order. Retribution and Fusillade both need Resolve. Acolyte’s Stone is a finisher; do not burn your pool on it before the main rotation.
- Standing in melee after armor disable. You lose Fortified Plate’s 10% DR while the armor is off. Use Rush’s crit window and ranged pressure, then let Incandescence reset you.
- Claim that Lazlo is “broken” or strongest at level 35 specifically is a Guide8 framing (“until Level 35”); treat the peak as a documented mid-game sweet spot rather than a hard power cliff.
- Exact boss name for the Royal Crypt unlock differs between sources (Royal Crypt Mammoth vs Vellen, the High Lord of Mammon). Use either, but the name conflict is unresolved.
Shell Unlock Reward and Endgame Weapon-Cap Payoffs
| Source | Reward |
|---|---|
| Royal Crypt of Mammon | Lazlo the Justicar Shell, permanently switchable, highest base HP |
| Completing Lazlo’s memory | Access to Retribution, Fortified Plate, and the full Heat tree |
| Axatana + Duality Stone | Doubled light-combo crit and Resolve loop |
| Hidden Nave / Endless Core (late game) | Removes the weapon cap so Axatana can exceed level 16 |
Lazlo’s payoff is endurance with teeth. The Heat meter turns a defensive Shell into a crit engine, and the Ballistazooka backup means you are never useless when the armor is down.
Frequently Asked Questions
Why is Lazlo not working after Overheat disables his armor?
Overheat is supposed to temporarily disable the armor. That is the trade window. Rush and Incandescence hand you Critical Chance and refill the Heat Meter when the armor comes off cooldown, so you pivot to the Ballistazooka burst instead of standing exposed.
Can you beat Zmey with Lazlo?
Lazlo is rated A-tier and is a safe pick, but tier lists place him below the S-tier boss killers. His Overheat burst works, but you will want the Endless Core weapon cap removed and a fully leveled Axatana before the dragon.
What Seal should Lazlo run?
Vatra's Seal (petrify on activation, the old Harden) suits a tank who wants a safety net, while Untarnished Seal gives a standard block and Perfect Guard. Pick based on whether you want the crutch or the higher-reward parry.
Is Lazlo really the tankiest Shell?
Sources confirm Lazlo has the highest base HP of any Shell and a base 10% Damage Reduction from Fortified Plate, scalable toward 30% through abilities like Warmed Up and Furnace.
About the author

Editor-in-Chief
Jack Cao is the founder and Editor-in-Chief of GameGuidesBox. He has been writing practical game guides for over a decade, specializing in action RPGs, extraction shooters, and competitive FPS. Every guide he signs is playtested first-hand: his logged test time includes 47 hours across two Crimson Desert playthroughs with DPS verification, 180 hours building a full Windrose settlement, and 45 hours across six Yunyun Syndrome endings runs. Favorite games include Titanfall 2, Baldur's Gate 3, Metro, PUBG, and CS2.
You may also like
Mortal Shell II How to Respec: Mether's Severance Guide
Mether's Severance turns Mortal Shell II's Glimpse commits into a refundable loop. Here is the exact respec route via Merrick and Zhirelle, what the refund covers, and when it is worth spending Coin.
Mortal Shell II: Every Playable Shell, Ability Tree, and Unlock Location
Confused about which Shell to bond first? We mapped all the playable Shells — the eight permanent bodies plus prologue-only Harros — with their full ability trees and exact unlock routes.
Mortal Shell II All 44 Bosses: Locations, Beacons, and Drops Checklist
Struggling to track down every grotesque in Fainweald? We mapped all 44 boss encounters, their nearest Beacon, and exactly what each one drops. Click to unlock the full checklist.
Comments