Mortal Shell II Harden, Parry, and Break Damage: A Timing Survival Guide
Harden mid-swing, land a Perfect Harden, or commit to a Parry -- master the three defensive Seals and the Break meter that turns defense into a Riposte.
Mortal Shell II Harden, Parry, and Break Damage: A Timing Survival Guide
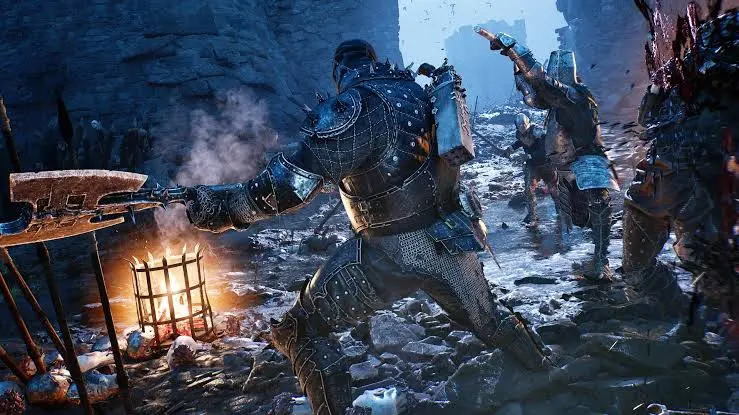
Mortal Shell II has no stamina bar, but it does not hand you one defensive system. It hands you three — Guard, Harden, and Parry — and locks each to a different Seal, so picking your defense is a build decision, not a reflex. The throughline is the Break meter: every timed defense does not just save your health, it fills the enemy’s posture until a Riposte opens. This guide covers how each defense works, how to time the strong versions, and how Break becomes damage.
Table of Contents
- Preparation: Which Seal You Should Equip Before Learning Any Defense
- Core Walkthrough: Harden, Parry, and the Break Meter
- Important Notes: One Seal Only, Red Attacks, and Hit-Detection Quirks
- Rewards and Easter Eggs: Defense Comparison and Break Contribution
Preparation: Which Seal You Should Equip Before Learning Any Defense
Only one Seal can be equipped at a time, and a Seal grants exactly one defensive ability. That makes Seal choice a loadout pillar, not an afterthought.
| Seal | Defense | How obtained | Risk profile |
|---|---|---|---|
| Untarnished | Guard / Perfect Guard | Default from start | Forgiving, hold-to-block |
| Vatra’s | Harden / Perfect Harden | Tar Golem (prologue / Garick’s Den) | Aggressive, mid-swing safe |
| Infinite | Parry | Genessa’s Guard tutorial, Marrow Keep | High risk, high Break |
| Slayer | Sidearm Break + Riposte bonuses | Merrick -> Forgotten Crossbow | Easy-mode, disables achievements |
Beginners: run Untarnished. You can hold Guard against an attack you cannot confidently time, and work toward Perfect Guards as your reads improve.
Core Walkthrough: Harden, Parry, and the Break Meter
1 How Harden Works on Vatra’s Seal and Why You Can Fire It Mid-Swing
Vatra’s Seal replaces Guard with Harden. Activate it (LB / ALT) and your character turns to stone, nullifying the next single physical hit — except red attacks. Its signature advantage is that it can be woven into an attack: begin your swing, Harden through the incoming counterhit, let the stone shatter, and the attack resumes. For aggressive players this is the best defense in the game because it never interrupts your offense.
Harden is not free. A meter sits below your health bar; each use empties it and it refills on its own. You can only Harden when it is filled. You can also hold the button to stay stone indefinitely, but you are committed until you release or get hit. When an enemy strike breaks your Harden, the attacker is briefly staggered — which is why Harden also works under simultaneous pressure from multiple foes where a strict Parry would whiff.
2 Perfect Harden Timing and the Instant Meter-Refill Loop
Time Harden so the stone forms the instant the attack connects and you get a Perfect Harden. It nullifies the hit and deals a small amount of Break Damage. The payoff is the meter: a Perfect Harden instantly refills the Harden meter to full. That creates a skill loop — Perfect timing, Perfect Harden, Break Damage, meter refills, another Perfect Harden becomes available immediately. String them as long as your timing holds.
You do not need a precise frame count. Every guide reviewed is explicit: watch the enemy’s attack animation and learn the moment immediately before impact. Panic inputs are the enemy of this loop. No authoritative frame data (startup, active, recovery) has been published, so play by feel.
3 How Parry on the Infinite Seal Out-Damages Everything
The Infinite Seal is the dedicated Parry option, earned by completing Genessa’s Guard/Perfect Guard tutorial in the Marrow Keep training area. To Parry, swing your arm (Q on keyboard) so it catches the incoming strike. A successful Parry nullifies damage and deals a large amount of Break Damage.
The math is the hook: one Parry deals roughly the Break Damage of three successful Perfect Guards or Perfect Hardens (GameRant). That is the highest immediate Break payoff of any conventional defense. The trade is brutal — a failed Parry provides no normal Guard protection, leaves you open, and can take the full hit. The Parry animation also takes time to complete, so early inputs whiff.
4 Reading Red vs Yellow Attacks and the Break Meter
Enemy attacks are color coded, and the cue is reliable.
- Red attacks: unblockable. GameRant, SportsRant, DTG Reviews, and the GamerFuzion review all confirm that Guard, Harden, and Parry fail against red attacks — including grabs and certain magical hits, often flagged by a red flash and a distinct ringing sound. Dodge or reposition; do not waste a charge.
- Yellow window: the GamerFuzion review states plainly that “Yellow means the window is there to parry.” This is the parryable cue, verified by a published review rather than rumor.
- Break meter: every enemy has a posture (Break) meter, shown as the yellow bar beneath their health. Fill it and the enemy breaks, opening a Riposte. Posture is the resource you attack; health is what you take after it breaks.
5 Turning Break Damage Into a Riposte Window
The loop is identical regardless of Seal: build Break, enemy breaks, Riposte appears, heavy damage. The Seal only changes how fast you get there.
| Defense | Break contribution | Best used by |
|---|---|---|
| Untarnished Perfect Guard | Small | Learners, safe trades |
| Vatra’s Perfect Harden | Small (but refills meter) | Aggressive mid-swing play |
| Infinite Parry | ~3x a Perfect Guard/Harden | Confident animation readers |
| Slayer sidearm/ability | Ranged Break route | Easy-mode, achievement-off saves |
You do not need to Parry to access Riposte. Any Break source contributes, so a player who hates Parry can still run the Riposte loop through Harden and melee pressure. The Slayer Seal instead routes Break through sidearms and even refunds Health and Resolve on Riposte — at the cost of disabling achievements for that save.
Important Notes: One Seal Only, Red Attacks, and Hit-Detection Quirks
- One Seal rule: only one defensive ability is ever active. Running Vatra’s means no Guard, no Parry. Pick based on the fights you keep losing, not habit.
- Red attacks ignore defense: neither Guard, Harden, nor Parry saves you from red attacks. Dodge or reposition; do not waste a Harden charge.
- Failed Parry is a full hit: Infinite has no safety net. Miss the timing and you eat the damage with no Guard fallback.
- Harden under pressure: because Perfect Harden works even when several enemies hit at once, Vatra’s is the strongest pick when outnumbered or for aggressive, hit-and-run Shells like Tiel.
- Shell-ability hit detection: skills that need auto-lock or fast repositioning are reported by some community sources to occasionally miss their hit detection [Unverified — flagged in seed material, not confirmed by press coverage]. If an ability whiffs, assume a targeting quirk rather than a bug until verified.
Rewards and Easter Eggs: Defense Comparison and Break Contribution
| Failure mode | Consequence |
|---|---|
| Failed Parry (Infinite) | No Guard, take full hit |
| Guard meter depleted (Untarnished) | Temporary staggered, vulnerable |
| Harden on cooldown (Vatra’s) | Cannot stone up; eat the hit |
| Red attack blocked/hardened | Damage goes through regardless |
The deeper reward of mastering these systems is consistency: a player who can Perfect Harden or Parry turns every enemy attack into Break progress, which is the fastest route to a Riposte and the safest way to conserve Mether’s Pulse charges across a long run.
Frequently Asked Questions
What is the difference between Harden and Parry in Mortal Shell II?
Harden lives on Vatra's Seal (from the Tar Golem) and turns you to stone to absorb one hit; you can fire it mid-swing and a Perfect Harden instantly refills its meter. Parry lives on the Infinite Seal (from Genessa's tutorial) and swings your arm to catch an attack for heavy Break Damage, but a missed Parry leaves you fully exposed. They are different Seals, so you equip one, not both.
How do I perform a Perfect Harden?
Hold the Harden input (LB on console, ALT on keyboard) so the stone forms the instant the enemy attack connects. A Perfect Harden deals Break Damage and instantly refills the Harden meter, letting you chain Perfect Hardens as long as your timing holds. You do not need a frame-perfect count -- read the wind-up.
What do the red and yellow attack colors mean?
Red attacks are unblockable: Guard, Harden, and Parry all fail against them, so dodge or reposition (confirmed by GameRant, SportsRant, DTG Reviews, and the GamerFuzion review). Yellow marks the parry window -- the cue that an attack is parryable -- which the GamerFuzion review confirms explicitly.
How does Break Damage lead to a Riposte?
Every enemy has a Break (posture) meter, shown as the yellow bar beneath their health. Melee, Perfect Guard, Perfect Harden, and Parry all fill it. When it fills, the enemy breaks and a Riposte opportunity opens for heavy damage. Parry builds Break roughly three times faster than a Perfect Guard or Perfect Harden.
Which Seal should a beginner equip?
Untarnished (the default Guard) is the most forgiving because you can hold the block and learn timing without an all-or-nothing punish. Move to Vatra's if you like aggressive Harden play, or Infinite once you can read attack animations confidently. Avoid Slayer if you care about achievements -- it disables them.
About the author

Editor-in-Chief
Jack Cao is the founder and Editor-in-Chief of GameGuidesBox. He has been writing practical game guides for over a decade, specializing in action RPGs, extraction shooters, and competitive FPS. Every guide he signs is playtested first-hand: his logged test time includes 47 hours across two Crimson Desert playthroughs with DPS verification, 180 hours building a full Windrose settlement, and 45 hours across six Yunyun Syndrome endings runs. Favorite games include Titanfall 2, Baldur's Gate 3, Metro, PUBG, and CS2.
You may also like

Mortal Shell II How to Respec: Mether's Severance Guide
Mether's Severance turns Mortal Shell II's Glimpse commits into a refundable loop. Here is the exact respec route via Merrick and Zhirelle, what the refund covers, and when it is worth spending Coin.
Mortal Shell II: Every Playable Shell, Ability Tree, and Unlock Location
Confused about which Shell to bond first? We mapped all the playable Shells — the eight permanent bodies plus prologue-only Harros — with their full ability trees and exact unlock routes.

Mortal Shell II All 44 Bosses: Locations, Beacons, and Drops Checklist
Struggling to track down every grotesque in Fainweald? We mapped all 44 boss encounters, their nearest Beacon, and exactly what each one drops. Click to unlock the full checklist.
Comments