Mortal Shell II Boss Order Route: Which Gates to Clear First and the Levers That Unlock Them
Rushing Mammon gets most players flattened. We lay out the gate-clearing order that actually works, the lever bosses you cannot skip, and the pits that waste runs. Click to read the safe route.
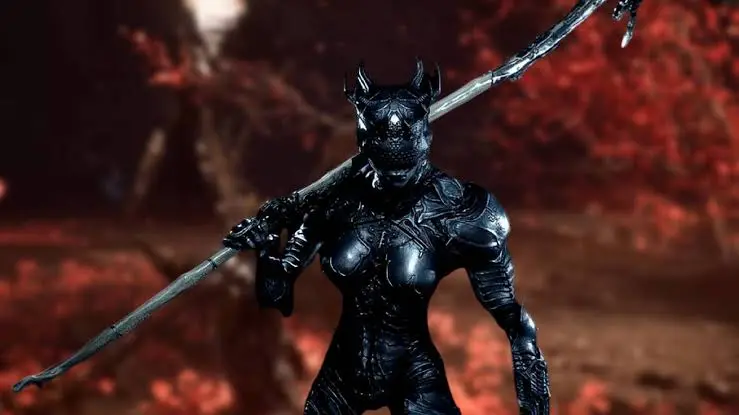
Mortal Shell II Boss Order Route: Which Gates to Clear First and the Levers That Unlock Them
Mortal Shell II is semi-open, but that freedom is a trap. Enemy density and raw damage ramp up sharply toward the Ruins of Mammon and the final gates. Every guide on this site converges on the same blunt warning: charging Mammon with a Fainweald-tier build gets you stonewalled fast. This guide sets the order that respects the curve and flags the lever bosses you cannot skip.
Table of Contents
- Preparation Before Setting a Route
- Recommended Gate Order From Glutted Mire to the Unfound Path
- Lever and Key Bosses That Gate Later Regions
- Pitfalls That Waste Entire Runs
- Ova Target and the Endgame Handoff
Preparation Before Setting a Route
Before you commit to any route, internalize three systems that the open structure hides:
- Beacons are your only reliable rest points. They are sparse and double as level-up spots and fast-travel nodes. Cleanse and rest at each one before a boss. Walking in at half resources is how attempts get burned.
- Gloom is your real leveling currency. Spend it on the Harbinger before repeating a fight you have already lost three times. More health and damage often beats “getting better” at the boss.
- Tarstones level by kills while equipped. If you are about to grind an area, equip the Tarstone you actually want to improve. A level-3 Tarstone is assumed gear for the endgame.
Recommended Gate Order From Glutted Mire to the Unfound Path
The region chain the game itself walks you through is: Disciple’s Pass → Marrow Keep (the hub) → Fainweald → Glutted Mire → Sanguine Caverns → Ruins of Nochte → Mammon → Gate of Mammon → Gate of Infinity → Sester’s Gate. Read that as the difficulty spine, not a hard corridor — but note where the milestones sit. The Faded Citadel is a mid-to-late stop inside the Gate of Infinity, roughly the ninth link in the chain; if you have reached it, you are on the back slope, and the Unfound Path finale is next.
The safe arc for hunts and Ova follows the same spine: Disciple’s Pass and Fainweald hunts -> Glutted Mire -> Sanguine Caverns -> Ruins of Nochte (Prisoners’ Domain via Vrago) -> Mammon and the Gate of Mammon -> Conquered Temple (Droeg) and the Faded Citadel inside the Gate of Infinity (Isaac) -> Unfound Path. The middle regions are the buffer that lets you hit Mammon and beyond with real power.
| Phase | Regions / Gates | Why here |
|---|---|---|
| 1 | Disciple’s Pass → Marrow Keep | On-ramp and hub; establish the return spine before wandering |
| 2 | Fainweald optional hunts | Low-risk Shell and lever setup |
| 3 | Glutted Mire | Light gate, easy Ova and Gloom |
| 4 | Sanguine Caverns (via Lucian) | Mandatory route opener, mild difficulty |
| 5 | Ruins of Nochte — Prisoners’ Domain (via Vrago) | Mandatory route opener, builds levels before the curve spikes |
| 6 | Mammon and the Gate of Mammon | Dense boss region; arrive leveled |
| 7 | Gate of Infinity: Conquered Temple, Faded Citadel | Droeg then Isaac; the Citadel sits mid-to-late (≈ step 9 of the chain) and Isaac yields the Unfound Path Ova |
| 8 | Sester’s Gate / Unfound Path | Tendril guardians, then Zmey |
The logic is cumulative. Each gate you clear first hands you Ova, Tarstone levels, and Gloom levels. By the time Mammon’s density spikes, you are not walking in with a prayer.
Lever and Key Bosses That Gate Later Regions
Two bosses drop hard progression keys, and two more are mandatory route openers. Miss them and regions stay locked.
| Boss | Drops / Opens | Location |
|---|---|---|
| Lucian, the Thirsting Knight | Opens Sanguine Caverns route | Cleanse Stonebled Gate Beacon (Hidden Keep) |
| Vrago, Solikar Champion | Opens Prisoners’ Domain route | Cleanse Nochtean Gate Beacon (Abandoned Shrine) |
| Bloodcursed Lithopod | Citadel Gate Lever (Citadel of Penance) | Gloomshade Grove, by the lake (world boss) |
| Viletongue Batushka | Sage’s Gate Lever (progression key) | Cleanse Castigator’s Keep Beacon |
| The Warden | Eredrim Shell | Center of Citadel of Penance |
| Sariel, the Endless | Sariel Shell + Clockwork Scythe | Chamber of Becoming, Ruins of Mammon |
The Citadel Gate Lever is dropped by Bloodcursed Lithopod southeast of the Gloomshade Grove Beacon. Return west to slot it into the main gate. Note there is a hidden alternate entrance from the One-Legged Wolf Beacon that teleports you into a prison cell, so the lever is not strictly required to enter — but it is the intended path and avoids the cell detour.
Pitfalls That Waste Entire Runs
Three mistakes sabotage boss runs more than any boss move:
- Rushing Mammon early. The world is open, but the damage curve is not. Clear Glutted Mire, Sanguine Caverns, and the Ruins of Nochte first so you arrive with several gates’ worth of power.
- Fighting solo when an ally is one Glimpse away. Some arenas offer a spectral Shell summon for a single Glimpse, permanent for that arena. Hoarding Glimpses and eating ten deaths is the bad trade.
- Facing Zmey without the Endless Core. The Hidden Nave Beacon is easy to skip, yet it removes the Tarforge upgrade cap. Capped gear against the final boss when uncapped power is one Beacon away is the most avoidable death in the game.
Ova Target and the Endgame Handoff
The Unfound Path opens only after you have collected enough Ova at the Gloom Siphon in Marrow Keep — reported as 168. Do not try to farm this at the end; cleanse Beacons as you progress and it arrives naturally. Isaac, the Scholar Prince, in the Faded Citadel is the gate that finally hands over the Ova to open the path, so he is a hard stop on the route.
Once inside the Unfound Path, the three tendril guardians (Orrem, The Monolith, Malborn Offspring) can be taken in any order. If one walls you, rotate to another tendril and return with more Gloom levels. Save the Hidden Nave Beacon and its Endless Core for last, right before Zmey.
What the route actually ends with
Worth knowing before you plan the final stretch: Mortal Shell II has two endings, not one. The main ending runs through this route’s climax — the Ova absorption device at Marrow Keep after Zmey. The second is the hidden Baghead ending, triggered in the Desolate Peak by telling a floating NPC “No” and then “Yes.” And because of how the flags land, a single playthrough that wants both endings has to take Baghead first and finish the main route second. Missing it means a second run.
Frequently Asked Questions
What order should I clear the gates in Mortal Shell II?
Follow the region chain: Glutted Mire, Sanguine Caverns, and the Ruins of Nochte before Mammon and the gates beyond it. Enemy density and damage climb hard toward Mammon, so arriving with several gates' worth of Ova, Tarstones, and Gloom levels is the difference between a fair fight and a wall.
Which bosses drop the levers that open later areas?
Bloodcursed Lithopod drops the Citadel Gate Lever for the Citadel of Penance, and Viletongue Batushka drops the Sage's Gate Lever. Both are world bosses tied to specific Beacons, and both gate progression.
Can I skip the optional bosses and still finish the game?
Yes. Only the six gate guardians, the three Unfound Path tendril bosses, and Zmey are required. Optional bosses exist for Shells, weapons, levers, and Gloom, not for the ending.
How many Ova do I need to open the Unfound Path?
Reported as 168 Ova collected at the Gloom Siphon in Marrow Keep. Treat it as a long-term goal and keep cleansing Beacons as you go rather than farming at the end.
About the author

Editor-in-Chief
Jack Cao is the founder and Editor-in-Chief of GameGuidesBox. He has been writing practical game guides for over a decade, specializing in action RPGs, extraction shooters, and competitive FPS. Every guide he signs is playtested first-hand: his logged test time includes 47 hours across two Crimson Desert playthroughs with DPS verification, 180 hours building a full Windrose settlement, and 45 hours across six Yunyun Syndrome endings runs. Favorite games include Titanfall 2, Baldur's Gate 3, Metro, PUBG, and CS2.
You may also like
Mortal Shell II How to Respec: Mether's Severance Guide
Mether's Severance turns Mortal Shell II's Glimpse commits into a refundable loop. Here is the exact respec route via Merrick and Zhirelle, what the refund covers, and when it is worth spending Coin.
Mortal Shell II: Every Playable Shell, Ability Tree, and Unlock Location
Confused about which Shell to bond first? We mapped all the playable Shells — the eight permanent bodies plus prologue-only Harros — with their full ability trees and exact unlock routes.
Mortal Shell II All 44 Bosses: Locations, Beacons, and Drops Checklist
Struggling to track down every grotesque in Fainweald? We mapped all 44 boss encounters, their nearest Beacon, and exactly what each one drops. Click to unlock the full checklist.
Comments