Mortal Shell II Beginner's First 2 Hours: A No-Nonsense Opening Route for 2026
Struggling to survive the opening of Mortal Shell II? We've mapped the first two hours step by step, from the Harros prologue to your first real Shell and weapon.
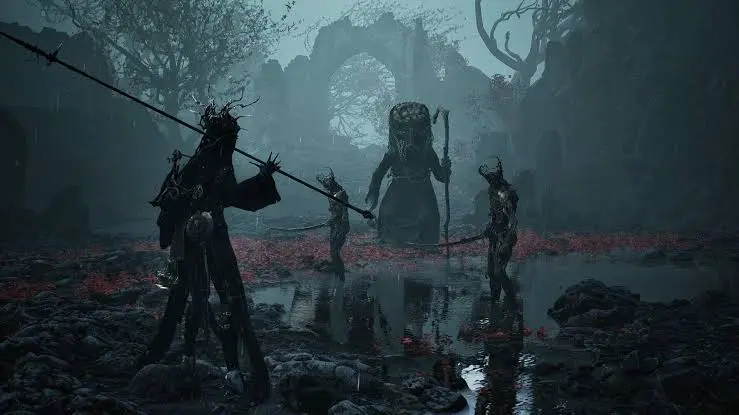
Mortal Shell II: Your First Two Hours, Step by Step
Mortal Shell II drops the stamina bar and asks you to manage aggression through a single resource called Resolve. The opening two hours are about learning the loop: earn Resolve by hitting things, spend it on your tools, and keep moving. This guide lays out a clean route through the prologue, your first settlement, your first non-starter weapon, and your first real Shell choice.
Table of Contents
- Preparation Before Leaving the Prologue: What the Game Hands You
- Core Walkthrough: From the Harros Tutorial to Your First Real Shell
- Important Notes: Mistakes That Wipe Your First Run
- Rewards and Early Unlocks Worth the Detour
Preparation Before Leaving the Prologue: What the Game Hands You
Mortal Shell II launched on 2026-08-20 for PC, PS5, and Xbox Series X|S, with a Devout early access window opening on 2026-08-17. You do not need the first game; you play the Harbinger, a bodiless servant of the Undermether sent to recover stolen Ova and cleanse Corrupted Gates.
Before you touch the open world, learn the HUD. These are the bars and counters you read every fight:
| HUD Element | What It Does |
|---|---|
| Coin | Currency for buying items and services from vendors. |
| Gloom | Leveling currency. Drops where you die; lost permanently if you die again before reclaiming it. |
| PP (Permanent Pickup) | Minor pickups that grant unique passive or active effects, scaling through Familiarity. |
| Mether’s Pulse | Healing item with charges that auto-replenish when you rest at a Beacon. |
| Resolve | Fuels Shell Abilities, Sidearms, and Ability Tarstones. Refilled by landing melee hits. |
| Health | Your current Shell’s health pool. |
| Shell Ability / Sidearm / Tarstone | Active tools, all gated by Resolve. |
Your main objective is fixed: collect enough Ova and cleanse all Corrupted Gates. If you are lost, head for the next Corrupted Gate. You must equip a Shell, a Weapon, a Sidearm, a Seal, and Tarstones to fight effectively. The prologue gives you the Harros Shell and the Iconoclast, your starting melee weapon, automatically.
Core Walkthrough: From the Harros Tutorial to Your First Real Shell
1 Clear the Prologue and Lock In the Iconoclast
Location: Opening cave and abandoned village. Action: Follow the crow Luka, interact with the fallen knight, and inhabit Harros. After you stand back up with Harros equipped, the Iconoclast is added to your inventory. Outcome: You now have a Shell and a weapon you cannot miss. Use this stretch to drill the basics: light attack, heavy attack, dodge, block, and ranged Sidearm fire. The Iconoclast carries you until you reach the first settlement.
2 Reach Mushroom Village and Understand the Beacon Economy
Location: Mushroom Village, the first stable settlement after the prologue. Action: Push past the village toward the beacon. Activate it, then purify the nearby Corrupted Gate to open the path onward. Outcome: Beacons are your sparse checkpoints. They let you rest, heal, and level, but fast travel only unlocks after you purify a beacon through its mini-dungeon. Plan routes between beacons carefully.
3 Grab the Chapel Key From the Caged Grisha Pup Clearing
Location: A clearing near Mushroom Village where Grisha Hunters have locked a Grisha Pup in a cage. Action: From the Mushroom Village beacon, head right and go down past the wooden bridge. Deal with the dancing villagers, then find the church doorframe. The Chapel Key hangs on a rope beside a revealed statue in this clearing. Outcome: The Chapel Key opens the Shrine of Trials. It is the single most important early pickup for weapon variety and is easy to miss if you rush the main objective.
4 Run the Shrine of Trials for the Axe & Dagger
Location: Shrine of Trials, west of the Mushroom Village beacon. Action: Use the Chapel Key to open the dungeon. Work through narrow corridors and ambushes, keeping no more than two enemies aggroed at once. In the first room, walk into the wall behind the statue to pass a hidden passage; later rooms use weighted floor switches you hit with your weapon. At the altar in the final room, claim the Axe & Dagger. Outcome: You now have a fast, mobile dual-weapon kit that pairs well with the Shell you are about to grab and shreds basic mobs.
5 Claim Tiel First, Then Decide on Proxima or Eredrim
Location: Open grave southeast of the Widow’s Overlook beacon, just south of Mushroom Village. Action: Fast travel to Widow’s Overlook, head southeast downhill, clear the cultists, and keep going until the screen pulses red near a torch-lit wooden doorway. Tiel is half-buried in a grave to your left. Interact, watch the short memory, and switch to him. Outcome: Tiel is the safest first Shell. His passive, Shadow Dash, turns you invisible for a few seconds on a perfect dodge and builds stagger on bosses; his active, Lingering Shadow, lets you go invisible on command and follow with a Shadow Strike. No enemy counters the stealth, which makes awkward one-on-one fights far more manageable.
If you prefer a different style, two alternatives are reachable early:
- Proxima (Shattered Beacon dungeon, northeast of Blackridge Pass): a tanky Shell with Grafted Armor mitigation and a Biosampler that farms biosamples to sell for Coin. Best for a durable, economy-focused run.
- Eredrim (Citadel of Penance, inside the Warden boss arena): a boss-breaker built around Break damage and execution. Strong, but it requires clearing a boss first, so save it for later.
Important Notes: Mistakes That Wipe Your First Run
- Gloom is fragile. It drops on death and is retrievable once. Die again before reaching it and it is gone. Reclaim before exploring deeper.
- The Slayer Seal softens the game but locks achievements. Equipping it makes Sidearms deal Break Damage and grants Health and Resolve on Riposte. If you care about trophies, avoid it on that save.
- Night Mode is the hard option. Enabled by taking the Gloombound Flame to Thestus in Marrow Keep, it grants extra Gloom from kills. You can swap difficulties anytime, so test both.
- Harden is your safety valve, not a panic button. Turning to stone mid-swing absorbs a hit and lets you finish the attack. Time it against single committed strikes, not long enemy strings.
- Beacons are sparse. This world spaces checkpoints wide; purify gates to open fast travel.
- Harros is gone after the prologue. Do not treat the tutorial Shell as your build. Your real progression starts with Tiel, Proxima, or Eredrim.
Rewards and Early Unlocks Worth the Detour
| Source | Reward |
|---|---|
| Prologue completion | Harros Shell (temporary) + Iconoclast (permanent starter weapon) |
| Mushroom Village clearing | Chapel Key |
| End of Shrine of Trials | Axe & Dagger (fast early weapon) |
| Grave south of Mushroom Village | Tiel Shell (stealth, beginner-safe) |
| Shattered Beacon dungeon | Proxima Shell (tank, gold farming) |
| Warden boss arena, Citadel of Penance | Eredrim Shell (boss-breaker) |
Frequently Asked Questions
Why does my Harros Shell disappear after the prologue in Mortal Shell II?
Harros is the prologue-only Shell. Once the intro sequence ends, the Shell you started with is gone and your real roster begins with the bodies you find in the open world. Treat the prologue as a tutorial, not your permanent class.
Which Shell should I get first in the early game?
Tiel is the safest first pickup. He turns invisible on a perfect dodge, no enemy has a reliable counter to the stealth, and there is no boss blocking the grave. Proxima and Eredrim are strong but serve different playstyles.
Do I lose my Gloom if I die in Mortal Shell II?
Gloom drops where you fall and can be retrieved with no penalty on the first death. If you die a second time before reaching it, the dropped Gloom is gone for good. Reclaim it before pushing further.
What does the Slayer Seal do and should I equip it?
The Slayer Seal makes Sidearms deal Break Damage and grants Health and Resolve on Riposte execution, which softens the early game considerably. The trade-off is that it locks you out of certain achievements, so skip it if you care about completion.
About the author

Editor-in-Chief
Jack Cao is the founder and Editor-in-Chief of GameGuidesBox. He has been writing practical game guides for over a decade, specializing in action RPGs, extraction shooters, and competitive FPS. Every guide he signs is playtested first-hand: his logged test time includes 47 hours across two Crimson Desert playthroughs with DPS verification, 180 hours building a full Windrose settlement, and 45 hours across six Yunyun Syndrome endings runs. Favorite games include Titanfall 2, Baldur's Gate 3, Metro, PUBG, and CS2.
You may also like

Mortal Shell II How to Respec: Mether's Severance Guide
Mether's Severance turns Mortal Shell II's Glimpse commits into a refundable loop. Here is the exact respec route via Merrick and Zhirelle, what the refund covers, and when it is worth spending Coin.
Mortal Shell II: Every Playable Shell, Ability Tree, and Unlock Location
Confused about which Shell to bond first? We mapped all the playable Shells — the eight permanent bodies plus prologue-only Harros — with their full ability trees and exact unlock routes.
Mortal Shell II All 44 Bosses: Locations, Beacons, and Drops Checklist
Struggling to track down every grotesque in Fainweald? We mapped all 44 boss encounters, their nearest Beacon, and exactly what each one drops. Click to unlock the full checklist.
Comments