Crimson Desert Wyvern's Sanctum Location Guide: Fast Travel, Rewards, Strategy
Find Wyvern's Sanctum in the Dragonspine Mountains. This guide covers the exact location, fast travel routes, boss strategies, and legendary loot including the Wyvern Lance.
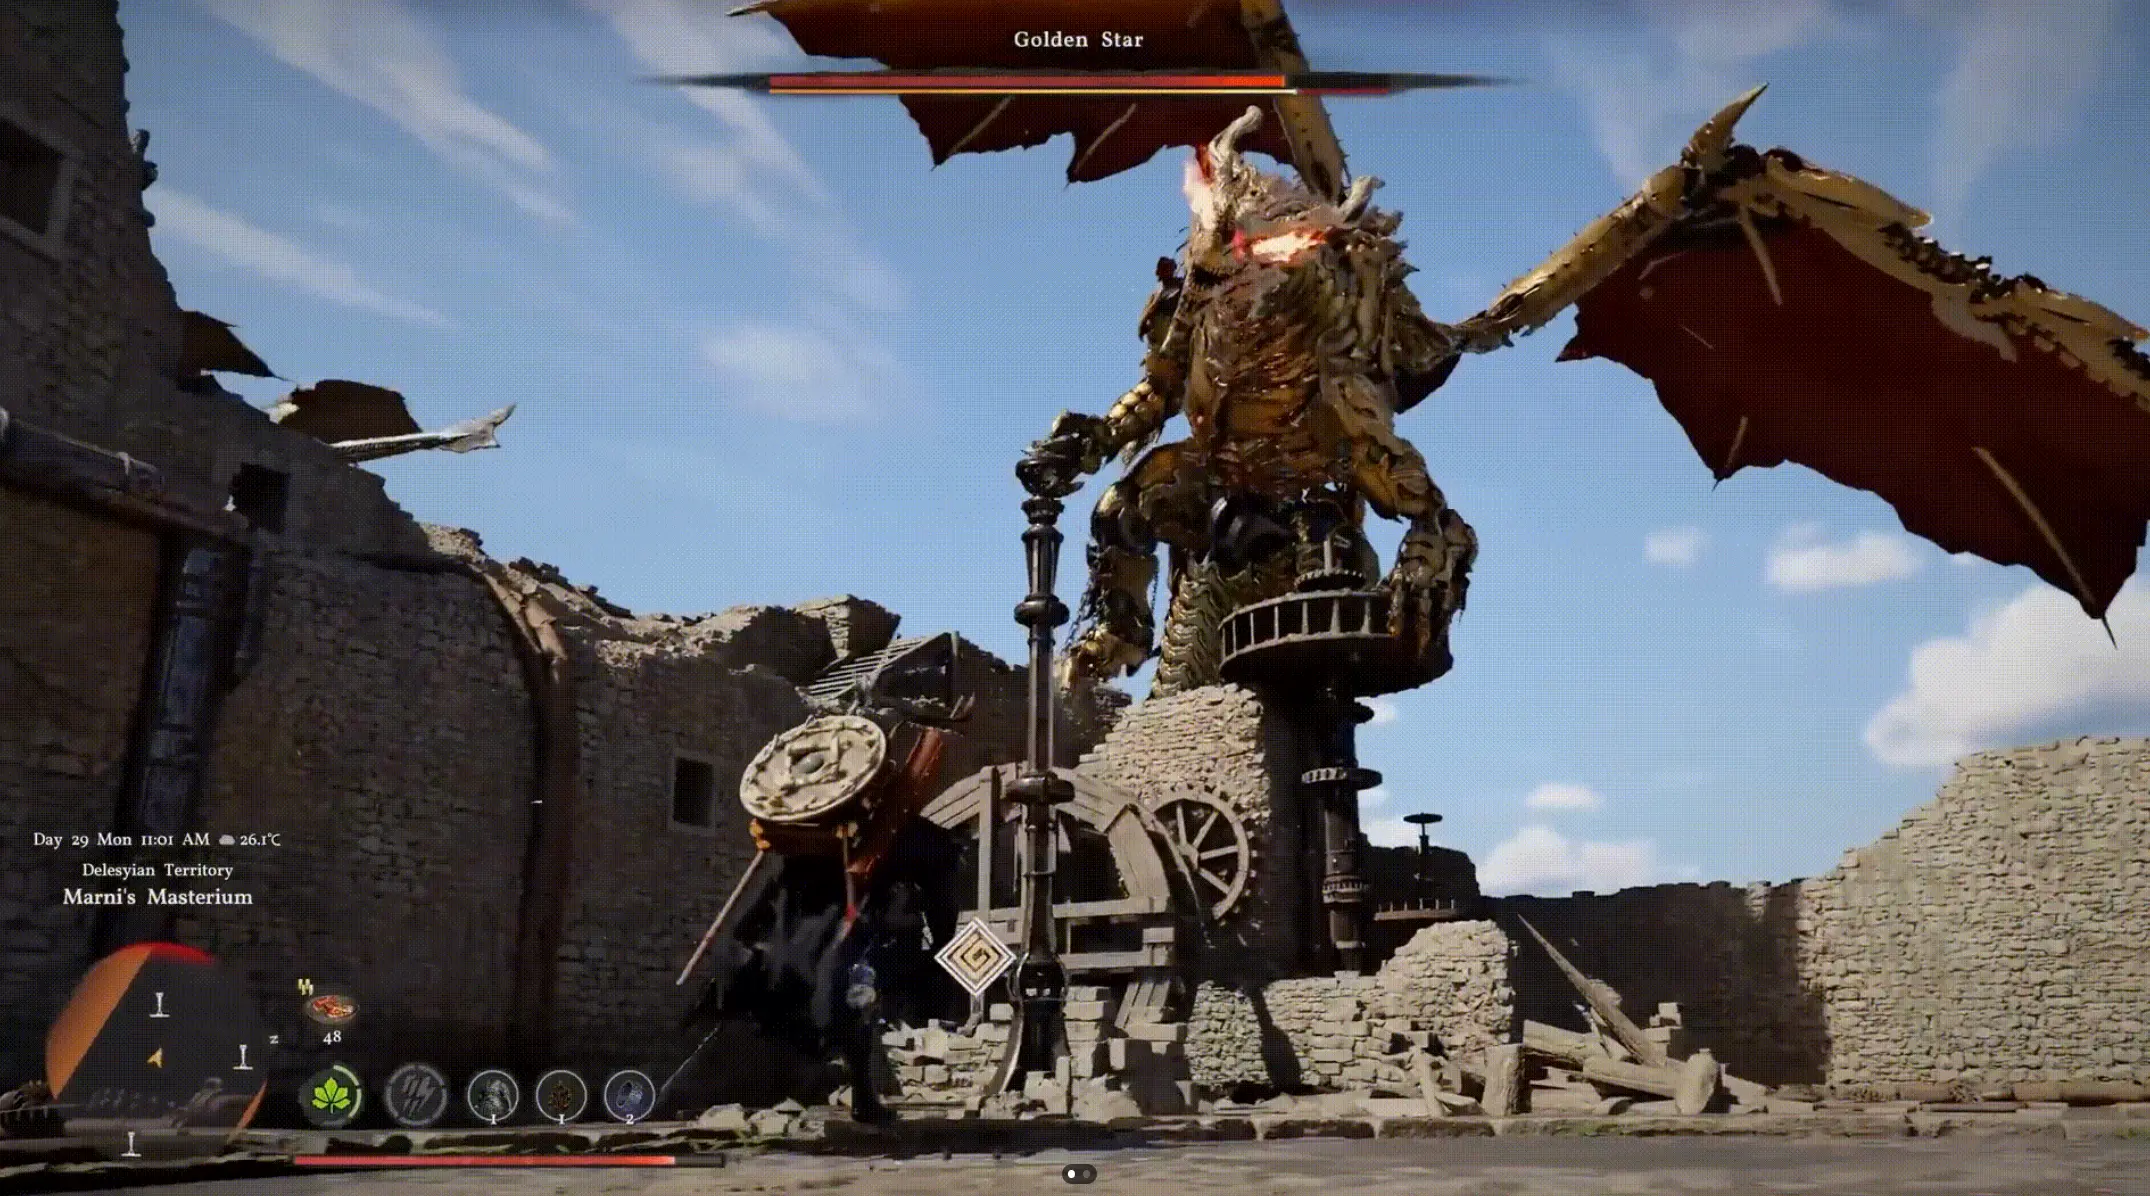
Wyvern’s Sanctum is located in the Dragonspine Mountains (northwest Crimson Desert). Access requires Chapter 4+ and flight ability. Activate the Abyss Nexus at the entrance for fast travel (nearest: Karin Quarry, 15 min flight). Rewards include Wyvern Lance (20 attack, 6 Abyss slots), Wyvern Scale Armor, and Dragon Heart accessory. Recommended Level 35-40 with 200+ HP.
Wyvern’s Sanctum Overview
Dungeon Information
| Attribute | Value |
|---|---|
| Location | Dragonspine Mountains |
| Region | Northwest Crimson Desert |
| Access Requirement | Chapter 4+, Flight ability |
| Recommended Level | 35-40 |
| Recommended HP | 200+ |
| Recommended Stamina | 250+ |
| Dungeon Type | Boss Dungeon |
| Fast Travel | Yes (Abyss Nexus) |
| Reset Type | Weekly (legendary loot) |
Location Map Reference
World Map Coordinates: Northwest Quadrant
Nearest Landmark: Dragonspine Peak
Elevation: High Mountain (requires flight)
Terrain: Rocky, volcanic
How to Reach Wyvern’s Sanctum
Step 1: Story Progression
Required Chapters:
- Complete Chapter 1-3 main quest
- Unlock flight ability (Chapter 3)
- Access Dragonspine region (Chapter 4)
Quest Prerequisites:
| Quest | Chapter | Requirement |
|---|---|---|
| ”The Dragon’s Call” | Chapter 4 | Main quest |
| ”Flight of the Wyvern” | Chapter 4 | Side quest (recommended) |
Step 2: Travel to Dragonspine Mountains
Method 1: Flight (Fastest)
1. Fast travel to Karin Quarry (Abyss Nexus)
2. Open map, locate Dragonspine Mountains (northwest)
3. Take off and fly northwest
4. Flight time: ~15 minutes
5. Look for volcanic peaks and dragon statues
6. Descend toward dungeon entrance
Method 2: Ground Travel (Not Recommended)
1. Fast travel to nearest ground Nexus
2. Navigate mountain paths
3. Avoid high-level enemies
4. Travel time: 30-45 minutes
5. More dangerous than flight
Step 3: Locate Dungeon Entrance
Visual Landmarks:
| Landmark | Description |
|---|---|
| Dragon Statues | Two large dragon statues flanking entrance |
| Volcanic Vent | Active steam vent near entrance |
| Stone Bridge | Natural rock bridge over chasm |
| Wyvern Nests | Egg nests on cliff sides |
Entrance Coordinates:
Approximate: Northwest corner of map
Elevation: High (mountain peak)
Visibility: Clear weather recommended
Step 4: Activate Fast Travel
1. Approach Abyss Nexus at dungeon entrance
2. Interact with Nexus
3. Confirm activation
4. Fast travel unlocked permanently
5. Name: "Wyvern's Sanctum Nexus"
Wyvern’s Sanctum Layout
Dungeon Structure
Entrance → Antechamber → Wyvern Roost → Boss Arena → Treasure VaultArea Breakdown
| Area | Enemies | Purpose |
|---|---|---|
| Entrance | 2-3 Wyvern Guards | Tutorial, warm-up |
| Antechamber | 4-6 Wyvern Knights | Mid-tier combat |
| Wyvern Roost | 1 Elite Wyvern | Mini-boss |
| Boss Arena | Wyvern Lord | Main boss |
| Treasure Vault | None | Loot collection |
Estimated Clear Time
| Run Type | Time |
|---|---|
| First Clear | 30-45 minutes |
| Speed Run | 15-20 minutes |
| Loot Run | 10-15 minutes |
Boss Strategy: Wyvern Lord
 Wyvern Lord boss fight mechanics and attack patterns
Boss Stats
| Stat | Value |
|---|---|
| HP | ~50,000 |
| Attack | High (one-shot potential) |
| Defense | Medium (armor breaks) |
| Weakness | Lightning, Piercing |
| Resistance | Fire (immune at high refines) |
| Phases | 3 |
Phase 1: Ground Combat (100-70% HP)
Attack Patterns:
| Attack | Telegraph | Damage | Counter |
|---|---|---|---|
| Tail Swipe | Wide wind-up | Medium | Dodge sideways |
| Wing Slam | Wing raise | High | Dodge backward |
| Fire Breath | Head pull-back | Very High | Dodge to side |
| Charge | Head down | Medium | Dodge perpendicular |
Strategy:
1. Stay mobile, don't get cornered
2. Attack after tail swipe (safe window)
3. Use charged attacks during recovery
4. Save stamina for fire breath dodge
5. Break armor when possible
Phase 2: Aerial Combat (70-40% HP)
Attack Patterns:
| Attack | Telegraph | Damage | Counter |
|---|---|---|---|
| Dive Bomb | High altitude | Very High | Dodge at last second |
| Aerial Fire | Fly overhead | High | Take cover |
| Wing Buffet | Wing flap | Medium | Block or dodge |
| Grab Attack | Talon extension | Instant Kill | Dodge sideways |
Strategy:
1. Use ranged attacks when airborne
2. Switch to lance/spear for reach
3. Wait for landing to deal damage
4. Watch for grab attack telegraph
5. Use flight ability to match altitude
Phase 3: Enraged (40-0% HP)
Attack Patterns:
| Attack | Telegraph | Damage | Counter |
|---|---|---|---|
| Rapid Fire Breath | Multiple breaths | Extreme | Constant dodging |
| Spin Attack | Full rotation | High | Stay close or far |
| Meteor Slam | Jump high | Extreme | Full map dodge |
| Berserker Rush | Multiple charges | High | Kite pattern |
Strategy:
1. All-out DPS, survival secondary
2. Use all cooldowns
3. Don't get greedy with attacks
4. Keep healing items ready
5. Focus on dodging over damage
Recommended Builds for Wyvern’s Sanctum
Ranged DPS Build
| Category | Choice |
|---|---|
| Primary Weapon | Bow/Crossbow |
| Secondary Weapon | Lance |
| Armor | Medium Armor |
| Abyss Cores | Momentum, Crow’s Pursuit |
Strategy:
1. Maintain distance during Phase 1
2. Switch to lance for Phase 2
3. All-out DPS in Phase 3
4. Kite boss around arena
Melee DPS Build
| Category | Choice |
|---|---|
| Primary Weapon | Dual Swords |
| Secondary Weapon | Hammer |
| Armor | Medium/Heavy Hybrid |
| Abyss Cores | Momentum, Malicebane |
Strategy:
1. Aggressive Phase 1 (safe windows)
2. Defensive Phase 2 (wait for landing)
3. All-out Phase 3 (risk/reward)
4. Use reversal attacks
Tank Build
| Category | Choice |
|---|---|
| Primary Weapon | Sword + Shield |
| Secondary Weapon | Lance |
| Armor | Heavy Tank Set |
| Abyss Cores | Health, Defense, Malicebane |
Strategy:
1. Block Phase 1 attacks
2. Poke damage with lance
3. Survive Phase 2 (defensive)
4. Outlast Phase 3 (tank through)
Rewards & Loot
Guaranteed Rewards
| Item | Type | Value |
|---|---|---|
| Wyvern Lance | Weapon (Spear) | 20 Attack, 6 Abyss slots |
| Wyvern Scale Chest | Armor | High defense, fire resistance |
| Wyvern Scale Legs | Armor | High defense, fire resistance |
| Dragon Heart | Accessory | +15% dragon damage |
Rare Drops
| Item | Drop Rate | Value |
|---|---|---|
| Wyvern Claw | 30% | Crafting material |
| Dragon Bone | 25% | Crafting material |
| Wyvern Egg | 10% | Quest item / Trophy |
| Ancient Dragon Coin | 5% | Currency |
Weekly Legendary Loot
| Item | Drop Rate | Notes |
|---|---|---|
| Wyvern Lance (Legendary) | 5% | 25+ Attack, 7 Abyss slots |
| Dragon Scale Armor | 5% | Best-in-slot fire resist |
| Heart of the Wyvern | 2% | Legendary accessory |
Weekly Reset: Legendary loot resets every 7 days (real time)
Fast Travel & Reset Mechanics
Abyss Nexus Network
| Nexus | Location | Distance to Wyvern’s |
|---|---|---|
| Karin Quarry | Hills of No Return | 15 min flight |
| Port Karma | Port Karma | 25 min flight |
| Capital City | Capital | 30 min flight |
| Wyvern’s Sanctum | Dungeon entrance | 0 min (at dungeon) |
Reset Mechanics
| Reset Type | Cooldown | Affected |
|---|---|---|
| Normal Loot | None | Basic materials |
| Elite Enemies | 24 hours | Elite drops |
| Boss Loot | 24 hours | Boss drops |
| Legendary Loot | 7 days | Legendary items |
Common Mistakes to Avoid
- Under-leveling - Don’t attempt below Level 35
- No fire resistance - Wyvern deals heavy fire damage
- Greedy DPS - Don’t over-commit during attacks
- Ignoring telegraphs - Boss attacks are highly telegraphed
- No healing items - Bring 20+ healing potions
- Wrong weapon - Lance/bow excel, avoid slow weapons
- Solo on first try - Consider co-op for learning
Frequently Asked Questions
Where is Wyvern's Sanctum located in Crimson Desert?
Wyvern's Sanctum is in the Dragonspine Mountains (northwest region). Access requires Chapter 4+ story progression and flight ability.
How do I unlock fast travel to Wyvern's Sanctum?
Activate the Abyss Nexus at the dungeon entrance. This unlocks permanent fast travel. The nearest Nexus is Karin Quarry (15 min flight).
What rewards do I get from Wyvern's Sanctum?
Wyvern Lance (20 attack, 6 Abyss slots), Wyvern Scale Armor Set, Dragon Heart accessory, and rare crafting materials (Dragon Bone, Wyvern Claw).
What level should I be for Wyvern's Sanctum?
Recommended Level 35-40 with 200+ HP, 250+ stamina, and a fully upgraded weapon. Bring healing items and resistance potions.
About the author
Editor-in-Chief
Founder and Editor-in-Chief of gameguidesbox.com, began surfing the web in the late 19th century. Passionate about movies, coffee, gaming, and life itself. Favorite games include Titanfall 2, Baldur's Gate 3, Metro, PUBG, and CS2.
You may also like

Crimson Desert Patch Turns Reviews Around After Rocky Launch
Pearl Abyss fixes critical bugs and adds quality-of-life features, pushing Steam reviews from 'Mixed' to 'Mostly Positive' within two weeks.
Crimson Desert's Mixed Launch Reveals the Uncomfortable Truth About Hype Economics
Five million sales and a 30% stock crash happened at the same time. That's not a paradox — it's exactly what happens when years of unchecked hype collides with a game that's good but not transcendent.

Crimson Desert PC Optimization Guide: How to Actually Get Good Performance on Mid-Range Hardware
The BlackSpace Engine is beautiful and unforgiving. Here's how to stop your GPU from crying and actually enjoy Crimson Desert without dropping to single-digit frames in open areas.
Comments