Slay the Spire 2 Classes Guide — All 5 Characters, Builds, and Mechanics Explained
Complete breakdown of all 5 playable characters in Slay the Spire 2 — starter decks, unique mechanics, optimal builds, and class-specific tips for Ironclad, Silent, Defect, Regent, and Necrobinder.
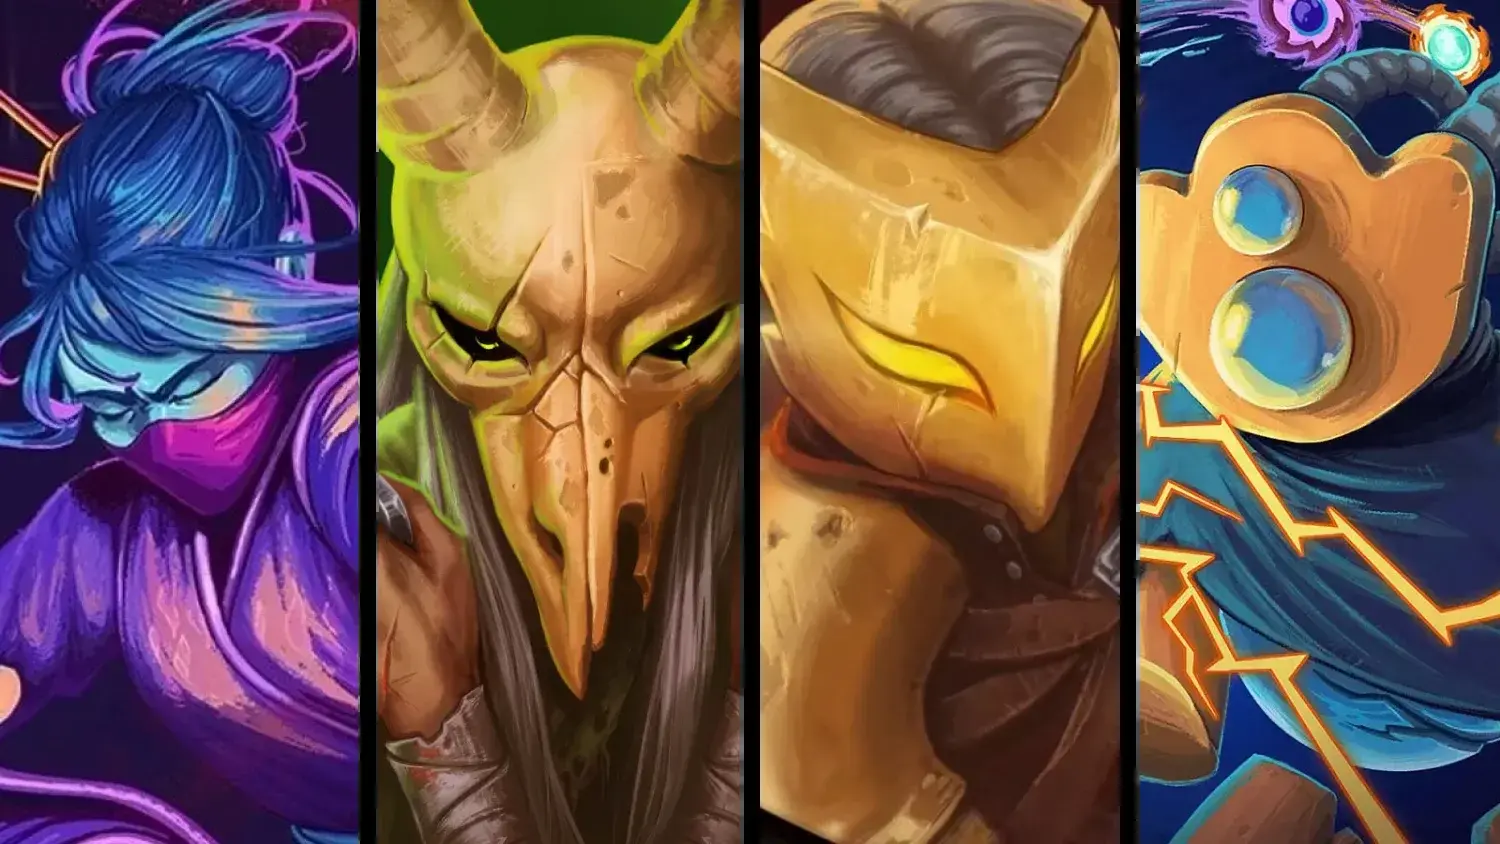
Slay the Spire 2 launches with five playable characters: three returning favorites rebuilt from the ground up, and two brand-new classes that bring entirely new resource systems to the table. Whether you’re a STS1 veteran relearning Ironclad or a first-timer trying to figure out what Doom even does — this guide has you covered.
Each entry covers: starting stats, starter relic, core mechanic systems, the best-performing builds, key cards, class strengths, weaknesses, and the most important tips for winning runs.
Slay the Spire 2 Card Database - All 567 Cards Complete interactive database of all 567 cards in Slay the Spire 2. Search by name, filter by class (Ironclad, Silent, Defect, Regent, Necrobinder, Colorless), type (Attack, Skill, Power), rarity (Common, Uncommon, Rare, Special), and keywords. Sort cards alphabetically or by cost. Each card displays its full description, energy cost, and high-quality image. Essential tool for deck planning, card discovery, and understanding synergies across all characters.
Slay the Spire 2 Relic Database - All 175 Relics Complete interactive database of all 175 relics in Slay the Spire 2. Filter by character pool (Any, Ironclad, Silent, Defect, Watcher), rarity (Common, Uncommon, Rare, Boss, Event, Shop, Starter), and 37 mechanic tags. Each relic displays tier grades per character (S+ to F), mechanic tags, and full effect descriptions. Sort by name or rarity. Essential for prioritizing relic pickups and understanding character-specific synergies during runs.
Slay the Spire 2 Complete Guide Hub Your ultimate resource for Slay the Spire 2. Find complete character guides, boss strategies, deck building tips, and advanced techniques all in one place.
Table of Contents
- Class Overview and Unlock Order
- The Ironclad — The Reliable Wrecking Machine
- The Silent — The Discard Engine
- The Defect — The Orb Automator
- The Regent — The Star-Powered Sovereign
- The Necrobinder — The Doom Lich with a Skeleton Best Friend
- Class Tier List and Meta Snapshot (EA v1.0)
- Universal Tips That Apply to Every Class
Class Overview and Unlock Order
| Class | Status | HP | Starter Relic | Difficulty |
|---|---|---|---|---|
| The Ironclad | Returning | 80 | Burning Blood | Beginner |
| The Silent | Returning | 70 | Ring of the Snake | Intermediate |
| The Regent | New | 75 | Divine Right | Intermediate–Advanced |
| The Necrobinder | New | 66 | Bound Phylactery | Advanced |
| The Defect | Returning | 75 | Cracked Core | Intermediate–Advanced |
Unlock order: Complete any run with Ironclad (win or lose) to unlock Silent. Continue progressing to unlock Regent, then Necrobinder, and finally Defect.
Recommended progression: Ironclad → Silent → Defect → Regent → Necrobinder.
The Ironclad — The Reliable Wrecking Machine
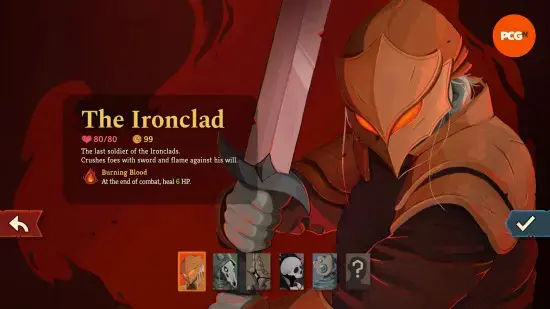
Role: The Tank
HP: 80
Starter Relic: Burning Blood — Heal 6 HP after every combat.
Starting Deck
| Card | Count | Function |
|---|---|---|
| Strike | 5 | Base attack — 6 damage |
| Defend | 4 | Base block — 5 block |
| Bash | 1 | 10 damage + 2 Vulnerable |
Core Mechanic Systems
Strength Scaling: Ironclad’s primary damage engine. Each point of Strength adds 1 damage per Attack card played. Cards like Inflame (+3 Strength), Demon Form (2 Strength per turn), and Spot Weakness (3 Strength on Vulnerable enemy) stack into devastating multipliers.
Exhaust Synergy: Several Ironclad cards trigger bonus effects when cards are Exhausted. Exhaust feeds engines like Corruption (all Skills cost 0 but Exhaust) + Dark Embrace (draw when you Exhaust) for burst turns where you play your entire hand for free.
Self-Healing: Between Burning Blood, cards like Feed and Second Wind, and relics like Self-Forming Clay, Ironclad can recover health mid-run — a unique survivability advantage no other class matches.
Block Generation: Body Slam converts Block to damage; Barricade makes Block persist between turns; Juggernaut deals damage when Block is gained. A full Block-damage hybrid build is a legitimate win condition.
Best Builds
Strength Build (Default, Recommended for Beginners)
- Core cards: Inflame, Demon Form, Spot Weakness, Twin Strike, Whirlwind
- Goal: Stack Strength fast and play multi-hit Attacks to multiply damage
- Key relic synergies: Vajra (+1 Strength free)
- Ramp curve: Inflame early → Demon Form mid-game → Spot Weakness as the finisher setup
Exhaust Build (High Skill, High Ceiling)
- Core cards: Corruption, Dark Embrace, Feel No Pain, Fiend Fire, Reaper
- Goal: Chain Exhausts to generate Block, draw, and burst damage in the same turn
- Warning: Requires precise sequencing — one bad turn can leave you without defenses
Body Slam Block Build (Anti-Boss Specialist)
- Core cards: Body Slam, Barricade, Entrench, Shrug It Off
- Goal: Accumulate enormous Block, then Body Slam for equal damage
- Best against: Bosses that deal large predictable hits — Block doubles as both defense and offense
Strengths and Weaknesses
Strengths:
- Highest HP of all five classes
- Burning Blood auto-heals every fight — enormous quality-of-life in long acts
- Multiple viable build paths; hard to get bricked by bad card offerings
- Best class for learning fundamental deck-building principles
Weaknesses:
- Lowest skill ceiling relative to other classes in experienced hands
- Early AoE is limited — multi-enemy rooms in Act 1 can be punishing before you find Whirlwind or Cleave
- Less dramatic combo potential than Silent or Necrobinder
Key Tips
- Lead with Bash. The 2-stack Vulnerable on turn 1 amplifies every Attack that follows. Always open Bash against single targets.
- Exhaust bloat, not just Strikes. When you pick up Exhaust synergies, prioritize removing Defends and surplus Strikes over keeping them for survivability — the engine is your real defense.
- Demon Form timing. Taking damage early to activate Red Skull while also running Demon Form is a deliberate strategy — not a mistake.
- Don’t sleep on healing relics. Ironclad can run lower HP thresholds than other classes. Burning Blood means you recover before the next fight.
The Silent — The Discard Engine
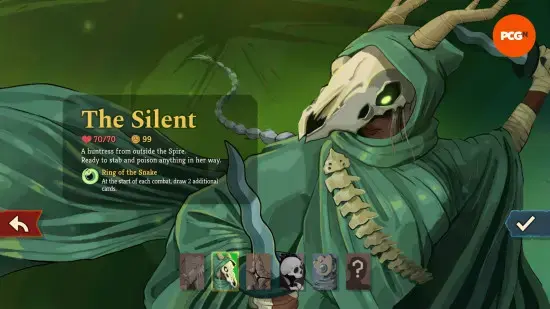
Role: The Discard Rogue
HP: 70
Starter Relic: Ring of the Snake — Draw 2 extra cards at battle start.
Starting Deck
| Card | Count | Function |
|---|---|---|
| Strike | 5 | Base attack — 6 damage |
| Defend | 5 | Base block — 5 block |
| Neutralize | 1 | Apply 1 Weak; costs 0 |
| Survivor | 1 | Gain 8 Block; discard 1 card (has Sly) |
Core Mechanic Systems
The Sly Keyword (New in STS2): The most impactful new addition to Silent’s kit. Cards with the Sly keyword, when discarded, are automatically played for free — no energy cost, no card play slot. Survivor (starter card) has Sly. Build a deck that repeatedly discards Sly cards and you’re effectively playing more cards per turn than any other class.
Poison Stacking: Classic Silent win condition. Stack Poison through cards like Deadly Poison, Bouncing Flask, and Catalyst (doubles current Poison). Poison doesn’t require attacks to deal damage — it ticks at end of each enemy turn. Ideal against high-armor enemies and Boss fights where direct damage is blocked.
Shiv Generation: Zero-cost 4-damage Attacks (upgraded: 6) that trigger relic effects, apply Shiv-count bonuses, and feed offensive cycles. Cards like Blade Dance and Cloak and Dagger generate multiple Shivs per play.
Card Draw: Ring of the Snake already gives +2 cards at battle start. Silent’s deck compounds this with Acrobatics, Expertise, and preparation-style cards. High draw density means you cycle to key cards faster than any other class.
Best Builds
Poison Build (Act 1–2 Reliable, Scales into Late Game)
- Core cards: Deadly Poison, Bouncing Flask, Catalyst, Noxious Fumes, Crippling Cloud
- Goal: Apply Poison early, use Catalyst to double stacks, hide behind Block while Poison kills
- Weakness: Slow against multiple enemies without AoE Poison sources
Shiv / Zero-Cost Infinite (Explosive, High Skill)
- Core cards: Blade Dance, Cloak and Dagger, Infinite Blades, Accuracy, After Image
- Goal: Generate Shivs for free, activate relic effects with each play, loop resources
- Ceiling: One of the highest damage outputs in the game when online
Sly / Discard Build (New to STS2, Hardest to Execute)
- Core cards: Survivor, Tactician, Reflex, Setup, Acrobatics
- Goal: Build a hand-cycling engine where discards produce free card plays, draw, and energy
- Warning: Requires multiple key pieces — weak if you don’t find the synergy cards
Strengths and Weaknesses
Strengths:
- Ring of the Snake is the best Starter Relic for draw tempo in the game
- Sly mechanic enables combo ceilings that approach “play your entire deck for free”
- Poison is a reliable backup plan that scales well into Act 3
- Most draw-efficient class — sees the most cards per run
Weaknesses:
- 70 HP — lowest of the three returning characters
- No self-heal. HP lost is HP gone.
- Early game damage can feel underpowered before key Shiv or Poison cards arrive
- Sly builds are fragile mid-construction — vulnerable in Act 2 before the engine is assembled
Key Tips
- Neutralize is your opener every fight. Neutralize costs 0, applies Weak immediately, and reduces incoming damage right away. Always play it first.
- Survivor > Defend early. Survivor provides the same 8 Block as Defend (upgraded) but also discards a card — that discard matters more as your Sly synergies grow.
- Catalyst timing is everything. Don’t Catalyst on 3 Poison stacks. Wait until you have 15–20 Poison and then double it for a lethal spike. Patience wins the Poison game.
- Exhaust your Strikes. Silent’s card removal options (like Eviscerate) should target Strikes and Defends first. A thinner deck cycles Poison and Shiv engines faster.
The Defect — The Orb Automator
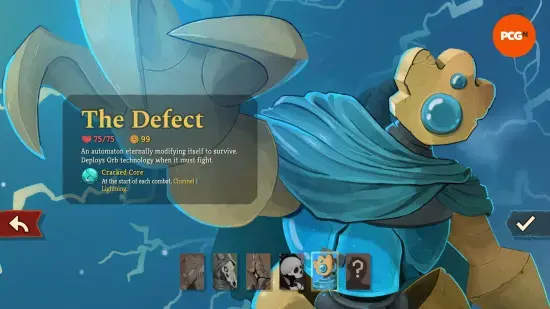
Role: The Orb Mage
HP: 75
Starter Relic: Cracked Core — Channel 1 Lightning Orb at battle start.
Starting Deck
Defect’s starting deck revolves around Orb manipulation cards alongside base Strike and Defend cards. The deck is built to immediately demonstrate the Orb channeling loop.
Core Mechanic Systems
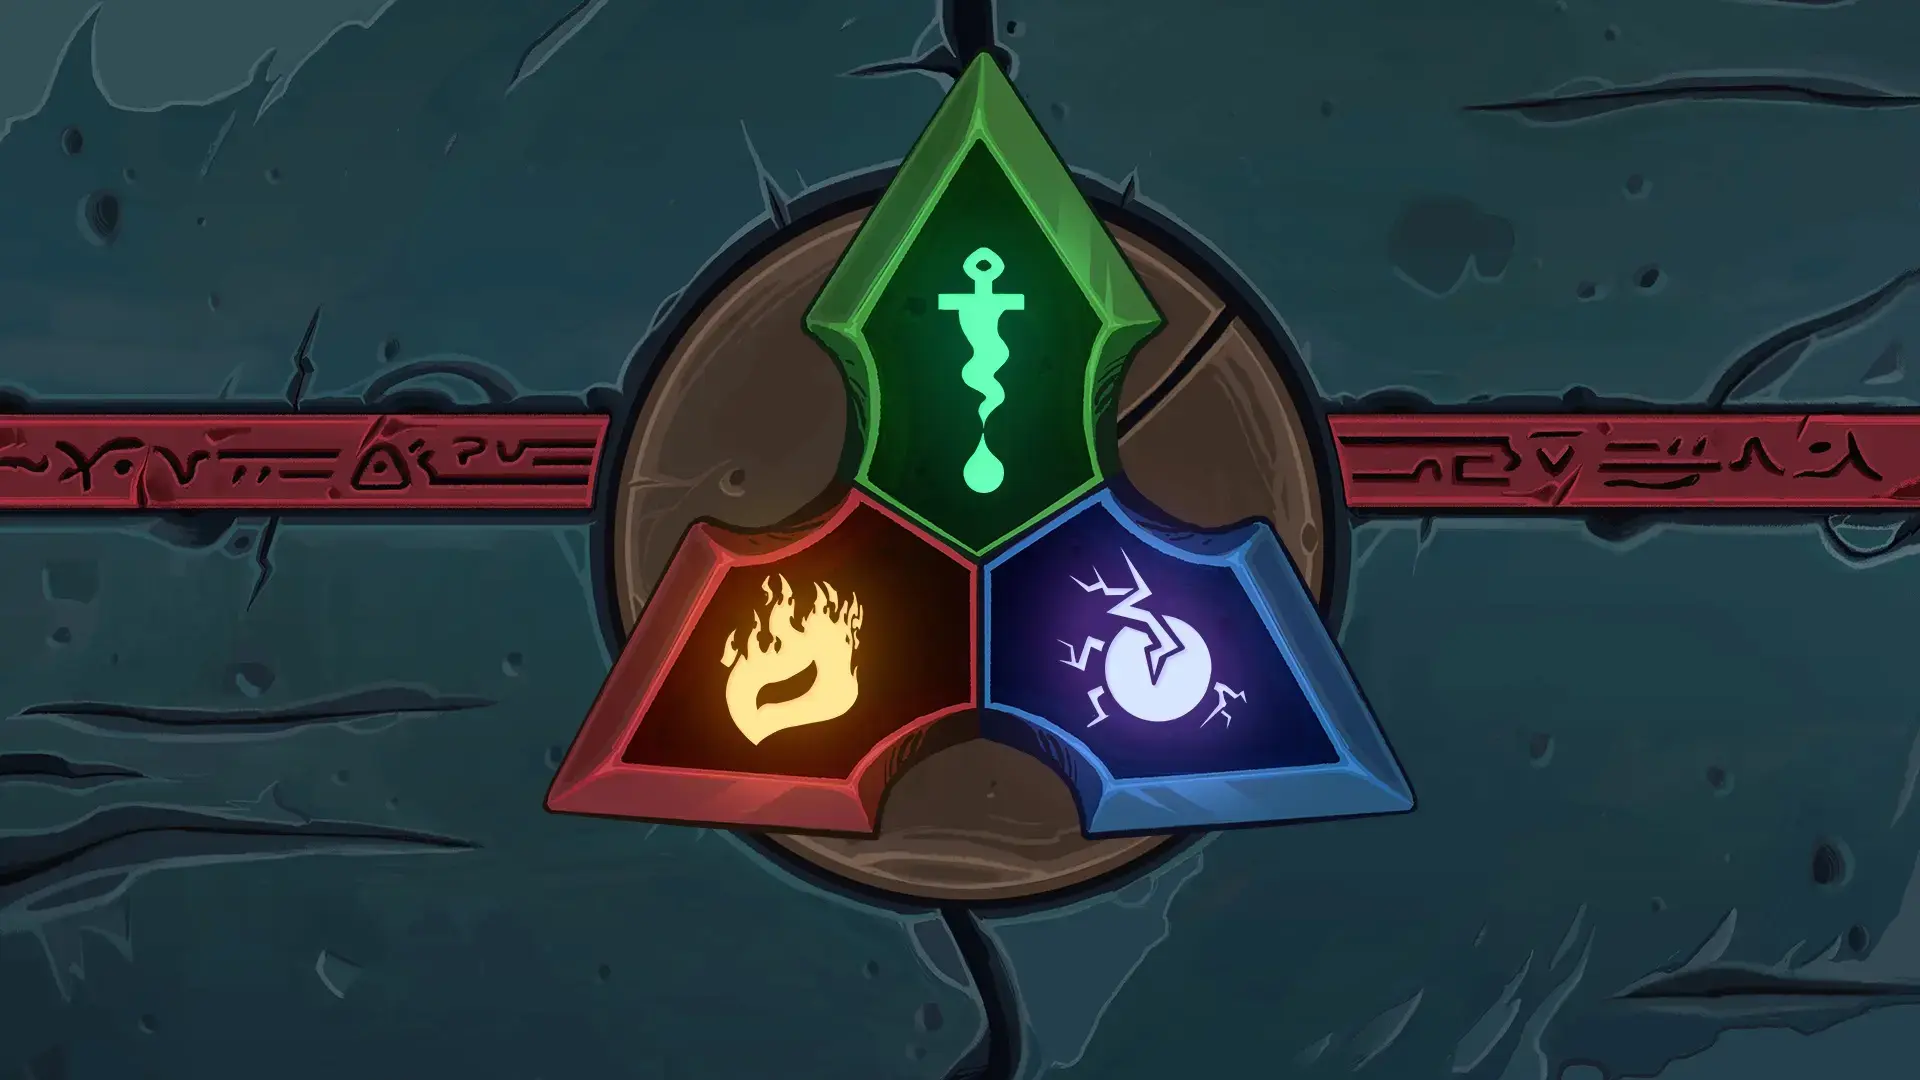
Orb Channeling: Defect channels elemental Orbs into slots. Each Orb has a passive effect (triggers at end of each of your turns) and an evoke effect (triggers when the Orb is pushed out of its slot or manually evoked). Orb types:
| Orb | Passive Effect | Evoke Effect |
|---|---|---|
| Lightning | Deal 3 damage to a random enemy | Deal 8 damage to a random enemy |
| Frost | Gain 2 Block | Gain 5 Block |
| Dark | Accumulate damage (stacks each turn) | Deal accumulated damage to lowest-HP enemy |
| Plasma | Gain 1 Energy | (evoke removes it for its stored energy) |
| Glass (New) | Deal AoE damage (decreasing each turn) | Deal double current value to all enemies |
Focus: Each point of Focus increases all Orb passive and evoke effects. In STS1, Focus could stack indefinitely. In STS2, permanent Focus scaling has been capped — making early Focus generation (Data Disk relic, Defragment card) more precious than before.
Orb Slots: You start with 3 Orb slots. Expanding slots (Rune Pyramid, Runic Capacitor relic) lets you hold more Orbs simultaneously, dramatically increasing passive output per turn.
Evoke Timing: Dark Orbs accumulate damage every turn you leave them in. Knowing when to evoke — versus letting a Dark Orb keep building — is one of Defect’s core skill expressions.
Best Builds
Lightning / Frost Mixed Engine (Beginner-Friendly)
- Core cards: Zap, Coolheaded, Streamline, Amplify, Defragment
- Goal: Channel Lightning for damage and Frost for Block; scale both with Focus
- Key relic: Data Disk (1 Focus at battle start), Runic Capacitor (3 extra Orb slots)
- This is the “learn Defect” build — intuitive passive income from both Orb types
Dark Orb / Burst Build
- Core cards: Darkness, Recursion, Dark Shackles, Creative AI
- Goal: Channel Dark Orbs and let them accumulate damage; evoke against high-priority targets for massive spikes
- Key relic: Symbiotic Virus (start with 1 Dark Orb channeled), Gold-Plated Cables (rightmost Orb triggers twice)
- Ceiling: Dark Orb can accumulate into hundreds of damage on long fights
Glass Orb AoE Build (New to STS2)
- Core cards: Glass Orb generation cards, Tempest, Glacier
- Goal: Channel Glass Orbs for diminishing AoE; evoke for burst — strong against multi-enemy rooms
- Key relic: Runic Capacitor to hold more Orbs; Data Disk for Focus scaling
- Best in: Act 1–2 Elite rooms and multi-enemy encounters
Strengths and Weaknesses
Strengths:
- Passive Orb income means Defect generates value even on suboptimal turns
- Strong at both offense (Lightning/Glass/Dark) and defense (Frost) from the same resource system
- Glass Orb adds AoE — a major gap-filler that STS1 Defect lacked
- Plasma Orb provides energy generation for combo turns
Weaknesses:
- Focus cap removed infinite scaling — Defect’s late-game ceiling is lower than STS1
- Cracked Core is a weaker Starter Relic than Burning Blood or Ring of the Snake
- Requires careful orb-slot management — poor ordering can brick your passive output
- Steep learning curve around evoke timing, especially for Dark Orbs
Key Tips
- Never fill slots randomly. Orb position matters — the oldest Orb evokes first when a new one is channeled. Plan your slot order deliberately.
- Dark Orbs reward patience. A Dark Orb left for 4+ turns can one-shot most Elites. Don’t evoke early unless you need to evict it for a better Orb.
- Defragment early. Each +1 Focus from Defragment compounds across all future passive triggers. Prioritize it in Act 1 card rewards.
- Glass Orb in multi-enemy rooms. Channel Glass immediately when facing 3+ enemies. The AoE starts high and decreases — front-load the damage.
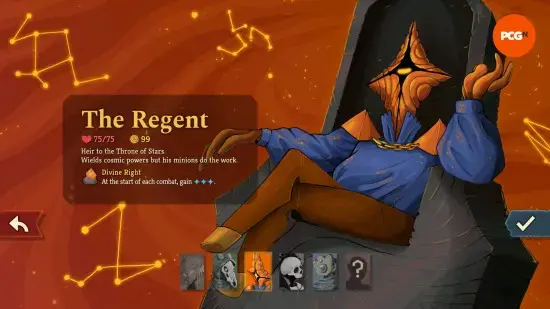
The Regent — The Star-Powered Sovereign
 Role: The Star Crafter
HP: 75
Starter Relic: Divine Right — Gain 3 Stars at battle start.
Core Mechanic Systems
Stars Resource: Regent’s secondary resource (max capacity: 24). Stars are generated through cards and Divine Right, persist between turns, and are spent to activate powerful spell effects. Unlike Energy which resets each turn, Stars bank across turns — enabling high-cost ability burst on demand.
The Sovereign Blade / Forging: Regent upgrades her primary weapon — the Sovereign Blade — during the run. Forging adds permanent damage to the blade and other scaling bonuses. Each Forge action consumes Stars but compounds across the run, making early investment critical.
Colorless Cards: Regent has access to a unique pool of Colorless Cards created through gameplay. Relics like Orange Dough (add 2 Colorless at battle start) and Regalite (2 Block per Colorless created) synergize directly with this card generation.
Alternate Acts: Regent has access to special route variations not available to other classes. These can lead to unique rewards, encounters, and power spikes — a mechanic currently being expanded during Early Access.
Best Builds
Stars Burst Build (Core Archetype)
- Core cards: Stars generation spells, high-cost Star-spending abilities
- Goal: Bank Stars across multiple turns, then spend everything on a single devastating ability activation
- Key relic: Lunar Pastry (1 Star per turn passively), Mini Regent (1 Strength first Stars spent per turn), Galactic Dust (10 Block per 10 Stars)
- Playstyle: Patient resource accumulation into burst windows
Forge / Sovereign Blade Scaling
- Core cards: Forge-enabling cards, attack cards that benefit from Sovereign Blade’s scaling damage
- Goal: Invest Stars into Forging early to compound the Blade’s damage multiplier over the run
- Key relic: Fencing Manual (Forge 10 at battle start), Mini Regent (Strength on Stars spend)
- Best for: Players who like incremental engine-building with guaranteed late-game scaling
Colorless Card Generation
- Core cards: Colorless cards, Colorless-trigger relics
- Goal: Flood the hand with zero-cost or discounted Colorless cards for burst turns
- Key relic: Orange Dough (2 Colorless to hand at start), Regalite (2 Block per Colorless created)
- Synergy: Regent’s Colorless pool includes strong neutral options unavailable to other classes
Strengths and Weaknesses
Strengths:
- Stars persist between turns — no wasted resources at turn end
- Sovereign Blade is a permanent passive damage scaler that compounds throughout the run
- High burst potential from banked Stars
- Alternate Acts open unique power-spike opportunities
Weaknesses:
- Slowest start of any class — needs several turns to build Stars before abilities come online
- Front-loaded investment in Forging can feel slow in Act 1
- Weaker against short fights where there isn’t time to bank Stars
- Most complex decision-making of any class that isn’t the Necrobinder
Key Tips
- Never waste Stars. If you end a fight with Stars banked, that’s fine — they carry over. If you could spend them and didn’t, that’s opportunity cost. Know which fights are worth banking versus spending.
- Forge early, Forge often. The Sovereign Blade’s Forge compound returns grow over time. A Forge in Act 1 is worth more than the same Forge in Act 3.
- Divine Right gives 3 Stars for free. That means most fights start with 3 Stars already banked. Plan your turn 1 around whether that’s enough to activate a key spell.
- Alternate Act paths are power opportunities. Don’t skip them out of comfort. Regent’s unique routes were designed to offer above-curve rewards.
The Necrobinder — The Doom Lich with a Skeleton Best Friend

Role: The Doom Lich
HP: 66
Starter Relic: Bound Phylactery — Summon 1 base unit at the start of each turn.
Core Mechanic Systems
Doom: A stacking debuff Necrobinder applies to enemies. When an enemy’s Doom count ≥ their current HP, they die at the start of their next turn — a guaranteed instant kill that bypasses all HP reduction mechanics. The key insight: you don’t need to deal the killing blow directly. Stack Doom to equal HP and wait.
Osty (Companion): A giant skeletal hand with its own HP pool. Osty attacks autonomously and can absorb damage directed at the Necrobinder. Cards control Osty — commanding attacks, triggering Summon effects, and sacrificing Osty for massive power spikes. When Osty is sacrificed, it respawns over time.
Souls: A resource token unique to Necrobinder. Cards that cost Souls generate high-value effects. Soul generation comes from cards like Funerary Mask (shuffle Soul cards into draw pile) and the Ivory Tile relic (gain 1 Soul per Soul-costing card played). A Soul engine turns into explosive high-velocity turns.
Graveyard (vs. Exhaust): Unlike other classes where Exhausted cards are permanently removed from the run, Necrobinder’s Exhausted cards enter a Graveyard — a separate zone they can be retrieved from. This changes the math on Exhaust synergies: Necrobinder’s exhausted cards aren’t gone, they’re parked.
Best Builds
Doom Stack Build (Core, Most Reliable)
- Core cards: Doom-applying cards, delay/block cards to survive while Doom ticks
- Goal: Apply Doom to match or exceed enemy HP, then survive one enemy turn for the kill trigger
- Key relic: Undying Sigil (Doom-marked enemies deal 50% less damage — survive while waiting for kill), Book Repair Knife (heal when Doom kills non-Minion enemies)
- Ideal against: Single high-HP targets (Elites, Bosses) where direct DPS is dangerous
Osty Summon / Sacrifice Loop
- Core cards: Summon cards, Sacrifice enablers, Osty buff cards
- Goal: Summon Osty, buff it, sacrifice for massive effects, use respawn timer to repeat
- Key relic: Bone Flute (2 Block per Osty attack), Bound Phylactery (Starter — free base unit each turn)
- Synergy: Sacrificing Osty at peak value (fully buffed) produces disproportionate payoffs
Soul Engine / High-Velocity
- Core cards: Soul-generating cards, low-cost cards that produce Souls, Haunt (deal 6 damage per Soul spent)
- Goal: Generate Souls rapidly, spend them on Haunt and other Soul-consuming effects for burst damage
- Key relic: Funerary Mask (shuffle 3 Soul cards into deck at battle start), Ivory Tile (1 Soul per Soul-costing card)
- Ceiling: When fully assembled, produces more damage per energy than any other class’s burst builds
Strengths and Weaknesses
Strengths:
- Doom provides a unique “kill floor” — even tanky enemies die once Doom equals their HP
- Osty acts as a second HP pool and independent attacker
- Graveyard system means Exhaust cards aren’t lost — Necrobinder’s resource economy is more resilient
- Highest skill expression ceiling in the roster
Weaknesses:
- 66 HP — the lowest base HP in the game
- Simultaneously managing Doom stacks, Osty HP, Souls, and the Graveyard is cognitively demanding
- Weak in fights that are too short to ramp Doom to threshold
- Bound Phylactery is the weakest Starter Relic of the five classes — Act 1 survival is the hardest of all characters
Key Tips
- Bound Phylactery saves lives. One free unit per turn is the reason Necrobinder doesn’t die in Act 1. Use every unit as a damage sponge before Osty comes fully online.
- Stack Doom before attacking. Against high-HP Elites, prioritize getting Doom to threshold over dealing direct damage. Once Doom matches HP, you’re waiting for a one-turn kill regardless of their remaining health.
- Osty timing on sacrifice. Don’t sacrifice a fresh Osty. Let it accumulate passive damage history (Bone Flute procs, attack buffs) before sacrificing for maximum effect.
- The Graveyard is a resource. Cards in your Graveyard aren’t dead — they’re available for retrieval effects. Factor this into card selection: Exhausting a key card on Necrobinder is less painful than on other classes.
- Undying Sigil is a must-have. Doom-marked enemies dealing 50% less damage while you wait for the kill is the defensive bridge that makes the strategy viable. Prioritize this relic above almost everything.
Class Tier List and Meta Snapshot (EA v1.0)
Based on community consensus and Early Access data as of March 2026:
| Tier | Class | Reasoning |
|---|---|---|
| S | Ironclad | Most reliable win rate. Strength builds are straightforward and scale consistently. Best for learning, not punishing for experts. |
| A | Defect | Strong passive engine with multiple Orb archetypes. Glass Orb fills the old AoE gap. Requires mechanical knowledge but rewards it. |
| A | Silent | Ring of the Snake is still oppressively good for draw. Sly mechanic adds new combo ceiling. Fragile, but piloted well: top-tier. |
| B | Regent | High ceiling, slow floor. Stars engine is powerful mid-to-late but Act 1 can feel underpowered. Mastery rewards extremely well. |
| B | Necrobinder | Lowest base HP, hardest multi-system management. Doom is genuinely broken once assembled but hardest to assemble. |
Note: This reflects general playability and learning curve. In skilled hands, all five classes can clear full Ascension runs.
Universal Tips That Apply to Every Class
Deck size matters more than card power. A deck of 12 powerful cards beats a deck of 25 mediocre ones. Every card you don’t take at a reward screen is a decision — not just adding cards, but protecting deck consistency.
Elite rooms are the primary scaling vector. Elites give relics. Relics compound across the entire run. Skipping Elites to preserve HP is usually a losing trade unless you’re critically low. Play Elites aggressively in Act 1.
Rest vs. Upgrade: the eternal question. The general rule: Upgrade over Rest until you’re below 50% HP, then Rest. But context matters — upgrading a key combo piece before a Boss is often worth taking the HP risk.
The Ancients replace Boss Relics. Each act’s Ancient offers Blessings under conditions. Learn what each Ancient wants and plan your route to meet those conditions if the Blessing is strong. Tezcatara’s Wax Relics are especially important — see the Relic Tier List guide for slot management.
Potion inventory is live ammunition. Potions don’t expire. Carrying a Strength Potion or Block Potion into a Boss fight is 100% valid. Don’t waste them on standard enemies unless you’re in danger.
Frequently Asked Questions
Which class should I start with in Slay the Spire 2?
The Ironclad is the best starting class. With 80 HP, a self-healing starter relic, and a straightforward Strength-scaling gameplan, it teaches you core STS2 mechanics without punishing every misstep. Beat a full run with Ironclad before touching Regent or Necrobinder.
What is the Sly mechanic in Slay the Spire 2 Silent?
Sly is a new keyword on certain Silent cards. When a Sly card is discarded, it is automatically played for free — without spending a card play or energy. This enables explosive combo turns where discarding cards triggers free effects, opening up high-ceiling infinite-style loops that didn't exist in STS1.
How does the Regent's Stars resource work?
Stars are a secondary resource (max 24) that Regent generates through cards and her Starter Relic gives 3 Stars per battle start. Stars persist between turns and are spent to activate powerful spell effects. The key is that Stars carry over — you can bank them across turns to afford high-cost abilities.
What is Doom and how does the Necrobinder use it?
Doom is a stacking debuff applied to enemies. When an enemy's Doom count equals or exceeds their current HP, they die on their next turn — a guaranteed kill mechanic. The Necrobinder builds around stacking Doom efficiently while using their skeleton companion to absorb hits and buy time.
Is the Defect still good in Slay the Spire 2?
Yes, but it plays differently. Permanent Focus stacking has been removed, making early Focus generation more valuable. The new Glass Orb (AOE damage that decreases each turn) adds AoE pressure. Defect rewards players who carefully plan orb channeling order and evoke timing, and scales well once the engine is running.
About the author
Editor-in-Chief
Founder and Editor-in-Chief of gameguidesbox.com, began surfing the web in the late 19th century. Passionate about movies, coffee, gaming, and life itself. Favorite games include Titanfall 2, Baldur's Gate 3, Metro, PUBG, and CS2.
You may also like
Slay the Spire 2 Relic Tier List — Every Relic Ranked
Every relic in Slay the Spire 2 ranked from S-tier powerhouses to situational picks, with detailed analysis of Ice Cream, Wax Relics, boss relic replacements, and which ones to avoid.

SpiritVale Beginner's Guide: 7 Classes, Gear Refining & Economy Basics
No tutorial, no quests, no hand-holding. SpiritVale drops you into Nevaris with nothing. Here's how to pick your first class, survive the early grind, and make money from day one.

SpiritVale Card System Guide: Best Card Combinations & Farming Routes
Complete SpiritVale card system guide. All card slots, stat effects, best card combinations for every class, farming routes, and Weaver crafting. Updated for EA v0.30.0.
Comments