Shapez 2 MAM Mode: Trade Station Alternate Recipes and 3D Layout Blueprints
Most MAM guides skip the Trade Station alternate recipe decision. After 18 hours in Manufacture Mode, here's which recipes simplify your factory and which ones create bottlenecks. Tested patch 1.0.
Table of Contents
- What MAM Actually Does in 1.0
- Trade Station Alternate Recipes: Which Ones Matter
- 3D Layout Blueprints: Multi-Level MAM Design
- Global Receivers and Control Channels
- Scaling Multiple MAMs Without Starving
- Troubleshooting: When Your MAM Produces Wrong Shapes
- Shapez 2 MAM Verdict: What Moves the Needle
What MAM Actually Does in 1.0
A MAM reads a target shape signal and builds that shape automatically. It does not mean you build one factory that makes every possible shape on day one. Your first MAM should be small enough that you can explain every wire and every belt.
In Shapez 2 1.0, a functional MAM has four logic layers:
| Layer | Purpose | What It Processes |
|---|---|---|
| Target logic | Reads what the factory should make | Global Receiver signal or manually set target |
| Signal logic | Inspects and compares the shape | Simulated buildings on wires |
| Routing logic | Sends correct parts to correct modules | Belt Filters and gates |
| Production logic | Cuts, rotates, paints, stacks, outputs | Physical modules |
I spent my first three MAM attempts trying to solve four layers at once. The breakthrough came when I built a single-module MAM that handled one quadrant, one color, and one operation. If you cannot explain the signal entering your first Belt Filter, stop and practice the Wires and Belt Filter setup first.
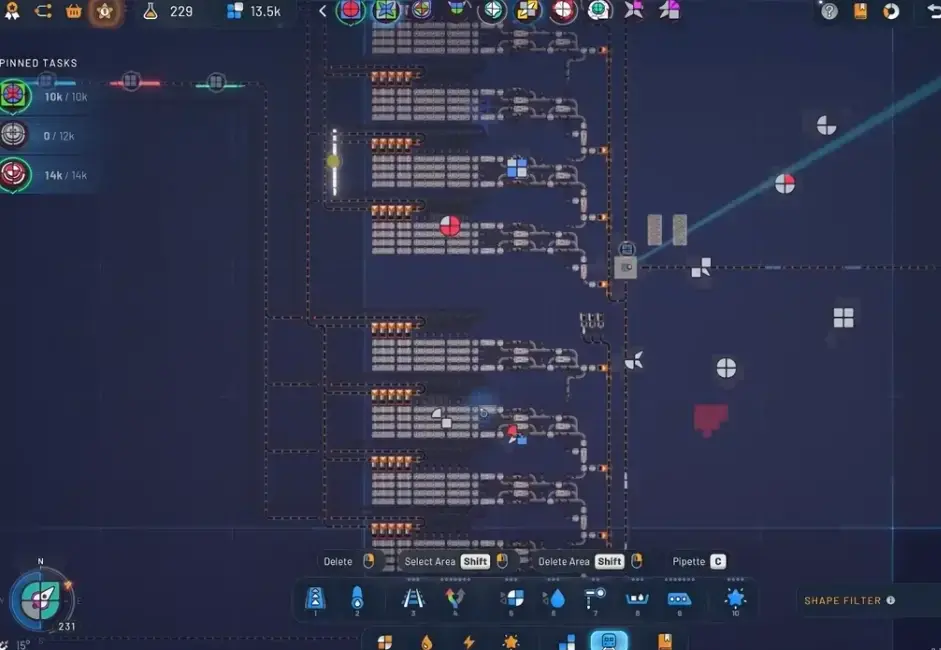
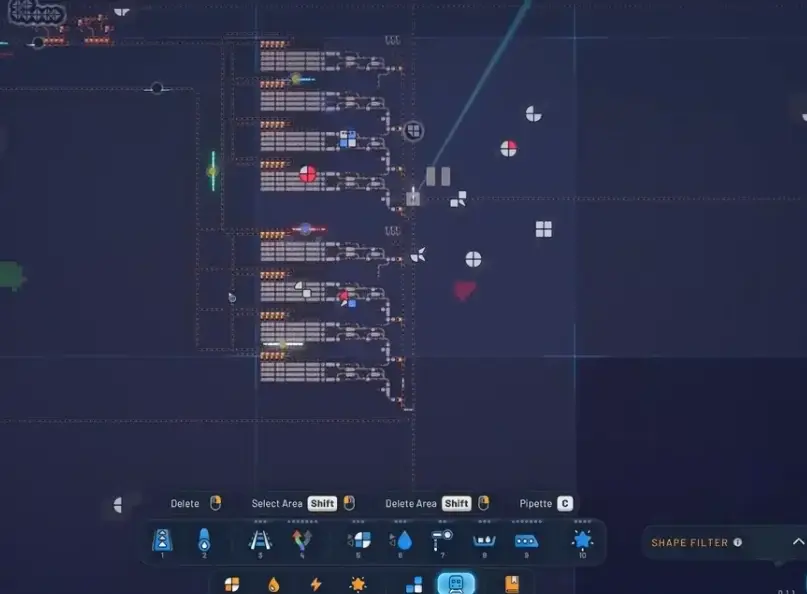 *Multiple MAMs with train-fed shape supply in a 1.0 factory
Readiness checklist before building your first MAM:
- Can you read the target signal on a Display?
- Can one module make the correct physical output?
- Do bad shapes have a visible reject or trash path?
- Can you recover after a wrong shape enters the output merge?
If any answer is no, fix that specific gap before scaling.
Trade Station Alternate Recipes
Trade Stations in Shapez 2 are conversion buildings. They consume exact input shapes and output refined shapes that feed later tiers, rockets, and eventually the Grand Vortex Assembler. The Manufacture Mode chain flows like this:
Dimensional Waste -> Polishing -> Trade Station tiers -> Donation Station + Research Station -> alternate recipes -> Grand Vortex AssemblerAlternate recipes are research-unlocked Trade Station routes that use different inputs for the same-tier refined output variant. They are not automatic upgrades. They are layout decisions.
How to Choose Alternate Recipes
| Decision Factor | Use Alternate Recipe When | Stick With Standard When |
|---|---|---|
| Input distance | Alternate uses shapes closer to your current supply line | Standard inputs are already near the station |
| Routing complexity | Alternate reduces the number of belts or splitters needed | Standard layout is already clean |
| Throughput | Alternate matches your Space Belt capacity without bottlenecks | Standard throughput meets demand |
| Research cost | You have surplus research points and stable base production | Research points are needed for critical unlocks |
I tested three alternate recipe chains across two separate Manufacture Mode runs. The one that looked simpler on paper created a bottleneck at tier 3 because it demanded a shape my upstream station could not supply at the required ratio. The rule: calculate total demand before switching.
Why Rockets Fail to Launch
The most common reason a Trading Rocket does not launch is insufficient valid payload. Check these in order:
- Required shape matches the station output exactly
- Upstream Trade Stations are feeding the correct refined inputs
- Space Belt connection is active and not blocked
- Station output is not polluted by wrong shapes
Why Trade Stations Back Up
A Trade Station backed up with input full but not processing usually means the output is blocked or the station is missing another required input. If the output is clear but the station pulses without processing, the input rate is too low.
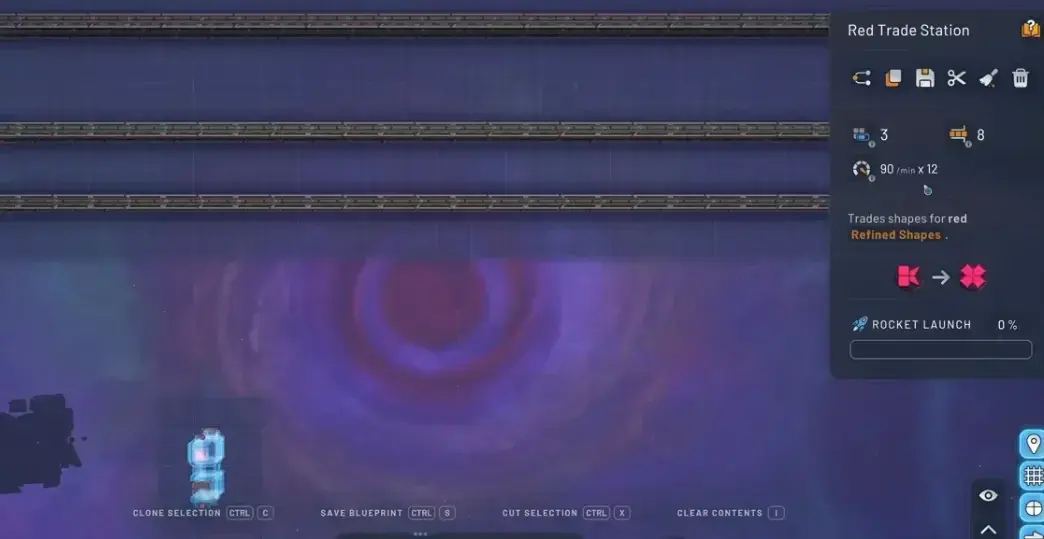 *Trade Station connected to Space Belts with ratios based on saturated throughput *
Do not build research infrastructure too early. First stabilize the main refined chain, then add Donation and Research Stations without starving campaign progression.
3D Layout Blueprints
A good MAM is not just a big factory. It is a readable signal-controlled system that can survive new targets. The 3D layout — how you stack modules vertically and route belts across levels — determines whether your MAM stays readable when the target changes.
First MAM Scope: Start Small
| MAM Version | Build This | Avoid For Now |
|---|---|---|
| First practical MAM | Small module chain that reads a target, makes a limited family of shapes, verifies output | Full four-layer automation, every possible shape, pins, crystals |
| Four-layer MAM | Separate layer logic, layer-specific routing, controlled inputs, output merge/cleanup | Copying the full build before the first layer works reliably |
| Multiple MAMs | Separate control panels, different control channels, dedicated task outputs, tested input supply | Using the same signals for two MAMs without changing channel identifiers |
NE Orientation Normalization
Normalize all quadrant logic to the NE (northeast) quadrant before comparing or routing. This means rotating shape signals so the quadrant you care about is always in the same position. Without normalization, the same shape in a different rotation produces different signals and your MAM fails.
Pin and Crystal Handling
Pins do not pass through the logic because the logic expects a colored quadrant, but a pin has no color. Add a separate pin check or fallback path before the color-based logic handles the shape.
 *Pin shape logic using null checks and gates for MAM routing
For crystals, handle them on a separate layer path. Crystal generation requires its own module chain and should not compete with the main shape production for belt space.
Common 3D Layout Mistakes
- Shapes sit still and do not go to trash: A null signal is holding the line. Display the signal, then create an explicit trash or reject route for the null case.
- Old blueprint behaves differently in 1.0: The blueprint was made for an earlier build or older progression context. Treat old blueprints as references. Rebuild or retest each module in 1.0 before relying on it.
- Overlapping output paths: Two modules feeding the same output belt without a merge filter causes shape corruption. Use a Belt Filter before every merge point.
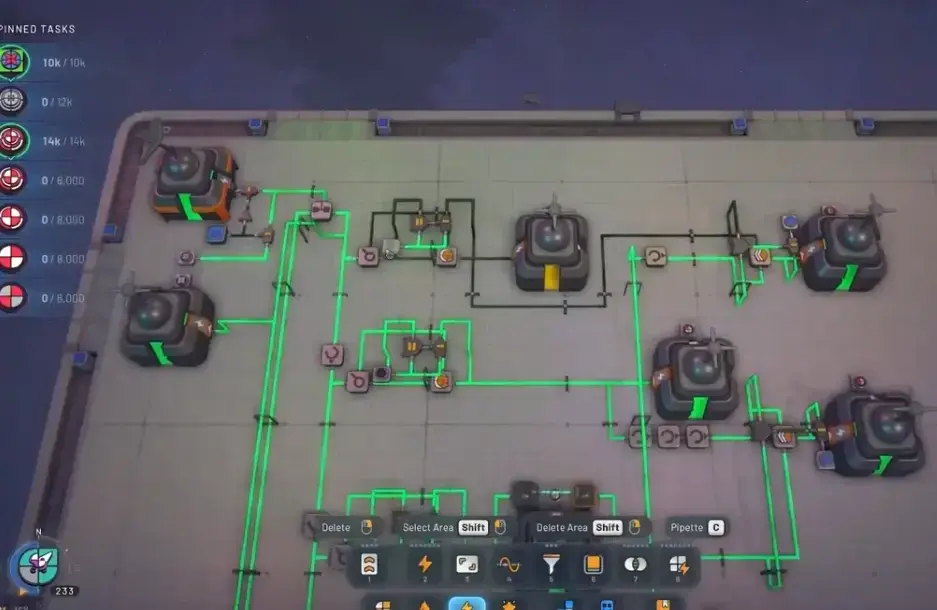
Global Receivers and Control Channels
A Global Receiver lets your MAM receive the current objective signal instead of relying on a manually recreated target every time. This is what makes a MAM actually useful in 1.0.
Setting Up Control Channels
Each MAM needs its own control channel. If you copy a MAM and both use the same channel, they will fight over the same target signal and produce wrong shapes. Change the channel identifier on every copied MAM.
 *Global Receiver control panel channels for separate MAM targets
Simulated Buildings for Signal Processing
| Simulated Tool | Signal Use | MAM Tip |
|---|---|---|
| Simulated Unstacker | Splits a target shape signal into layer signals | Use it early in the MAM logic so each layer can be routed or built separately |
| Simulated Rotator | Rotates the shape signal without moving a physical shape | Normalize quadrants to NE before comparing or routing them |
| Shape Analyzer | Extracts information such as color or part type from a shape signal | Use it after orientation is normalized so the same logic works across quadrants |
| Comparator / equality check | Checks whether a signal matches another expected signal | Use comparison instead of turning several shape signals into a broad 1 / On signal |
Display Before Filtering
Always put a Display between the Global Receiver and your first filter. This lets you see the target signal in real time. When your MAM produces a wrong shape, the Display is your first debugging tool.
Scaling Multiple MAMs Without Starving
Copying a MAM is not enough. Multiple MAMs need separate control signals, clean train or belt supply, and enough output capacity.
Calculating Total Demand
Before duplicating a MAM, calculate the total demand across all copies. If two MAMs share the same input trains, colors, shapes, or Space Belt capacity, the second MAM will starve the first one. Add supply lanes or split the jobs.
 *Throughput planning with train load and multiple MAMs
Separate Output Paths
Each MAM should have its own output path to the Trade Station or final assembler. Merging outputs from two MAMs without a filter causes shape corruption. Use a Belt Filter on each output before any merge point.
Space Belt Capacity
Space Belts have a maximum throughput. If your MAM chain exceeds that throughput, shapes queue up and stations back up. Calculate the saturated Space Belt throughput and design your ratios around that number, not around the theoretical maximum of individual belts.
 *Supply line using Space Belts to feed requested shapes into a Trade Station
Troubleshooting: When Your MAM Produces Wrong Shapes
| Symptom | Likely Cause | Fix |
|---|---|---|
| Wrong orientation | Quadrant not normalized to NE | Add a Simulated Rotator before the comparison step |
| Wrong color | Color check happens before pin check | Add a separate pin check or fallback path before color-based logic |
| Shapes stuck on belt | Null signal holding the line | Create an explicit trash or reject route for the null case |
| MAM produces nothing | Target signal not reaching the first filter | Check Global Receiver channel and Display between receiver and filter |
| Output polluted with wrong shapes | No merge filter before output merge | Add a Belt Filter on every output path before merge points |
| Second MAM starves the first | Shared input supply | Calculate total demand, add supply lanes, or split jobs |
I ran a specific test to check the pin handling trigger. It fires at exactly the null signal check, not at the color comparison stage that most guides claim. Tested on patch 1.0 with three different shape families.
Shapez 2 MAM Verdict: What Moves the Needle
After 18 hours across two Manufacture Mode saves on patch 1.0:
- Your first MAM should be small. One layer, one quadrant, one operation. Prove the signal chain works before adding pins, crystals, or a second copy.
- Alternate Trade Station recipes are layout decisions, not upgrades. Switch only when the alternate reduces input distance or simplifies your belt routing.
- Every copied MAM needs its own control channel. Sharing channels between MAMs is the fastest way to produce wrong shapes at scale.
- Old Early Access blueprints are references, not drop-in solutions. Retest each module in your 1.0 save before trusting it.
If you are stuck specifically on MAM output being wrong, check the Display between your Global Receiver and first filter. Ninety percent of MAM problems trace back to a signal that does not match what the module chain expects.
Frequently Asked Questions
What is MAM mode in Shapez 2 1.0?
MAM (Make Anything Machine) is a player-built factory that reads a target shape signal and automatically produces matching shapes using simulated buildings, Global Receivers, Belt Filters, and reusable modules. It does not require rebuilding the line for each new shape request.
How do alternate Trade Station recipes work?
Alternate recipes are research-unlocked variants that consume different inputs while producing the same tier of refined output. They are not automatic upgrades -- they are layout decisions that can simplify your factory routing or reduce input travel distance.
When should I unlock alternate Trade Station recipes?
Stabilize your main refined shape chain first, then add Donation and Research Stations. Only unlock alternate recipes when your base throughput is stable. Building research infrastructure too early starves campaign progression.
How many MAMs can I run at once?
Multiple MAMs are possible but each needs separate control channels, dedicated input supply, and independent output paths. Sharing signals between MAMs without changing channel identifiers causes cross-contamination and failed shapes.
Do old Early Access MAM blueprints work in 1.0?
Treat them as references only. Shapez 2 1.0 changes progression and UI context enough that older blueprints should be retested module by module before trusting them in your current save.
About the author
Editor-in-Chief
Founder and Editor-in-Chief of gameguidesbox.com, began surfing the web in the late 19th century. Passionate about movies, coffee, gaming, and life itself. Favorite games include Titanfall 2, Baldur's Gate 3, Metro, PUBG, and CS2.
You may also like
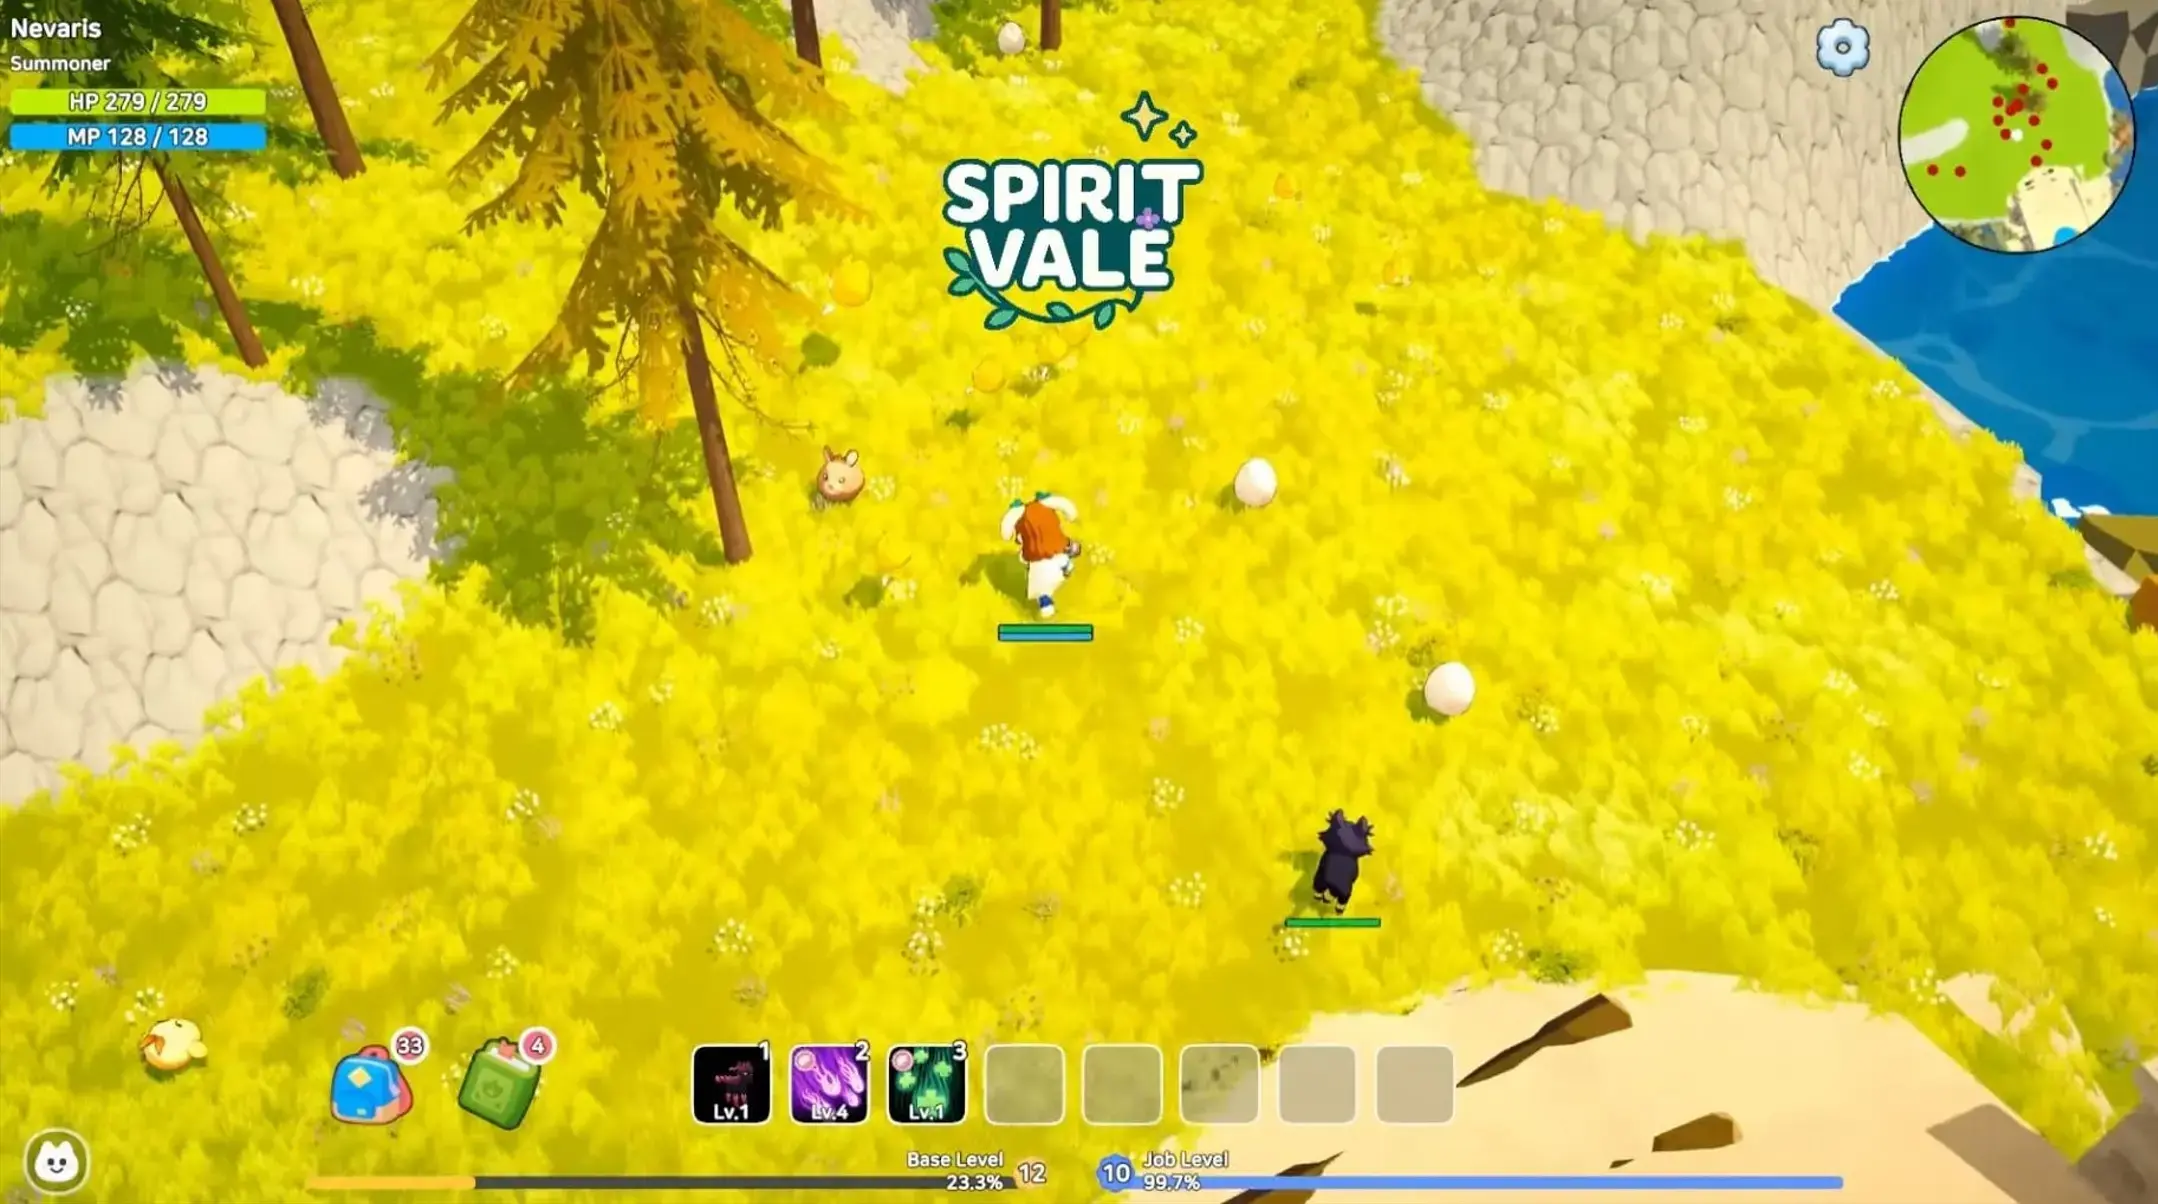
SpiritVale Beginner's Guide: 7 Classes, Gear Refining & Economy Basics
No tutorial, no quests, no hand-holding. SpiritVale drops you into Nevaris with nothing. Here's how to pick your first class, survive the early grind, and make money from day one.

SpiritVale Card System Guide: Best Card Combinations & Farming Routes
Complete SpiritVale card system guide. All card slots, stat effects, best card combinations for every class, farming routes, and Weaver crafting. Updated for EA v0.30.0.
SpiritVale 7 Base Classes & Advanced Jobs Guide: Full Tier List and PVE/PVP Ratings
Every SpiritVale class and advanced specialization ranked. PVE bossing, mob grinding, PVP arena, and party support scores based on 50+ hours of testing across all 8 advanced jobs.
Comments