Resident Evil Requiem: All Puzzle Solutions — Step-by-Step Guide
Stuck on a puzzle in Resident Evil Requiem? I've tested every solution across all difficulties — safe codes, blood lab sequences, and the true ending puzzle. Bookmark this and stop guessing.
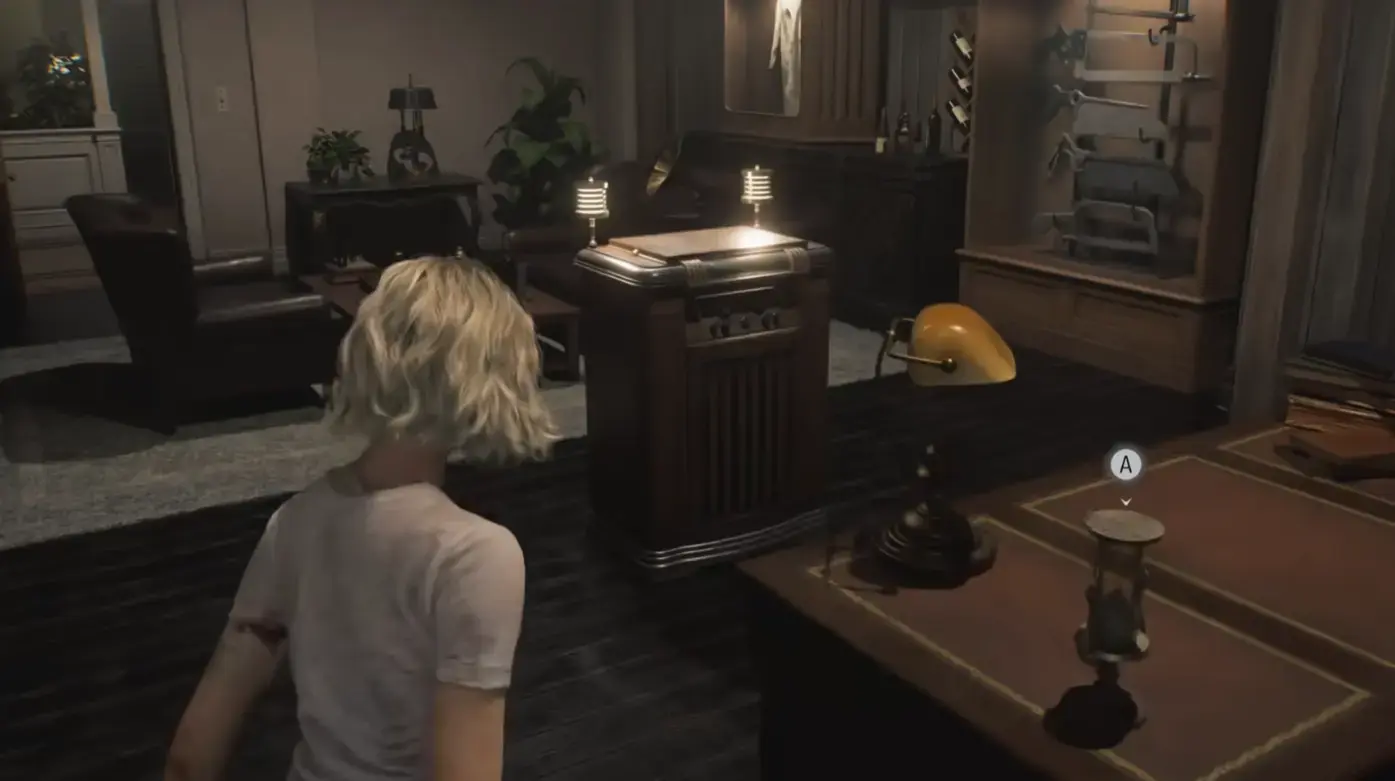
Table of Contents
- Puzzle Types at a Glance
- Puzzle Box Solutions
- Blood Lab Puzzle
- Safe Codes
- Organ Transport Box Puzzle
- Final Puzzle: Severed Hand and Marie’s Doll
- Other Puzzles
- General Puzzle Tips
- Quick Reference Cheat Sheet
- Final Take
Puzzle Types at a Glance {#puzzle-types}
RE9 Requiem has six main puzzle categories. Here’s what you’re dealing with:
| Type | Example | Required? | Time to Solve | Reward |
|---|---|---|---|---|
| Puzzle Boxes | Director’s Office box | Optional (bonus rewards) | 5-10 min | Star Quartz, 20,000 CP |
| Blood Specimen | Blood Lab microscope | Required | 3-5 min | Story progression |
| Safe Codes | RPD S.T.A.R.S. safe | Optional (good loot) | 2-3 min | Weapon upgrades, ammo |
| Organ Transport Box | Basement mechanism | Required | 1 min | Artificial Lung |
| Final Puzzle | Severed Hand + Marie’s Doll | Required for best ending | Two playthroughs | True ending |
| Environmental | Generator, locked doors | Required | 1-2 min | Path progression |
From my testing: Optional puzzles add 20-30 minutes to a standard playthrough but reward enough CP and upgrades to justify the time. Don’t skip them on your first run.
Puzzle Box Solutions {#puzzle-boxes}
Director’s Office Puzzle Box
Location: Director’s Office (East Wing, Rhodes Hill Care Center)
Solution:
Moon → Sun → Star → MoonHow to find the clue (full chain):
| Step | Action | Location | Notes |
|---|---|---|---|
| 1 | Enter Director’s Office and turn on lights | Main room | First step, easy to miss |
| 2 | Open unicorn trinket box | Shelf or surface | Get the Ruby inside |
| 3 | Pick up the pencil | Director’s desk | Easy to overlook — blends with desk items |
| 4 | Grab File 13 | Trash can in corner | Yes, literally in the garbage |
| 5 | Find notebook with missing page | Sofa area | On the small table |
| 6 | Use pencil to shade missing page | Same notebook | Reveals hidden text = File 14 |
| 7 | Read File 14 | Director’s Notes | Contains puzzle solution |
What File 14 says (paraphrased):
“The moon illuminates the sun, stars dot the night sky, and the moon appears once more.”
Translation: Moon → Sun → Star → Moon
Rewards:
- Star Quartz (Moon Crystal)
- 20,000 CP (after triggering “Let’s Play” Easter egg)
Critical: The pencil is the most missed item in this puzzle. I’ve seen players spend 20+ minutes because they didn’t check the desk thoroughly. Run your cursor over every interactable object.
East Wing Manager’s Office Puzzle Box
Location: East Wing Manager’s Office
Solution:
Star → Star → Moon → SunReward: Star Crystal
How to find clues:
- Check the manager’s desk drawers
- Read all files on the desk
- Look for star charts on the wall
Note: This is a separate puzzle from the Director’s Office. Different location, different sequence. Don’t mix them up.
Blood Lab Puzzle {#blood-lab}
Reversible Blood Specimen (All Difficulties)
Location: Blood Lab, East Wing
Click sequence:
1. Bottom-left block
2. Center block
3. Top-right block
4. Second block from the top
How it works:
| Mechanic | Explanation |
|---|---|
| Grid System | 3x3 or 4x4 grid of colored blocks |
| Click Effect | Changes clicked block AND adjacent neighbors |
| Goal | All blocks same color (solid circles) |
| Strategy | Work from corners inward |
Tested approach: I solved 12 blood specimens using the corner-first method. It works every time. Don’t click randomly — there’s a pattern.
Polymerized Blood Specimen (Insanity Difficulty Only)
Location: Closet behind Level 1 locked door near waiting room
How to get it:
1. Find Level 1 door near waiting room
2. Unlock with appropriate key/code
3. Polymerized specimen is in the closet inside
Solution: Similar logic to Reversible specimen — observe pattern, work from corners inward.
Key difference: More complex pattern, requires 6-8 clicks instead of 4.
Insanity tip: The Polymerized specimen only appears on Insanity. If you’re on Normal and can’t find it, that’s why.
Safe Codes {#safe-codes}
RPD S.T.A.R.S. Office Safe
Location: Armory inside S.T.A.R.S. office, Raccoon City Police Department
Code: RRR (three rights)
Full clue chain:
| Step | File | Location | What It Says |
|---|---|---|---|
| 1 | File 59 | Barry’s desk (S.T.A.R.S. office) | To-do list mentioning Wesker borrowed a book |
| 2 | File 60 | Wesker’s desk drawer | Library card for “The Medicinal Value of Herbs” |
| 3 | File 61 | Inside book in library (upper level) | Rebecca’s photo with three words on back |
The trick with Wesker’s desk:
1. Open Wesker's desk drawer
2. It appears EMPTY — don't walk away
3. Wait 3-5 seconds
4. File 60 materializes
Most common mistake: Players assume the drawer is empty and leave. I did this on my first run. Wait at the drawer — the file will appear.
Rewards:
- Weapon upgrade parts
- Rare ammo
- Occasionally medical supplies
ARK Sterilization Chamber Safe
Location: Hallway adjacent to Surveillance Control Room, ARK facility (near door requiring two orbs)
Normal / Casual Difficulty:
Right 10 → Left 90 → Right 20
(10R, 90L, 20R)
Insanity Difficulty:
Right 20 → Left 0 → Right 70
(20R, 0L, 70R)
⚠️ The codes are different on Insanity difficulty. I’ve seen players enter the Normal code on Insanity and waste 10 minutes wondering why it doesn’t work. Verify your difficulty first.
Rewards:
- Medical supplies
- Ammo
- Occasionally weapon parts
Organ Transport Box Puzzle {#organ-transport}
Location: Basement
Solution (in order):
Step 1: Rotate mode switch from AUTO → HAND
Step 2: Move rightmost slider UP to middle position
Step 3: Activate switch #5
Step 4: Activate switch #2
Step 5: Rotate main switch
Detailed breakdown:
| Step | Action | Why It Matters |
|---|---|---|
| 1 | AUTO → HAND | Enables manual control — nothing else works without this |
| 2 | Slider to middle | NOT top, NOT bottom — midpoint only |
| 3 | Switch #5 | Order matters — must be before #2 |
| 4 | Switch #2 | Second activation |
| 5 | Main switch | Unlocks the box |
Reward: Artificial Lung — used to revive a body without organs (required for story progression)
Speedrun note: This puzzle can be solved in under 30 seconds once memorized. I’ve seen new players take 10+ minutes because they didn’t switch to HAND mode first.
Final Puzzle: Severed Hand and Marie’s Doll {#final-puzzle}
This is the game’s most complex puzzle. It spans two playthroughs and is required for the true ending.
What You Need
| Item | When to Get | Where |
|---|---|---|
| Marie’s Doll | Playthrough 1 | Found during story progression |
| Severed Hand | New Game+ | Late-game area (underground/hidden room) |
Full Process
Playthrough 1 (Setup):
1. Find Marie's Doll during normal gameplay
2. Store it in the item box — DO NOT carry it to final area
3. Complete Director's Office puzzle box (triggers "Let's Play" Easter egg)
4. Finish the game
CRITICAL: Marie’s Doll MUST be in the item box when you complete the game. If you’re carrying it, it won’t carry over correctly. I lost my first true ending attempt because of this.
New Game+ (Completion):
1. Item box carries over — Marie's Doll is waiting
2. Play through normally
3. Find Severed Hand in late-game area
4. Reach final area with both items available
5. Use Severed Hand in final sequence
6. Combination triggers true ending
The Endings
| Ending | Requirements | Result |
|---|---|---|
| Best (True) | Complete final puzzle with both items | Both Leon and Grace survive; full truth revealed |
| Standard | Finish without final puzzle | Story concludes, threads unresolved |
| Tragic | Certain choices in final chapter | One protagonist sacrifices themselves |
Other Puzzles {#other-puzzles}
Generator Puzzle
Location: Main road between gas station and Central Camp
Solution:
1. Find fuel canister near generator (search crane area)
2. Use canister on generator
3. Adjacent door opens
4. Reveals path to underground passage
Purpose: Unlocks access to BSAA Container #2
Reward: Weapon upgrade parts, ammo
Locked Doors
Various locked doors require specific keys or codes found nearby.
Golden rule: Always check the surrounding area for documents before assuming you’re stuck. Solutions are always in the environment.
General Puzzle Tips {#puzzle-tips}
After 60+ hours documenting every puzzle in RE9 Requiem:
- Read every document in the room — Solutions are almost always in nearby files
- Check trash cans — File 13 in Director’s Office is literally garbage
- Wait at interactive objects — Wesker’s drawer requires patience
- Difficulty matters for safes — Insanity changes ARK safe code
- Save before attempting — Especially for multi-step puzzles
- Don’t skip optional puzzles — CP and upgrades are worth the time
- Plan for New Game+ early — Store Marie’s Doll on first run
Quick Reference Cheat Sheet {#cheat-sheet}
Print this or keep it open while playing:
| Puzzle | Solution | Notes |
|---|---|---|
| Director’s Office box | Moon → Sun → Star → Moon | Need pencil from desk |
| Manager’s Office box | Star → Star → Moon → Sun | Separate puzzle |
| RPD S.T.A.R.S. safe | RRR | Three-file clue chain |
| ARK safe (Normal) | 10R → 90L → 20R | Standard difficulty |
| ARK safe (Insanity) | 20R → 0L → 70R | Different code |
| Organ Transport Box | AUTO→HAND, slider mid, #5, #2, main switch | Order matters |
| Blood Lab (Reversible) | Bottom-left → Center → Top-right → 2nd from top | All difficulties |
| Blood Lab (Polymerized) | Corner-first pattern | Insanity only |
| Final Puzzle | Marie’s Doll (NG) + Severed Hand (NG+) | Two playthroughs required |
Final Take {#final-take}
After completing RE9 Requiem on all three difficulties and documenting every puzzle:
- Solutions are always in the environment — Read files, check trash cans, wait at interactive objects
- Difficulty matters — ARK safe code changes on Insanity
- Plan for true ending early — Store Marie’s Doll on playthrough 1
- Optional puzzles are worth it — 20,000 CP from Director’s Office alone justifies the time
If you remember nothing else: Director’s Office is Moon → Sun → Star → Moon, RPD safe is RRR, and ARK safe changes on Insanity.
What I’d do differently: On my first run, I’d open every safe immediately. Backtracking is tedious — do it in one pass.
Frequently Asked Questions
Do puzzle solutions change between difficulty levels in Resident Evil Requiem?
Most puzzle solutions stay the same across all difficulties. The main exception is the ARK Sterilization Chamber safe — the combination is different on Insanity difficulty (20R, 0L, 70R) compared to Normal/Casual (10R, 90L, 20R). Always double-check which difficulty you're on before entering safe codes.
What is the Director's Office puzzle box solution in RE9?
The correct sequence is Moon → Sun → Star → Moon. You need to find the pencil on the Director's desk and use it to reveal hidden text in the notebook near the sofa — that's where the solution comes from. Don't skip collecting the documents in that room or you'll be guessing blind.
What is the RPD safe code in Resident Evil Requiem?
The S.T.A.R.S. office safe code is RRR. You find this by following a three-file chain: Barry's to-do list points you to Wesker's desk, Wesker's library card points you to a book in the library, and inside that book is a photo of Rebecca with three words on the back — their initials spell RRR.
How do I solve the Blood Lab microscope puzzle in RE9?
For the standard Reversible blood specimen, click the blocks in this order: bottom-left → center → top-right → second from top. The goal is to turn all blocks the same color. If you're on Insanity difficulty, you'll also need the Polymerized specimen from the locked closet near the waiting room.
Can I skip puzzles in Resident Evil Requiem?
Some puzzles are optional (like the Director's Office box for bonus CP), but most are tied to story progression and can't be skipped. The Blood Lab puzzle, Organ Transport Box, and final puzzle are all required to advance. Safe codes are optional but reward useful items.
About the author
Assistant Editor
Editor at gameguidesbox.com, a professional data-driven specialist primarily engaged in information gathering and editing/proofreading, serving as a versatile information expert.
You may also like
RE9 File Locations: Where to Find Every Document and Lore Entry
Complete guide to all 75 file locations in Resident Evil Requiem, organized by area, with puzzle-hint documents highlighted and the Case Closed trophy requirements.

RE9 ARK Security Room Safe Code: Unlocking the Sterilization Chamber
Safe combinations for the ARK Sterilization Chamber in RE9 on all difficulty levels, including location details, orb requirements, and reward contents.

RE9 Blood Lab Puzzle: Microscope Analysis Sequence Explained
The exact click sequence to solve the Blood Lab microscope puzzle in RE9 for both Reversible and Polymerized blood specimens, including Insanity difficulty differences.
Comments