Private Military Manager: Complete Beginner's Guide to Building Your PMC Empire
Beginner's guide to Private Military Manager covering optimal squad composition, mercenary stamina and mood management, tactical planning, and early-game money strategies.
This guide walks you through everything needed to build a successful private military company in Private Military Manager: Tactical Auto Battler. From mercenary recruitment and class roles to tactical planning and facility management, you’ll learn the systems that separate bankrupt failures from profitable PMCs.
Table of Contents
- Essential Preparation Before Your First Contract
- Core Mission Walkthrough: Planning to Execution
- Mercenary Classes and Optimal Squad Composition
- Training Schedule and Stamina Management System
- High-Risk Mechanics and Common Failure Triggers
- Equipment Upgrades and Arms Dealer Progression
- Rewards, Side Contracts, and Hidden Income Sources
Essential Preparation Before Your First Contract
Understanding the Core Loop
Private Military Manager is a tactical auto-battler where you play as the CEO of a private military company in 1990s South America (fictional city of Cordivia). The gameplay loop is:
- Planning Phase: Plot tactical routes, assign equipment, set behavior protocols
- Execution Phase: Watch missions play out automatically (no direct combat control)
- Analysis Phase: Review performance reports, adjust training, manage resources
- Development Phase: Recruit new mercenaries, upgrade facilities, buy better gear
Initial Setup Priorities
- Starting Squad: You begin with 3-4 basic operatives. Don’t get attached—they’re placeholders.
- Cash Management: Keep at least 50% of starting funds reserved. Early bankruptcy is real.
- Secretary Esperanza: She delivers critical intel on arms dealers, headhunters, and new contacts. Check in daily.
- Weekly Inspections: Fail these and client trust tanks. Maintain minimum squad average rating (usually 17+).
Key Interface Tabs
| Tab | Purpose |
|---|---|
| Squad | View mercenary stats, assign training, manage schedules |
| Headhunter | Recruit new mercenaries with specific class roles |
| Armory/Market | Purchase weapons, armor, grenades, tactical gear |
| Facilities | Research upgrades, unlock training options, improve base |
| Schedule | Set daily training/rest routines for each operative |
| Missions | Accept main contracts and side jobs |
Core Mission Walkthrough: Planning to Execution
Phase 1: Mission Briefing
When you accept a contract, you’ll receive:
- Primary Objective: Main goal (destroy target, eliminate VIP, secure location)
- Bonus Objectives: Optional goals (no casualties, half squad survives, time limit)
- Enemy Intel: Approximate enemy count, armor types, known fortified positions
- Map Layout: Sector breakdown showing breach points, cover positions, enemy spawn zones
Phase 2: Tactical Planning (Critical Step)
This is where most beginners fail. The planning phase determines everything:
-
Route Planning: Plot your squad’s path through each sector on the tactical map
- Avoid open fields—use cover paths even if longer
- Plan breach points for each room (Breacher class required for most)
- Identify high-risk sectors for grenade stuns (Pointman class)
-
Behavior Protocols: Set engagement rules for each sector
- “Cautious Advance”: Slower but reduces ambush risk
- “Aggressive Push”: Faster but higher casualty chance
- “Hold Position”: Defensive stance for choke points
-
Equipment Loadout: Match weapons to expected enemy types
- Shotguns → Close quarters, armored targets (Breacher)
- SMGs → Medium range, unarmored grunts (Pointman)
- Sniper Rifles → Long range, priority targets (Marksman)
- Assault Rifles → General purpose (Vanguard)
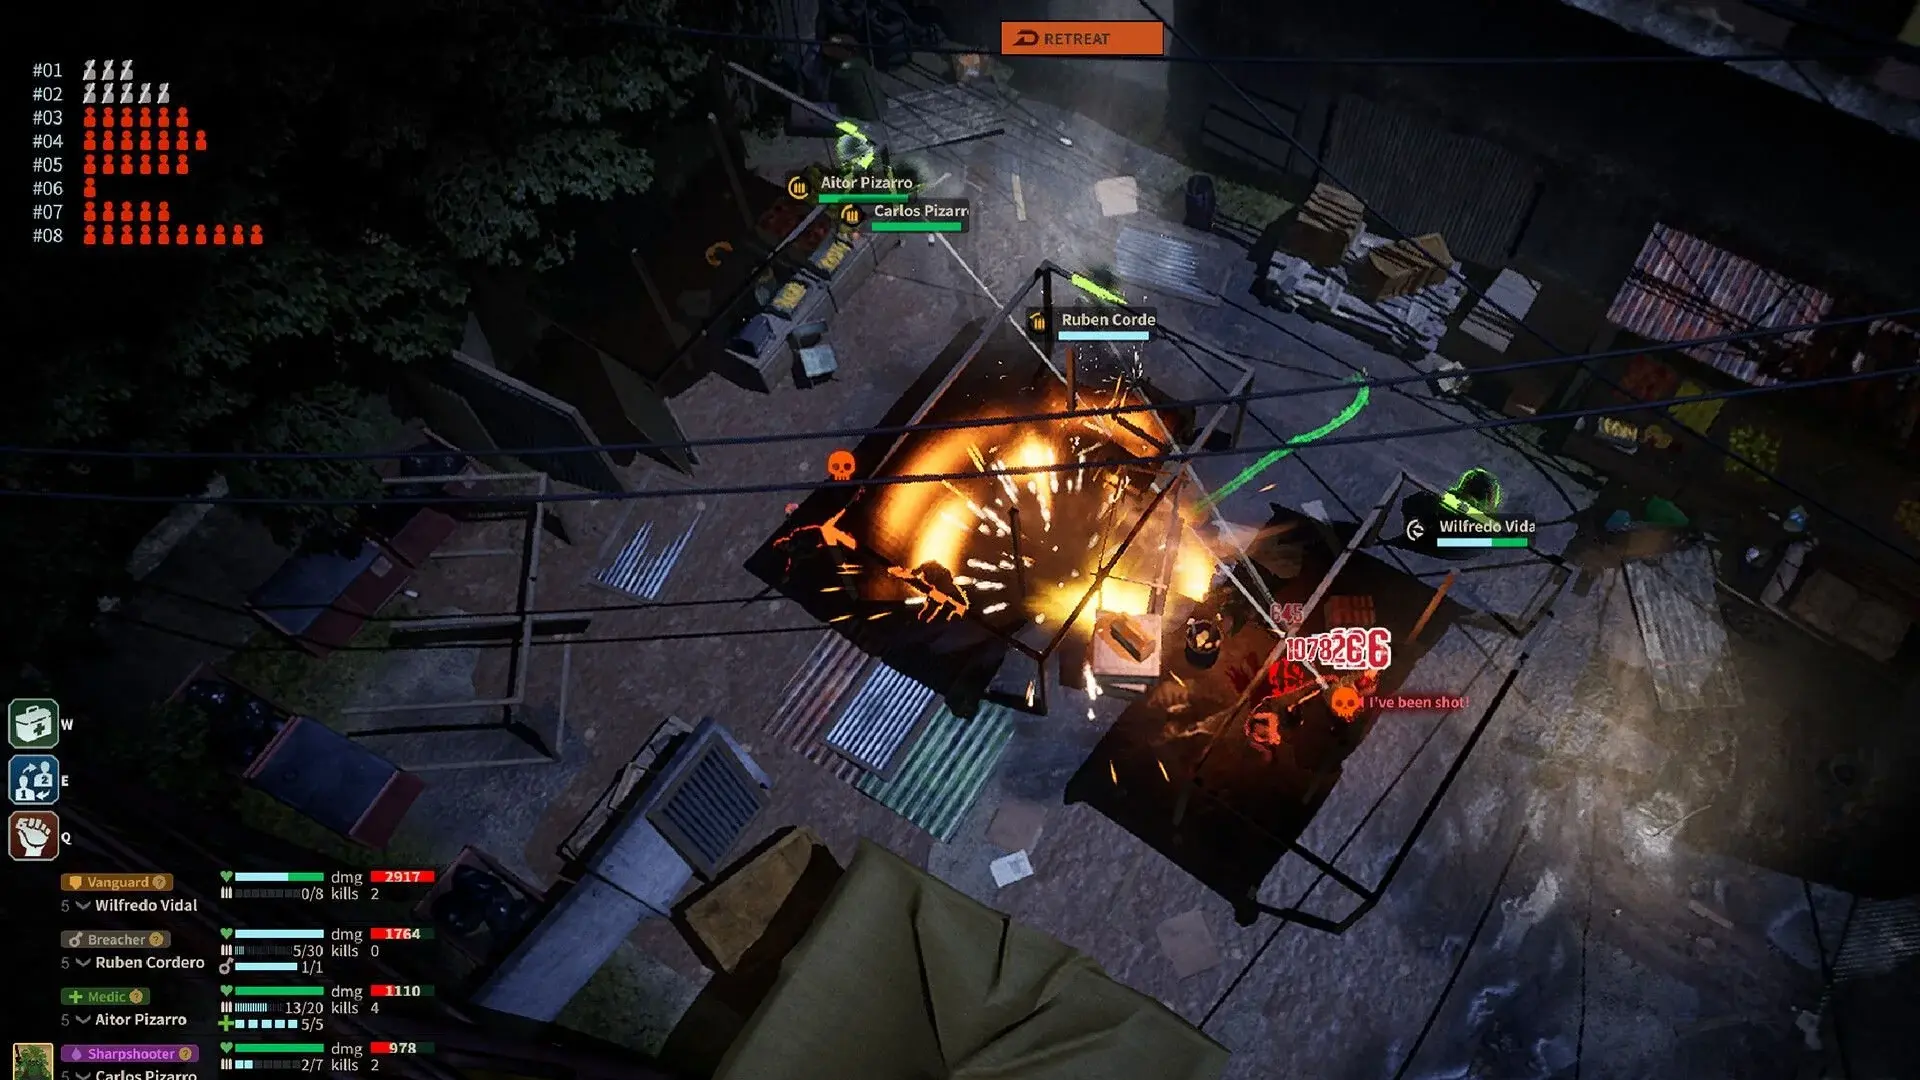
Phase 3: Mission Execution
Once you start the mission:
- Combat plays out automatically—you cannot directly control firing or movement
- You CAN reposition team members during the mission (limited uses)
- You CAN order grenade throws at specific points (Breacher/Pointman)
- You CAN direct medic healing priority (if Medic class is in squad)
Pro Tip: Expect to fail the first attempt on new mission types. Use initial runs as reconnaissance to learn enemy placements and adjust tactics accordingly.
Mercenary Classes and Optimal Squad Composition
The Four Core Classes (Meta Composition)
The game heavily incentivizes a specific 4-man composition. Deviate at your own risk.
Vanguard
Role: Main Tank / Damage Sponge
- Key Stat: Ballistic Protection (highest of all classes)
- Primary Weapon: Assault Rifles, LMGs
- Position: Front of formation, takes first contact
- Why Mandatory: Only class that reliably survives hard encounters in position 1
- Equipment Priority: Body armor upgrades, helmet, medical kits
Breacher
Role: Room Clearing / AoE Control
- Key Stat: Shotgun Damage, Grenade Efficiency
- Primary Weapon: Shotguns (M870, AA-12)
- Position: Second in formation, handles door breaches
- Why Mandatory: Breaching points exist in 95% of levels. Without Breacher, rooms become deathtraps.
- Equipment Priority: Shotgun upgrades, fragmentation grenades, stun grenades
Pointman
Role: Flex Damage / AoE Stun
- Key Stat: SMG Damage, Grenade Carry Capacity
- Primary Weapon: SMGs (MP5, Vector)
- Position: Third formation, supports Vanguard
- Why Essential: Only class that can carry grenades alongside Breacher. Handles armored targets SMGs crack.
- Equipment Priority: SMG damage mods, extra grenade slots, light armor for mobility
Marksman (Sharpshooter)
Role: Long-Range Elimination / Priority Target Removal
- Key Stat: Accuracy, Critical Hit Chance
- Primary Weapon: Sniper Rifles, DMRs
- Position: Rear formation, overwatch
- Why Essential: One-shot potential on high-value targets. Clears threats before they reach your squad.
- Equipment Priority: Scope upgrades, armor-piercing rounds, camouflage gear
Medic [Optional/Luxury]
Role: Healing / Damage Mitigation
- Key Stat: Healing Speed, Ballistic Protection Bonus (via pre-combat first aid)
- Primary Weapon: PDWs, Light Rifles (secondary to healing)
- Position: Rear formation, follows Vanguard
- When to Use: Replace Pointman or Marksman on high-difficulty missions where survival > speed
- Limitation: Cannot carry grenades. Trades AoE control for sustain.
Squad Size Progression
- Early Game: 4 operatives (minimum for full composition)
- Mid Game: 5-6 operatives (allows rest rotation + side jobs)
- Late Game: 6+ operatives (experimental modes, zombie/robot modes support larger squads)
Training Schedule and Stamina Management System
Understanding Operative Stats
Each mercenary has four core stats to manage:
| Stat | Impact | Recovery Method |
|---|---|---|
| Stamina | Affects training success rate, mission performance | Rest days, vacation |
| Mood | Affects mission success chance, injury resistance | Talk interactions, vacation, successful missions |
| Success Rate | Combined metric from stats + equipment + tactics | Improve underlying stats, better gear |
| Health | Injury status prevents training/missions | Medical treatment, rest |
Daily Schedule Optimization
The schedule interface lets you assign 3 training slots per day per operative. This seems overwhelming—here’s the streamlined approach:
Training Types (Simplified)
- Target Practice / Shooting Range → Increases shooting accuracy
- Cardio / Running → Increases stamina capacity
- CQC / Strength Training → Increases damage reduction, close-quarters performance
- Study / Tactical Research → Increases perception, tactical skill
- Rest / Recovery → Restores stamina, reduces injury risk
Beginner Schedule Template
For your core 4 operatives, use this rotation:
Day 1-3: Focus Training
- Slot 1: Primary stat training (match to class role)
- Slot 2: Secondary stat training
- Slot 3: Rest (light recovery)

Day 4: Active Recovery
- Slot 1: Light cardio
- Slot 2: Talk interaction (mood boost)
- Slot 3: Rest

Day 5-7: Specialized Training
- Slot 1-2: Class-specific training
- Slot 3: Rest or mood maintenance
Presets Are Your Friend
The game allows you to save schedule presets for groups or individuals. Create these presets early:
- “Mood Recovery”: Talk + Rest + Light Activity
- “Stat Grind”: 2x Training + 1x Rest
- “Pre-Mission Prep”: Light training + Rest + Equipment check
- “Full Rest”: 3x Rest slots (for injured operatives)
Vacation System
When an operative’s mood drops below 30:
- Send them on 3-day vacation
- They gain +15 mood per day (+45 total)
- They’re unavailable for missions/training during this period
- Never send your best two operatives on vacation simultaneously
Injury Prevention
- Injuries occur when stamina is too low or training risk is too high
- Training shows risk percentage—keep it at 0% for core squad members
- Injured operatives miss 2-5 days depending on severity
- Medical facilities reduce recovery time (facility upgrade priority)
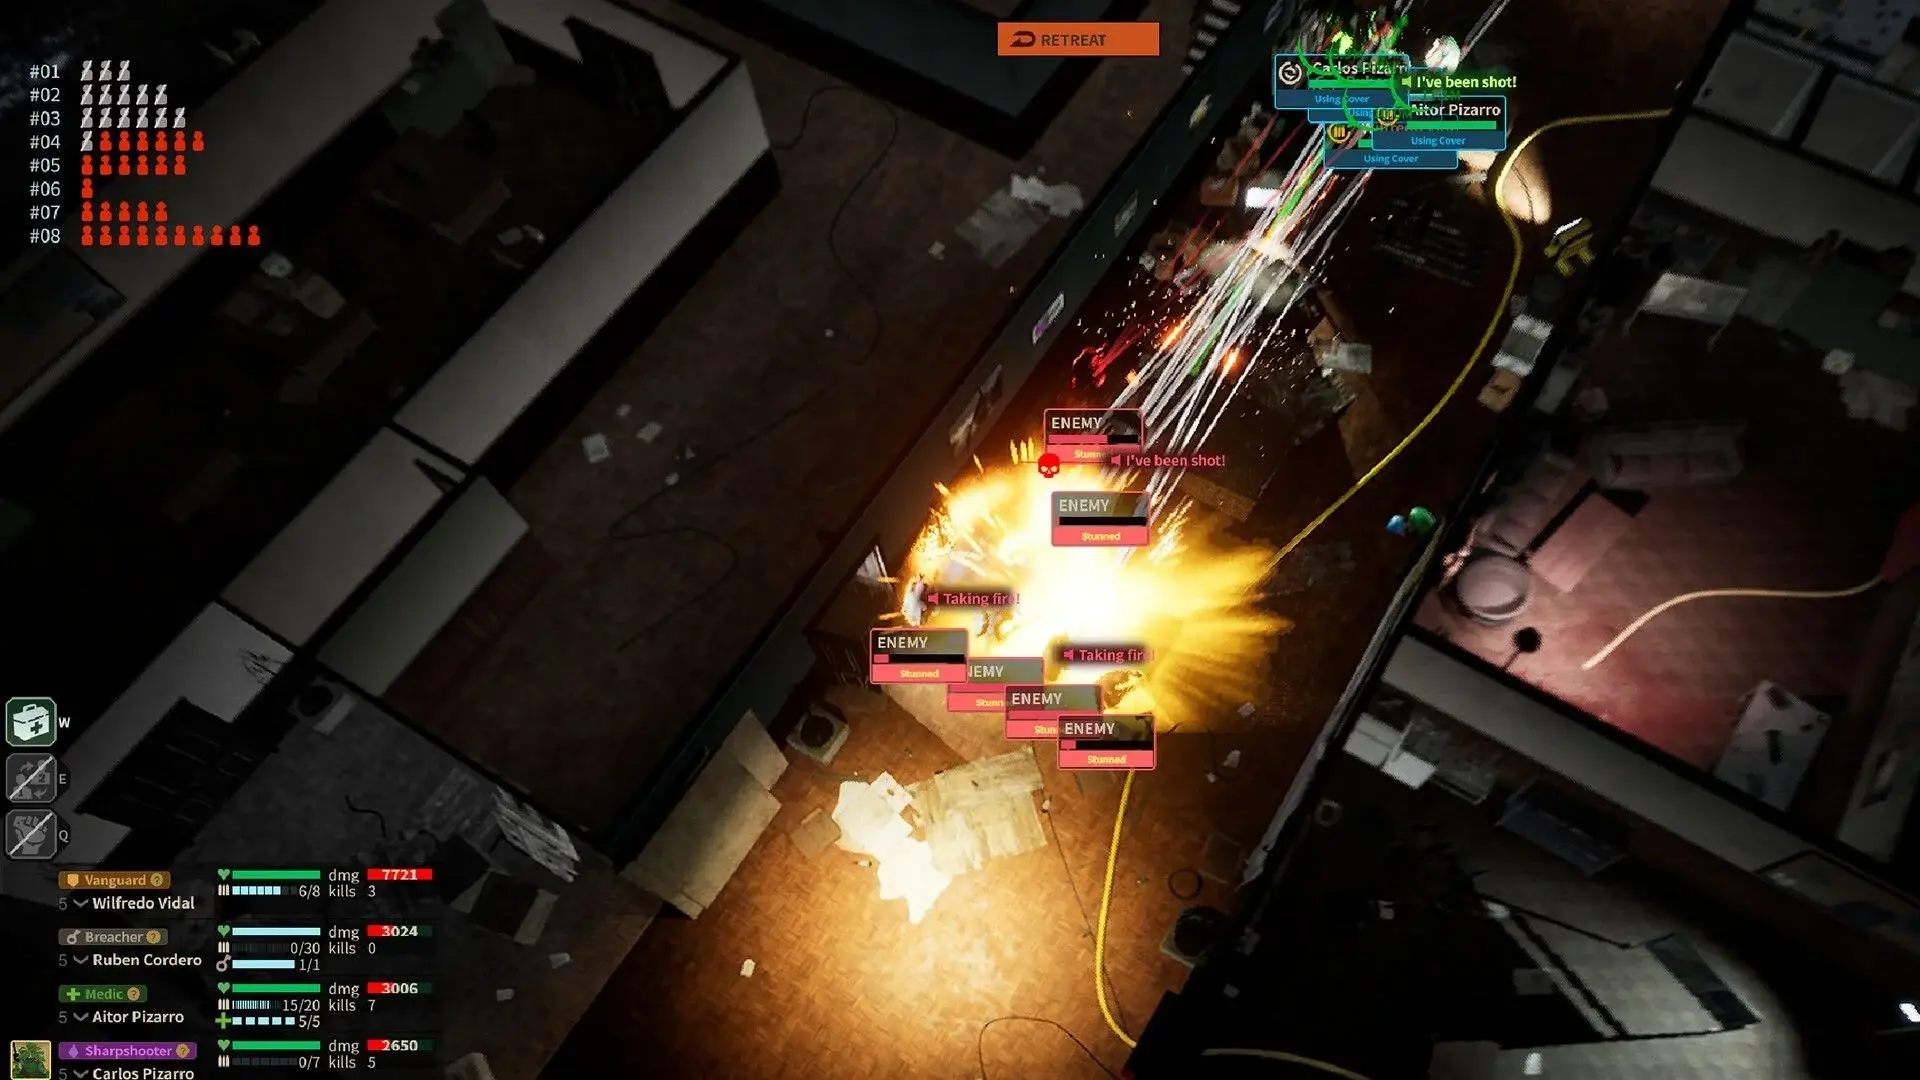
High-Risk Mechanics and Common Failure Triggers
Failure Point #1: Poor Tactical Pathing
The #1 reason squads wipe is rushing through sectors without planning:
- Open Field Crossing: Always use cover paths, even if 2x longer
- Unbreached Doors: Never enter rooms without Breacher clearing first
- Choke Points: Identify enemy ambush zones on map before starting
- Elevation Disadvantage: Enemy snipers on high ground will delete your squad
Mitigation: Use first mission attempt as reconnaissance. Note where enemies spawn, adjust route for second attempt.
Failure Point #2: Wrong Equipment Loadouts
Mismatched weapons = wasted money and dead mercenaries:
| Enemy Type | Effective Weapons | Ineffective Weapons |
|---|---|---|
| Unarmored Grunts | SMGs, Shotguns | Sniper Rifles (overkill) |
| Armored Targets | Armor-Piercing Rifles, Shotguns | Standard SMGs |
| Long-Range Snipers | Your Marksman, Smoke Grenades | Shotguns (can’t reach) |
| Room Campers | Stun Grenades + Shotgun Rush | Single-file entry |
Failure Point #3: Stamina/Mood Mismanagement
Running operatives into the ground:
- Stamina below 30% = 50%+ mission failure chance
- Mood below 20% = injury probability spikes
- Training fatigued operatives = wasted time + injury risk
Mitigation: Check stamina/mood daily. Schedule rest before critical missions.
Failure Point #4: Squad Composition Errors
Common beginner mistakes:
- No Breacher: Can’t clear rooms efficiently → squad wipes at first door
- No Vanguard: Nobody tanks damage → squishy operatives die instantly
- Double Medic: No AoE control → grenades needed but nobody carries them
- All Snipers: Great at range, deleted at close quarters
Failure Point #5: Financial Mismanagement
- Spending all cash on weapons → can’t recruit replacements
- No emergency fund → can’t afford inspection penalties
- Over-investing in facilities early → squad undergeared
Rule of Thumb: Keep 30-50% of total cash as emergency reserve until mid-game.
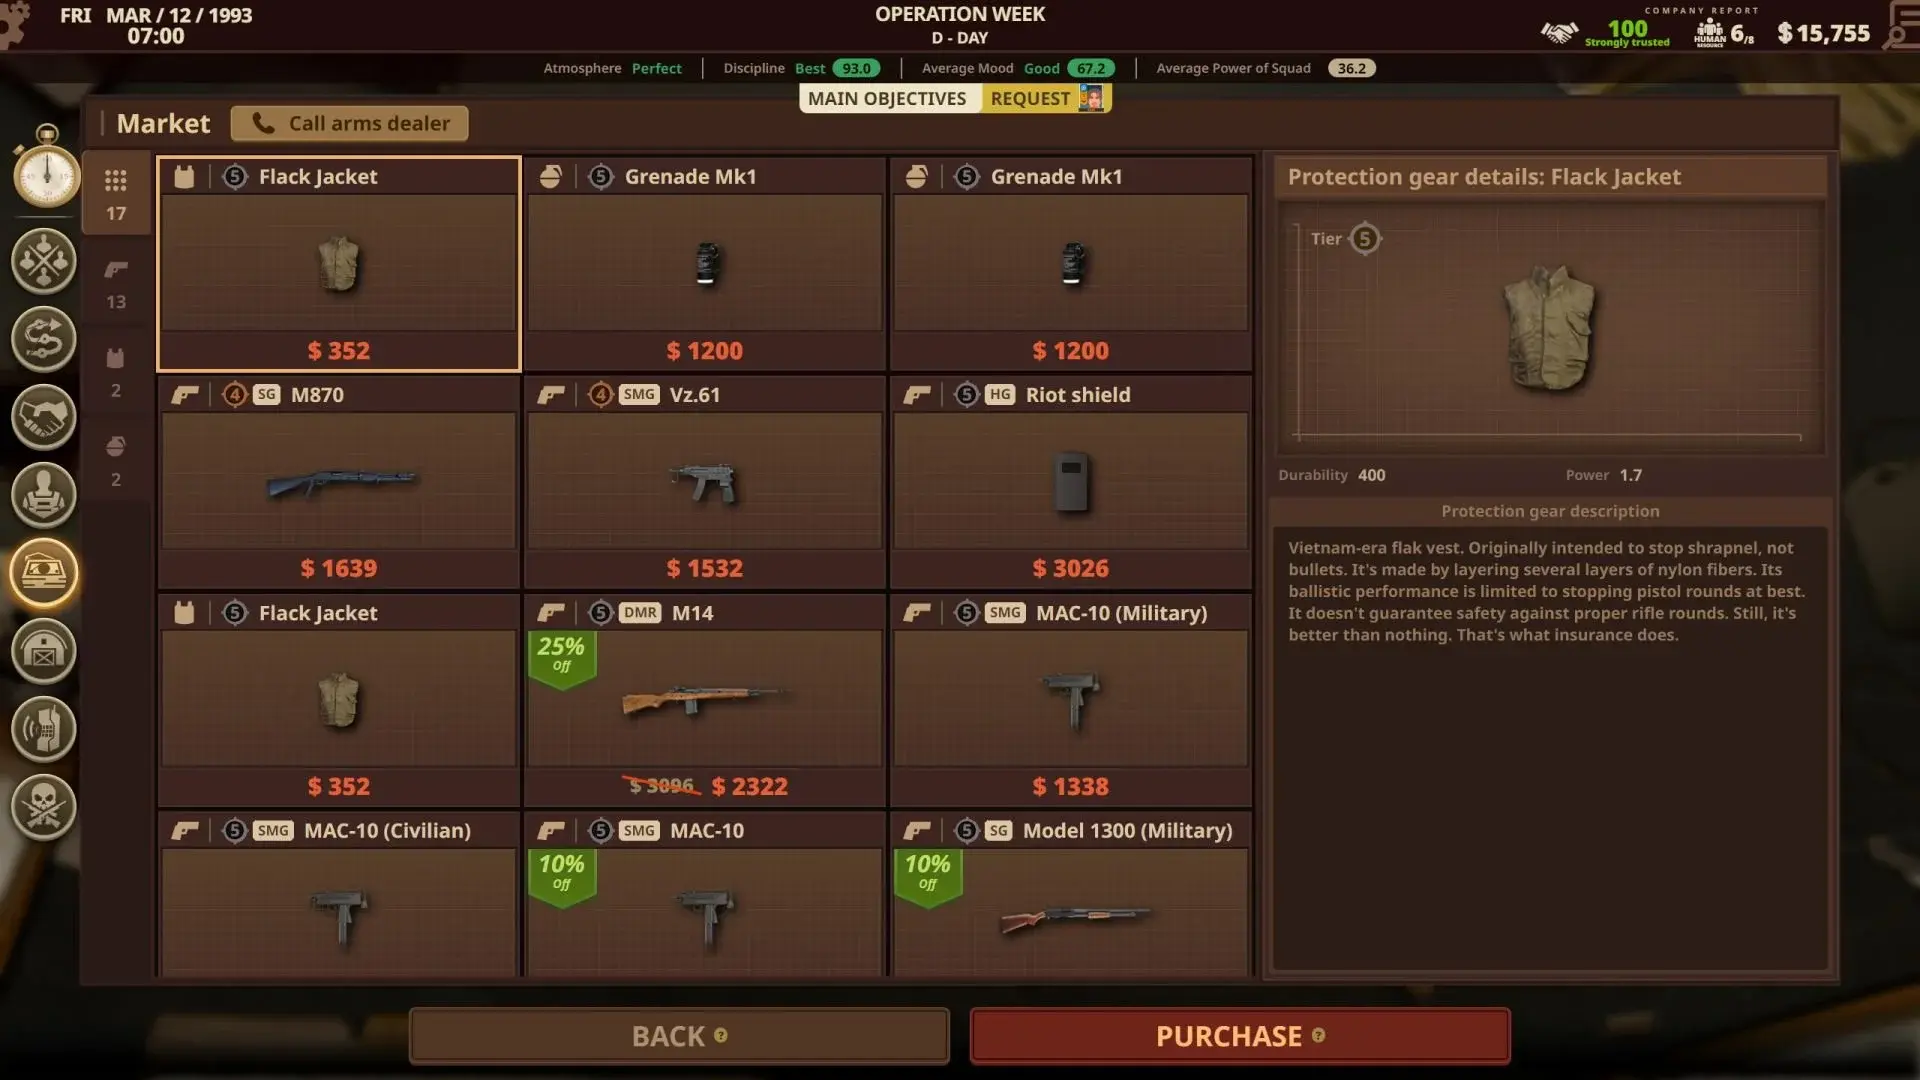
Equipment Upgrades and Arms Dealer Progression
Building Arms Dealer Trust
The arms dealer inventory expands as trust increases:
- Trust Level 1: Basic pistols, shotguns, light armor
- Trust Level 2: SMGs, assault rifles, medium armor
- Trust Level 3: Sniper rifles, LMGs, heavy armor, grenades
- Trust Level 4+: Experimental weapons, specialized gear
How to Increase Trust
- Purchase equipment regularly (don’t skip shopping between missions)
- Complete contracts successfully (trust bonus on mission rewards)
- Some dialogue options with secretary can unlock dealer contacts
Equipment Priority List
Early game purchases (in order):
- Body Armor (Vanguard): Highest ROI—keeps your tank alive
- Shotgun (Breacher): Core to room clearing, upgrade damage first
- Grenades (Pointman): Stun grenades for ambush rooms, frag for grouped enemies
- Scope (Marksman): Increases one-shot potential on priority targets
- Helmets (All): Cheap survivability boost, buy in bulk
Mid-Game Upgrades
- Armor-piercing rounds for assault rifles
- Extended magazines for SMGs
- Tactical vests with extra grenade slots
- Medical kits for emergency healing
Market Refresh Mechanics
- Inventory refreshes periodically (varies by game version)
- Rare items appear randomly—buy immediately if you need them
- Prices fluctuate based on trust level and story progression
Rewards, Side Contracts, and Hidden Income Sources
Main Contract Rewards
- Base Payment: Fixed amount per contract (scales with difficulty)
- Performance Bonus: Varies by bonus objectives completed
- Reputation Gain: Unlocks higher-tier contracts
- Equipment Drops: Rare missions drop unique weapons/armor
Side Job Strategy
Side jobs provide crucial early-game income but have opportunity costs:
When to Take Side Jobs
- ✅ Between main contracts with downtime
- ✅ When you have 5+ operatives (can spare 2-3)
- ✅ For quick cash before major purchase
- ❌ Never send your best two operatives (they’ll be unavailable for main missions)
- ❌ Don’t take side jobs before weekly inspections
Side Job Types
| Type | Risk | Reward | Recommended Squad |
|---|---|---|---|
| Escort Mission | Low | Medium | Vanguard + 2 DPS |
| Building Clear | Medium | High | Full 4-man composition |
| VIP Protection | High | Very High | Vanguard + Medic + 2 DPS |
| Reconnaissance | Low | Low | Any 2-3 operatives |
Hidden Income Sources
- Weekly Inspection Bonuses: Maintain squad rating above threshold for bonus payments
- Client Trust Multipliers: High trust clients pay 10-20% more for contracts
- Equipment Resale: Sell obsolete gear when upgrades arrive (50% return)
- Achievement Rewards: Some milestones grant lump-sum cash bonuses
Facility Upgrade ROI
Not all facilities are worth upgrading early:
High Priority
- Medical Bay: Reduces injury recovery time → more uptime
- Shooting Range: Unlocks advanced training → faster stat growth
- Barracks: Increases max operative capacity → more squad flexibility
Low Priority (Early Game)
- Aesthetic Upgrades: Purely cosmetic, zero gameplay impact
- Advanced Research Labs: Unlock late-game tech you don’t need yet
- Luxury Amenities: Mood bonuses are marginal compared to vacation system
Frequently Asked Questions
What is the best mercenary class composition for beginners in Private Military Manager?
Start with Vanguard + Breacher + Pointman + Marksman. Vanguard tanks damage with high ballistic protection, Breacher clears rooms with shotguns and grenades, Pointman handles SMG work and AoE stun grenades, and Marksman provides long-range one-shot potential. This composition covers all tactical needs.
How do I manage mercenary stamina and mood effectively?
Schedule rest days when stamina drops below 50%. Use 'Talk' interactions daily to boost mood. Send underperforming mercenaries on 3-day vacations for +45 mood recovery. Avoid training fatigued operatives—success rates plummet and injury risk spikes.
Why do my mercenaries keep failing missions in Private Military Manager?
Mission failures usually stem from three issues: poor tactical pathing (plan routes carefully in planning phase), wrong equipment loadouts (match weapons to enemy armor types), or low morale/stamina (manage rest schedules). Review post-mission reports to identify specific failure points.
Should I spend money on facility upgrades or recruit more mercenaries first?
Prioritize recruiting to reach 5-6 operatives before heavy facility investment. You need squad depth to handle simultaneous missions and rest rotations. Early game, spend on weapons/armor upgrades for your core 4. Save facility research for mid-game when income stabilizes.
What's the fastest way to earn money in Private Military Manager?
Take side jobs between main missions, but never send your best two operatives—they'll be unavailable for critical missions. Focus on contracts with 'at least half survive' objectives rather than 'no casualties' bonuses early on. Upgrade arms dealer trust for better weapon access and pricing.
About the author
Editor-in-Chief
Founder and Editor-in-Chief of gameguidesbox.com, began surfing the web in the late 19th century. Passionate about movies, coffee, gaming, and life itself. Favorite games include Titanfall 2, Baldur's Gate 3, Metro, PUBG, and CS2.
You may also like

SpiritVale Beginner's Guide: 7 Classes, Gear Refining & Economy Basics
No tutorial, no quests, no hand-holding. SpiritVale drops you into Nevaris with nothing. Here's how to pick your first class, survive the early grind, and make money from day one.

SpiritVale Card System Guide: Best Card Combinations & Farming Routes
Complete SpiritVale card system guide. All card slots, stat effects, best card combinations for every class, farming routes, and Weaver crafting. Updated for EA v0.30.0.

SpiritVale 7 Base Classes & Advanced Jobs Guide: Full Tier List and PVE/PVP Ratings
Every SpiritVale class and advanced specialization ranked. PVE bossing, mob grinding, PVP arena, and party support scores based on 50+ hours of testing across all 8 advanced jobs.
Comments