Marathon Beginner Guide: 7 Essential Tips to Avoid 80% of Early Mistakes
New to Marathon? Don't waste runs learning the hard way. These 7 essential tips cover heat management, knife combat, loot priority, and extraction planning that every beginner needs to know.
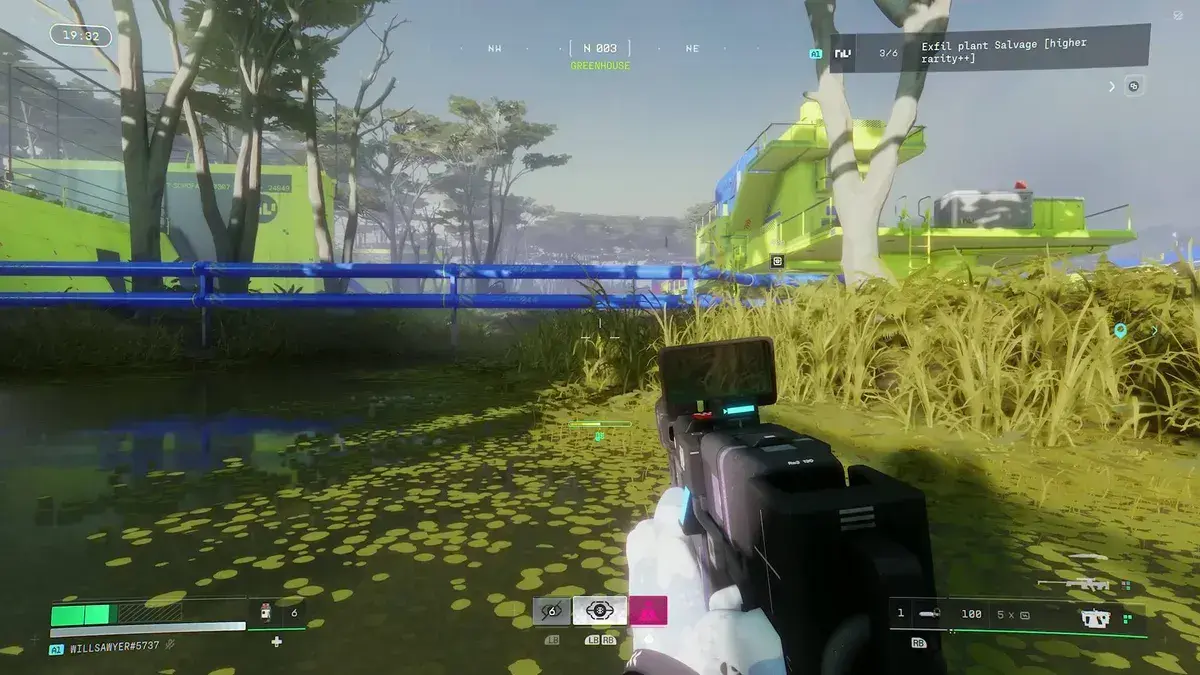
Marathon doesn’t hold your hand. As an extraction shooter, every mistake costs you gear, time, and progress. But here’s the good news: most beginners make the same 7-8 mistakes over and over. This guide covers the essential tips that will save you dozens of failed runs and help you progress faster than 90% of new players.
Table of Contents
- Tip 1: Master Heat Management Before Everything
- Tip 2: Use Your Knife More Than Your Gun
- Tip 3: Prioritize Unstable Materials Over Gear
- Tip 4: Don’t Get Greedy — Extract Early and Often
- Tip 5: Upgrade Heat and Vault First
- Tip 6: Choose Weapons Based on Map
- Tip 7: Focus on Priority Contracts
- Bonus: Common Beginner Mistakes to Avoid
Tip 1: Master Heat Management Before Everything
Why It Matters: Heat is your stamina bar. Overheating leaves you vulnerable and immobile—death sentences in Marathon.
How Heat Works
| Action | Heat Generated |
|---|---|
| Sprinting | Moderate |
| Sliding | Moderate |
| Quick Melee | Low |
| Active Camo (Assassin) | High |
| Jumping/Mantling | Low |
When You Overheat:
- Cannot sprint
- Cannot slide
- Cannot quick melee
- Severely limited mobility
- Easy target for enemies
Heat Management Techniques
1. Burst Movement
- Sprint for 3-4 seconds → stop → sprint again
- Don’t hold sprint continuously
- Use cover breaks to cool down
2. Crouch to Cool Faster
- Crouching drains heat faster than standing
- Use after intense movement sequences
- Even faster in water or rain
3. Know Your Heat Capacity
- Base capacity is limited early game
- Upgrade via Heat Sink (CyberAcme faction)
- First upgrade makes massive difference
Pro Tip: “Heat is extremely limiting when you first begin your Marathon journey, but even just the first Heat Sink CyberAcme upgrade will make a big difference in how fast you get around maps.” — Rock Paper Shotgun
Heat Capacity Upgrades (Priority Order)
| Upgrade | Faction | Impact |
|---|---|---|
| Heat Sink | CyberAcme | Critical - Get this first |
| Hardware Stats | Various | Reduces overheat duration |
| Agility Implants | Vendor | Improves movement efficiency |
Tip 2: Use Your Knife More Than Your Gun
 ]
]
Why It Matters: Ammo is scarce. Your knife is silent, infinite, and surprisingly powerful. Beginners waste ammo on enemies that die in 2-3 knife swings.
Knife Damage Chart
| Enemy Type | Knife Hits to Kill | Ammo Saved |
|---|---|---|
| Tick (small enemy) | 1 hit | 5-10 rounds |
| Tick Nest | 3 hits | 15-30 rounds |
| Basic UESC | 2-3 hits | 10-20 rounds |
| Downed Player | 1 hit | N/A (finisher) |
When to Use Knife
Always Use Knife For:
- Tick nests (seriously, never use ammo)
- Low-tier UESC patrols
- Finishing downed enemies
- Moving between zones (faster movement speed)
When to Use Gun:
- Medium/high-tier UESC
- Player encounters (obviously)
- Boss enemies (Wardens, Commanders)
- Emergency situations
Community Wisdom: “USE YOUR KNIFE. Ammo is scarce enough. There is no reason ever, EVER, to use even a single bullet on a tick nest. One knife swing will kill the tick, three will kill the nest.” — Reddit u/72HourVeteran
Knife Combat Tips
1. Sprint-Stab Technique
- Sprint toward enemy → quick melee → retreat
- Repeat until enemy dies
- Minimizes damage taken
2. Crouch-Stab for Stealth
- Crouch reduces noise
- Stab from behind = silent takedown
- Won’t alert nearby enemies
3. Knife + Assassin Shell
- Assassin’s Active Camo + knife = instant deletes
- Shadow Strike core increases invisibility melee damage
- Best solo stealth build combination
Tip 3: Prioritize Unstable Materials Over Gear
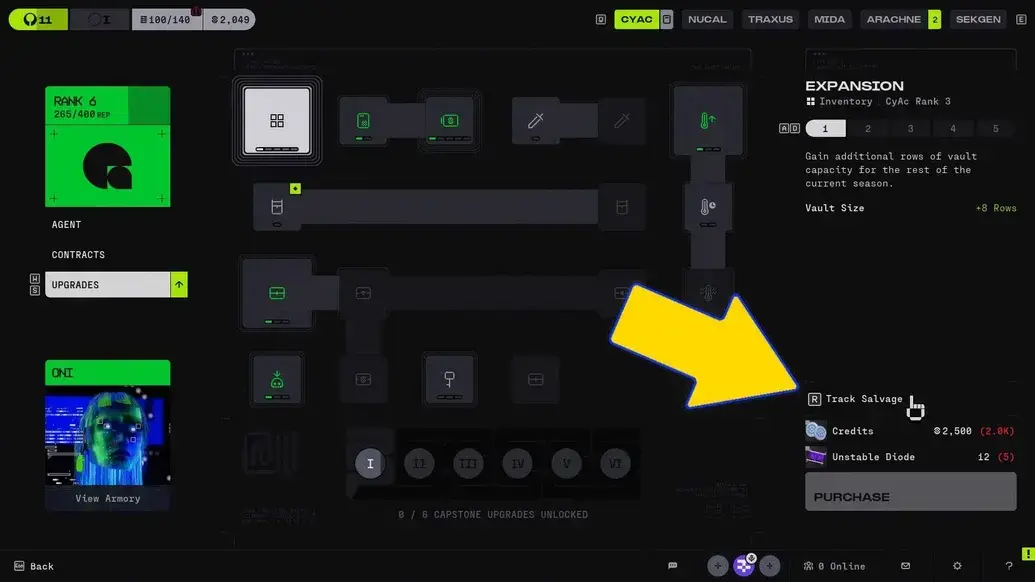
Why It Matters: Weapons and armor are temporary. Faction upgrades are permanent. Beginners hoard gear but neglect the upgrades that make future runs easier.
What Are Unstable Materials?
Unstable materials are special loot items used for faction progression. They’re marked with “Unstable” prefix:
| Material | Type | Use |
|---|---|---|
| Unstable Biomass | Organic | Faction upgrades |
| Unstable Circuitry | Tech | Faction upgrades |
| Unstable Alloy | Metal | Faction upgrades |
| Unstable Isotope | Rare | High-tier upgrades |
Priority Loot Order
Tier 1 (Always Pick Up):
- Unstable materials (any type)
- Ammo for your current weapon
- Shields (if you don’t have one)
- Healing items
Tier 2 (Pick Up If Space):
- Better weapons than current
- Armor upgrades
- Mods/attachments
- Consumables (smoke, meds)
Tier 3 (Leave Unless Rich):
- Common materials (non-Unstable)
- Low-tier weapons (you’ll replace soon)
- Excess ammo (if already full)
- Random junk (sell at base)
Pro Tip: “Use the ‘Track Salvage’ function while viewing upgrades to make finding materials easier in the game world.” — Rock Paper Shotgun
Faction Upgrade Strategy
First 5 Runs Priority:
- Heat Sink (CyberAcme) - Most important
- Vault Expansion (CyberAcme) - More storage
- Weapon Damage (Sekiguchi) - Kill faster
- Stamina/Agility (Various) - Better movement
- Shield Capacity (Various) - Survive more hits
Track Your Materials:
- Open faction menu
- Select upgrade you want
- Click “Track Salvage”
- Materials appear marked on map
Tip 4: Don’t Get Greedy — Extract Early and Often
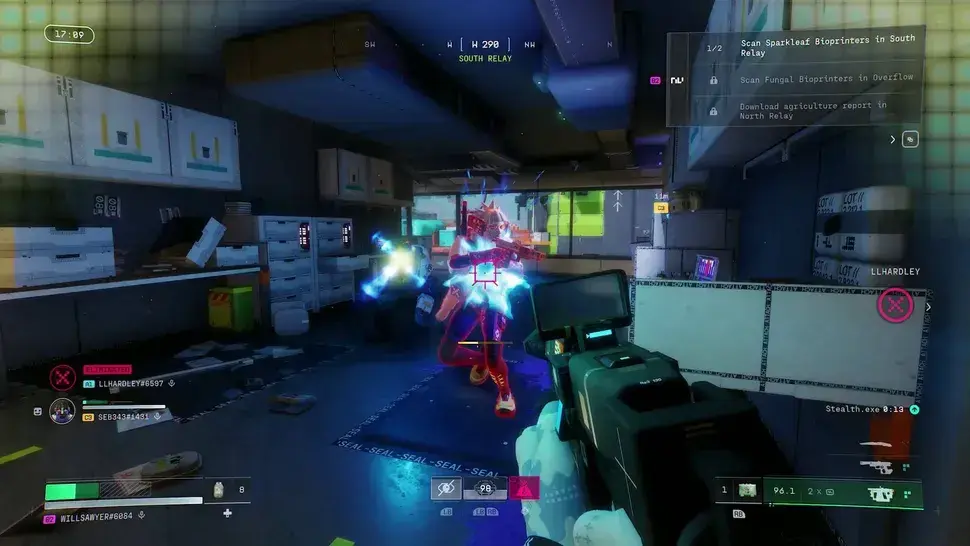
Why It Matters: Greed kills runs. Beginners try to loot everything, stay too long, and die 50 meters from extraction. Small, consistent progress beats heroic failures.
The Greed Cycle (Don’t Do This)
Land → Loot POI #1 → Good loot → "One more room" →
Loot POI #2 → Better loot → "Just the locked room" →
Hear gunfire → "I can take them" → Fight → Third party →
Die with $10k of loot → Lose everything
The Smart Extract Loop (Do This Instead)
Land → Complete contract objective →
Loot 1-2 high-value rooms →
Check extraction timer →
Leave while ahead →
Repeat next run
When to Extract
Good Times to Extract:
- Contract objective complete
- Backpack is 50-70% full with good loot
- You hear multiple teams rotating in
- Shield is below 50%
- Ammo is running low
- Teammate is down (solo: you’re injured)
Never Stay For:
- “Just one more chest”
- Revenge kills (you’ll die trying)
- Clearing entire map
- Chasing that one legendary item
Beginner Mindset: “It’s perfectly okay and even encouraged to make small, incremental progress on your early runs, slowly building up your gear, vault, and upgrades. Don’t feel like you have to scour a map and do everything there is to do.” — Rock Paper Shotgun
Extraction Planning
Before Each Run:
- Identify 2-3 extraction points on map
- Note their locations relative to your route
- Plan rotation path (don’t sprint blind)
- Listen for audio cues (other teams extracting)
At Extraction Point:
- Arrive 30-60 seconds early
- Check surrounding area (scope or drone)
- Throw smoke if unsure
- Wait for timer, don’t panic
- Be ready to fight (others may camp)
Tip 5: Upgrade Heat and Vault First
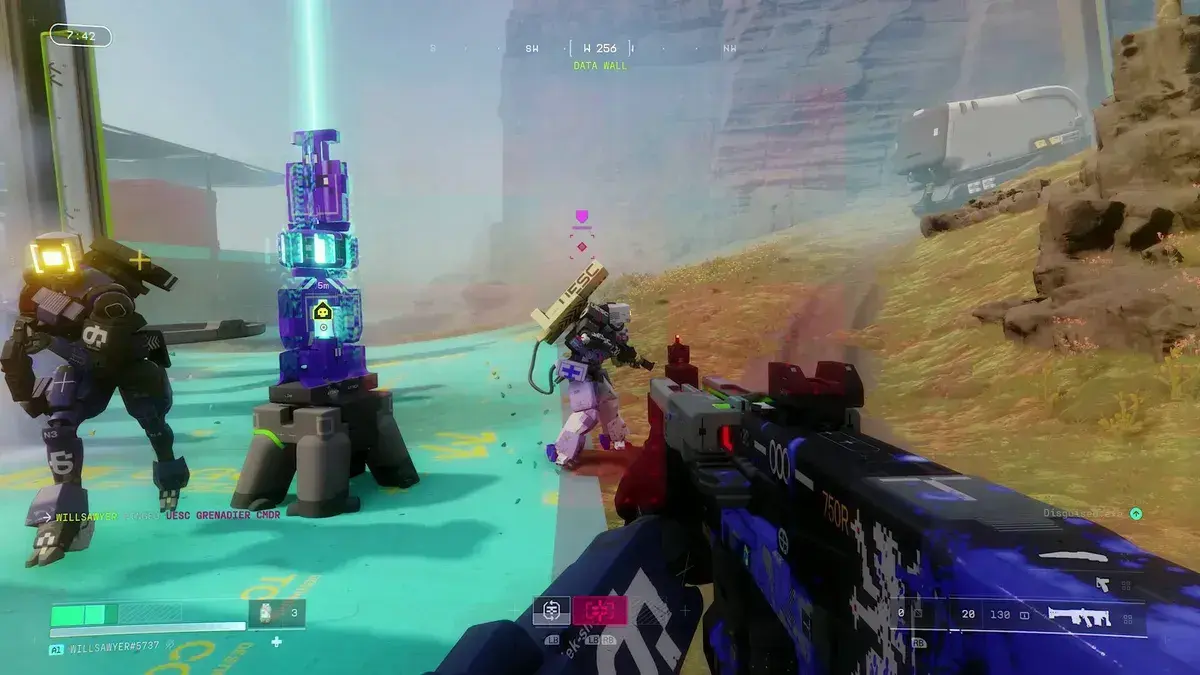
Why It Matters: These two upgrades impact every single run you do. Everything else is secondary.
Heat Sink Upgrade (CyberAcme)
What It Does:
- Increases maximum heat capacity
- Allows longer sprint sequences
- More slides in combat
- Less frequent overheating
Why It’s First:
- Affects mobility (core survival mechanic)
- Makes every run smoother
- Cheap early upgrade
- No diminishing returns
Cost: ~500-1000 Credits (early game)
Vault Expansion (CyberAcme)
What It Does:
- Increases permanent storage
- More gear saved between runs
- Can hoard Unstable materials
- Better preparation for future runs
Why It’s Second:
- Prevents “no space” frustration
- Allows material stockpiling
- More loadout options
- Quality of life improvement
Cost: ~1000-2000 Credits (early game)
Upgrade Priority Tree
Run 1-3: Heat Sink (Level 1)
Run 4-6: Vault Expansion (Level 1-2)
Run 7-10: Heat Sink (Level 2) + Weapon Damage
Run 11+: Specialized upgrades (playstyle dependent)
Pro Tip: “Only the first two [Vault upgrades] are needed in the early days, as there are diminishing returns after that.” — Rock Paper Shotgun
What NOT to Upgrade Early
Low Priority (Wait Until Run 10+):
- Cosmetic unlocks (waste of resources)
- Niche weapon mods (focus on basics first)
- Advanced faction perks (core upgrades first)
- Rare material multipliers (not enough volume yet)
Tip 6: Choose Weapons Based on Map
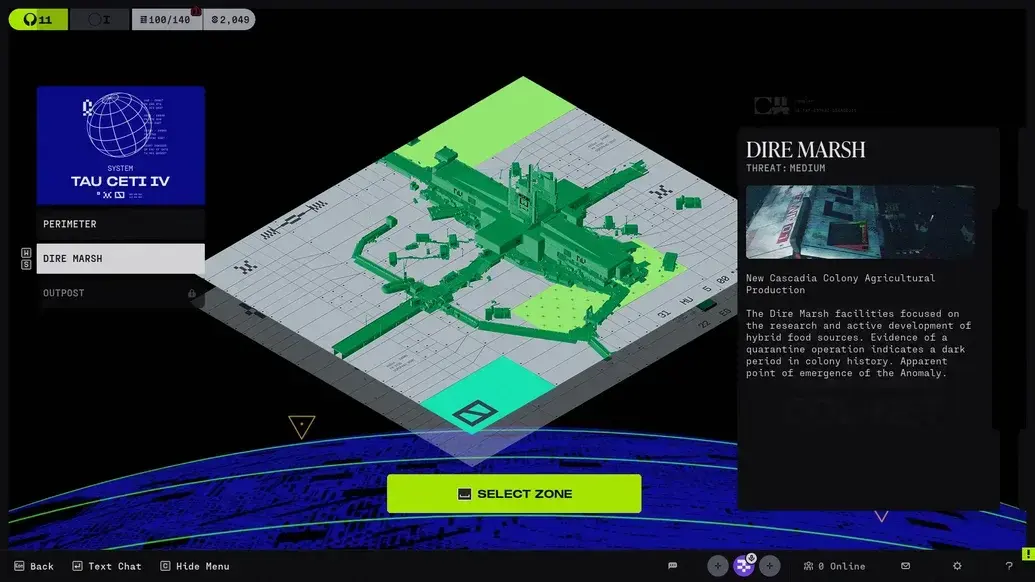
Why It Matters: Different maps favor different engagement distances. Bringing a sniper rifle to a CQC map is suicide. Beginners use the same loadout everywhere and wonder why they struggle.
Map Weapon Matchups
| Map | Best Weapon Types | Avoid |
|---|---|---|
| Perimeter | ARs, Precision Rifles, Mid-range | Shotguns (too open) |
| Dire Marsh | Versatile (AR + Shotgun/SMG) | Pure long-range (too many buildings) |
| Outpost | Shotguns, SMGs, CQC weapons | Sniper rifles (no sightlines) |
Recommended Beginner Loadouts
Perimeter Loadout:
- Primary: V75 Scar or M77 Assault Rifle
- Secondary: Hardline PR (precision backup)
- Why: Mid-range dominance, versatile
Dire Marsh Loadout:
- Primary: BR33 Volley Rifle (burst precision)
- Secondary: Bully SMG or WSTR Shotgun
- Why: Mixed engagement distances
Outpost Loadout:
- Primary: WSTR Combat Shotgun
- Secondary: Bully SMG
- Why: Close-quarters domination
Pro Tip: “Perimeter favours medium range weapons such as SMGs, while Dire Marsh favours long range ones such as sniper rifles. Outpost encourages short range weapons like the ever-powerful shotgun.” — Rock Paper Shotgun
Weapon Tier List for Beginners
S-Tier (Always Good):
- WSTR Combat Shotgun (CQC king)
- BR33 Volley Rifle (versatile burst)
- Bully SMG (reliable, ammo-efficient)
A-Tier (Situationally Great):
- V75 Scar (solid AR)
- M77 Assault Rifle (beginner-friendly)
- Hardline PR (good precision)
B-Tier (Learn First, Then Replace):
- Starting weapons (Rook kit)
- Sponsored kit guns (free, but basic)
- Looted weapons (random, unmodded)
Tip 7: Focus on Priority Contracts
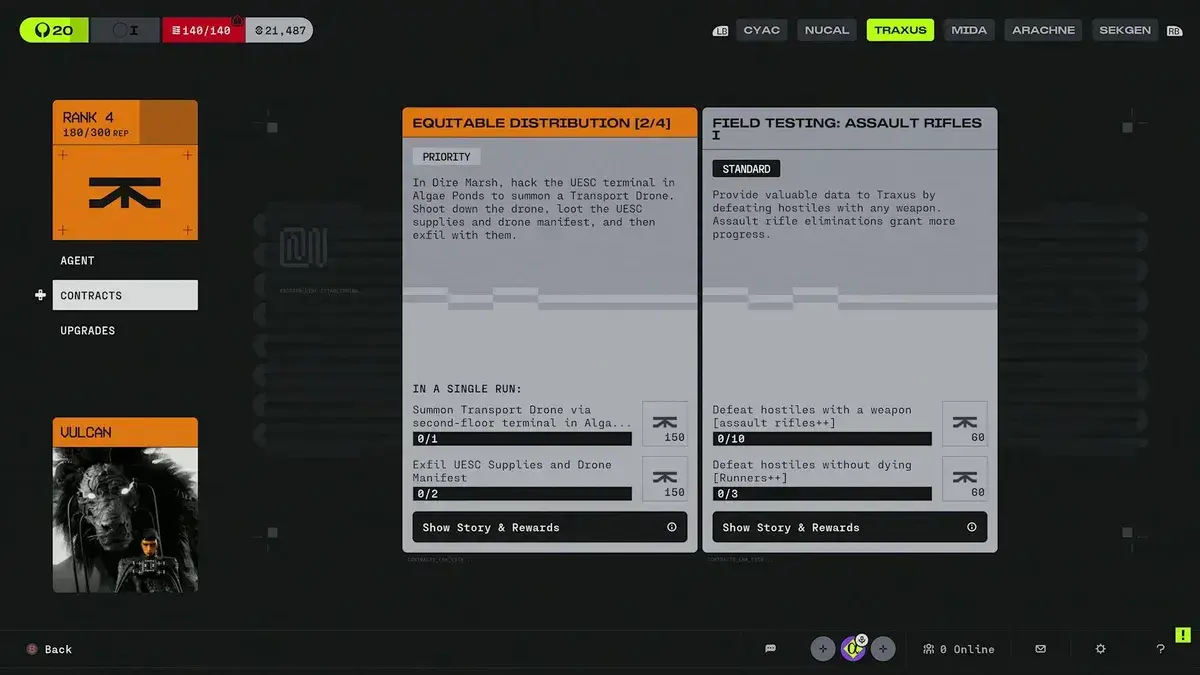 Why It Matters: Contracts guide your runs and provide structure. Priority Contracts offer the best rewards for effort. Beginners wander aimlessly; veterans follow contract routes.
Contract Types
Daily Contracts:
- Reset every 24 hours
- Good for consistent progress
- Often simple (kill X enemies, extract Y times)
Priority Contracts:
- Higher rewards
- More specific objectives
- Guide you to high-value zones
- Focus on these
Faction Contracts:
- tied to specific factions
- Unlock faction-specific upgrades
- Required for progression
- Complete as you level
Best Early Contracts
| Contract Type | Why It’s Good | Recommended For |
|---|---|---|
| Kill X UESC | Teaches combat, low risk | Runs 1-5 |
| Extract with X item | Forces looting discipline | Runs 3-8 |
| Visit X POI | Map knowledge building | Runs 1-10 |
| Complete X runs | Grind progression | Ongoing |
Contract Routing Strategy
1. Check Contracts Before Deploying
- Open contract menu
- Note required POIs
- Plan route around objectives
- Don’t improvise mid-run
2. Complete Primary First
- Focus on main objective
- Secondary objectives are bonus
- Don’t risk extraction for side goals
3. Track Progress Mid-Run
- Check contract status periodically
- Adjust route if needed
- Extract once primary is complete
Pro Tip: “Focus on Priority Contracts. The rewards are significantly better and they provide clear direction for your runs.” — IGN Beginner Guide
Bonus: Common Beginner Mistakes to Avoid
Beyond the 7 essential tips, here are additional mistakes that trip up new players.
Mistake 1: Not Using Sponsored Kits
Problem: Beginners think sponsored kits are “noob gear” and avoid them.
Reality: Sponsored kits are free and perfect for learning. You’ll lose gear anyway while learning—might as well use free stuff.
Fix: Use sponsored kits for runs 1-10. Upgrade naturally as you extract better gear.
Mistake 2: Ignoring Audio Cues
Problem: Playing without headphones or not paying attention to sound.
Reality: Sound is critical in extraction shooters. Footsteps, gunshots, and abilities all provide intel.
Fix:
- Use headphones (mandatory)
- Learn audio signatures
- Stop moving to listen when unsure
Community Wisdom: “Sound is the king in FPS. This is one of those tips that may seem too simple. However, many players, especially beginners, do not focus on sound too much. Speakers will not cut it. Use headphones and listen carefully.” — IntoIndieGames
Mistake 3: Fighting Every Team You See
Problem: Beginners think they must fight every enemy team.
Reality: Most fights are optional. Smart players avoid bad engagements and live to extract.
Fix:
- Ask: “Do I need this fight?”
- If no, disengage
- Save fights for contract objectives or self-defense
Mistake 4: Not Tracking Upgrade Materials
Problem: Looting randomly without knowing what you need.
Reality: Every faction upgrade requires specific materials. Looting without tracking = wasted runs.
Fix:
- Open faction menu before each run
- Click “Track Salvage” on desired upgrades
- Materials appear marked on map
- Focus on those items
Mistake 5: Playing Dire Marsh Too Early
Problem: Beginners jump into Dire Marsh on run 1-2.
Reality: Dire Marsh has higher AI difficulty, more PvP pressure, and complex navigation.
Fix:
- Runs 1-3: Perimeter (Beginner)
- Runs 4-10: Perimeter (Normal)
- Runs 11+: Dire Marsh
Community Report: “Dire Marsh is unbelievably pretty but you will die if you stop to take in the scenery. In 21 runs of Dire Marsh I only extracted twice. Don’t get burned out on it. It’s not you. It’s the Louisiana heat vibes.” — Reddit u/72HourVeteran
Mistake 6: Not Communicating with Team
Problem: Solo queue players don’t ping or communicate.
Reality: Even in solo queue, basic pings coordinate team movement and prevent friendly fire.
Fix:
- Ping enemies (mandatory)
- Ping loot teammates might need
- Ping extraction route
- Use voice comms if possible
Mistake 7: Forgetting You Can Use Items Immediately
Problem: Beginners loot items but don’t use them mid-run.
Reality: You can equip found gear immediately. Don’t save “good stuff” for later—use it now.
Fix:
- Check loot for upgrades mid-run
- Equip better weapons/shields immediately
- Share consumables with teammates (especially as Triage)

Marathon Database
Looking for a full breakdown of every weapon, runner, core, implant, mod, and item? Check out the Marathon Database — a complete interactive reference with filters and hover details for all in-game content.
Frequently Asked Questions
What is the most important thing for Marathon beginners?
Manage your Heat system and don't overheat. Upgrade Heat Capacity early via faction trees. Also, use your knife for weak enemies to save ammo.
Should beginners use sponsored kits in Marathon?
Yes. Sponsored kits are free and perfect for learning runs. Don't be afraid to use them until you can reliably extract with better gear.
Which map should beginners play in Marathon?
Start with Perimeter (Beginner) for your first 2-3 runs, then switch to Perimeter (Normal). Avoid Dire Marsh until you understand the core loop.
What should beginners loot first in Marathon?
Prioritize Unstable materials (for faction upgrades), ammo, and shields. Weapons and armor can be found mid-run. Focus on upgrades that persist between runs.
About the author

Editor-in-Chief
Founder and Editor-in-Chief of gameguidesbox.com, began surfing the web in the late 19th century. Passionate about movies, coffee, gaming, and life itself. Favorite games include Titanfall 2, Baldur's Gate 3, Metro, PUBG, and CS2.
You may also like
Marathon PvP Not Spawning? Developer Response + How to Find More Fights
Tired of running solo with no PvP action? Bungie finally responded to the 'PvP is infrequent' complaints. Learn which maps actually spawn players and how to force more encounters.
Marathon Ranked Mode Guide: Release Date, Requirements, Rewards & How It Works
Ranked mode drops March 21 in Marathon. We break down unlock requirements, gear ante rules, all 6 rank tiers, weekend-only schedule, and exclusive rewards you can't miss.
Marathon Assassin Build: Best Solo Loadout Guide
Solo players dominate with Assassin. Discover the exact Cores, Implants, and weapons that make Assassin the most broken solo shell in Marathon.
Comments