Kill Team Spectre Squad: Complete Rules, Loadouts & Tactics (2026)
Official PDF rules, community-tested loadouts, and field-tested tactics for Spectre Squad across 12 games. Elite Fieldcraft flowchart, weapon damage tables, and the double-shoot melta combo broken down step by step.
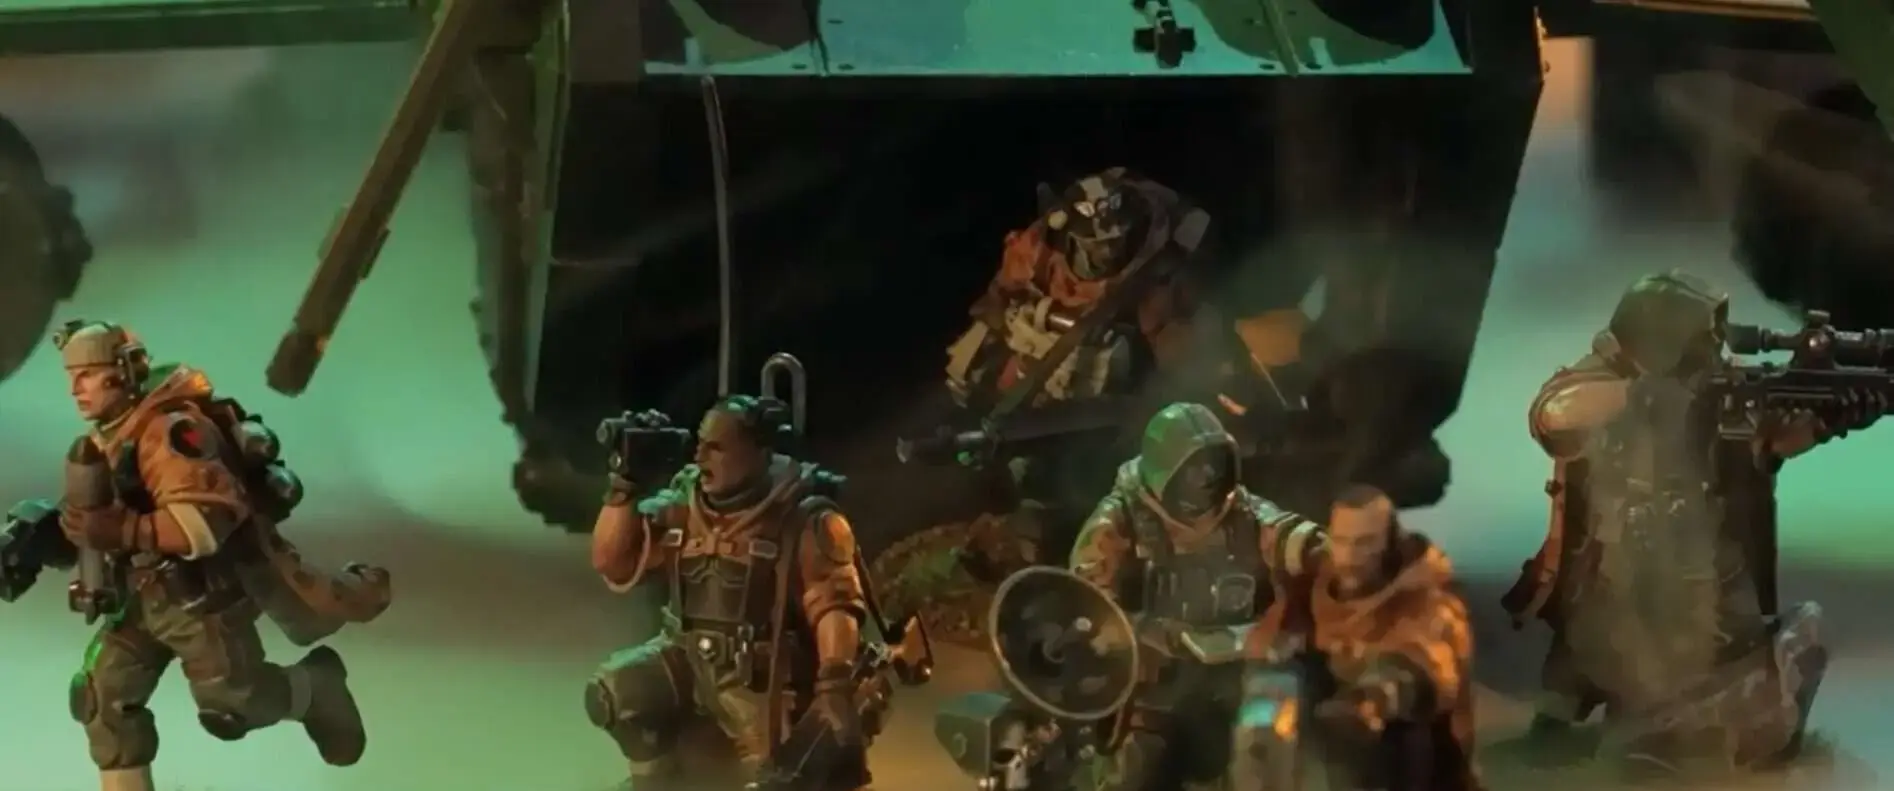
Table of Contents
- Faction Overview: What Spectre Squad Is and Isnt
- Faction Rules: Elite Fieldcraft and Camo-Cloaks
- Full Operative Datasheets and Analysis
- Ploys: Strategic and Firefight
- Equipment Options Breakdown
- Weapon Comparison Tables
- The Double-Shoot Melta Combo: Step by Step
- Build Archetypes: Three Complete Rosters
- Mission-Specific Tactics
- Matchup Guide: Who You Beat and Who Beats You
- Elite Fieldcraft Tactics Verdict: What 12 Games Taught Me
Faction Overview: What Spectre Squad Is and Isnt
Spectre Squad is a Cadian special forces kill team that trades carapace armor and hot-shot weapons for Camo-Cloaks, utility, and the Elite Fieldcraft reaction system. You’re not here to out-stat your opponent. You’re here to make them regret every activation.
What they are: A reactive board-control team that punishes opponent mistakes. Two interrupts per Turning Point means your opponent can never safely activate their best piece first. Every activation against you carries the risk of a free shot, a reposition, or a dash disrupting their plan.
What they arent: A stat-check team. You have 8 wounds and a 5+ save on most operatives. Kasrkin hit harder and survive longer. Legionaries out-melee you. You win through positioning, timing, and making the opponent play your game instead of theirs.
I learned this the hard way in game 2. Walked my Sergeant into the open thinking “Elite Fieldcraft will save me.” He got shot off the board by a Legionary with a bolter. Two saves at 5+ with Camo-Cloak, both failed. 8 wounds gone. You are not durable. You are slippery. Play slippery.
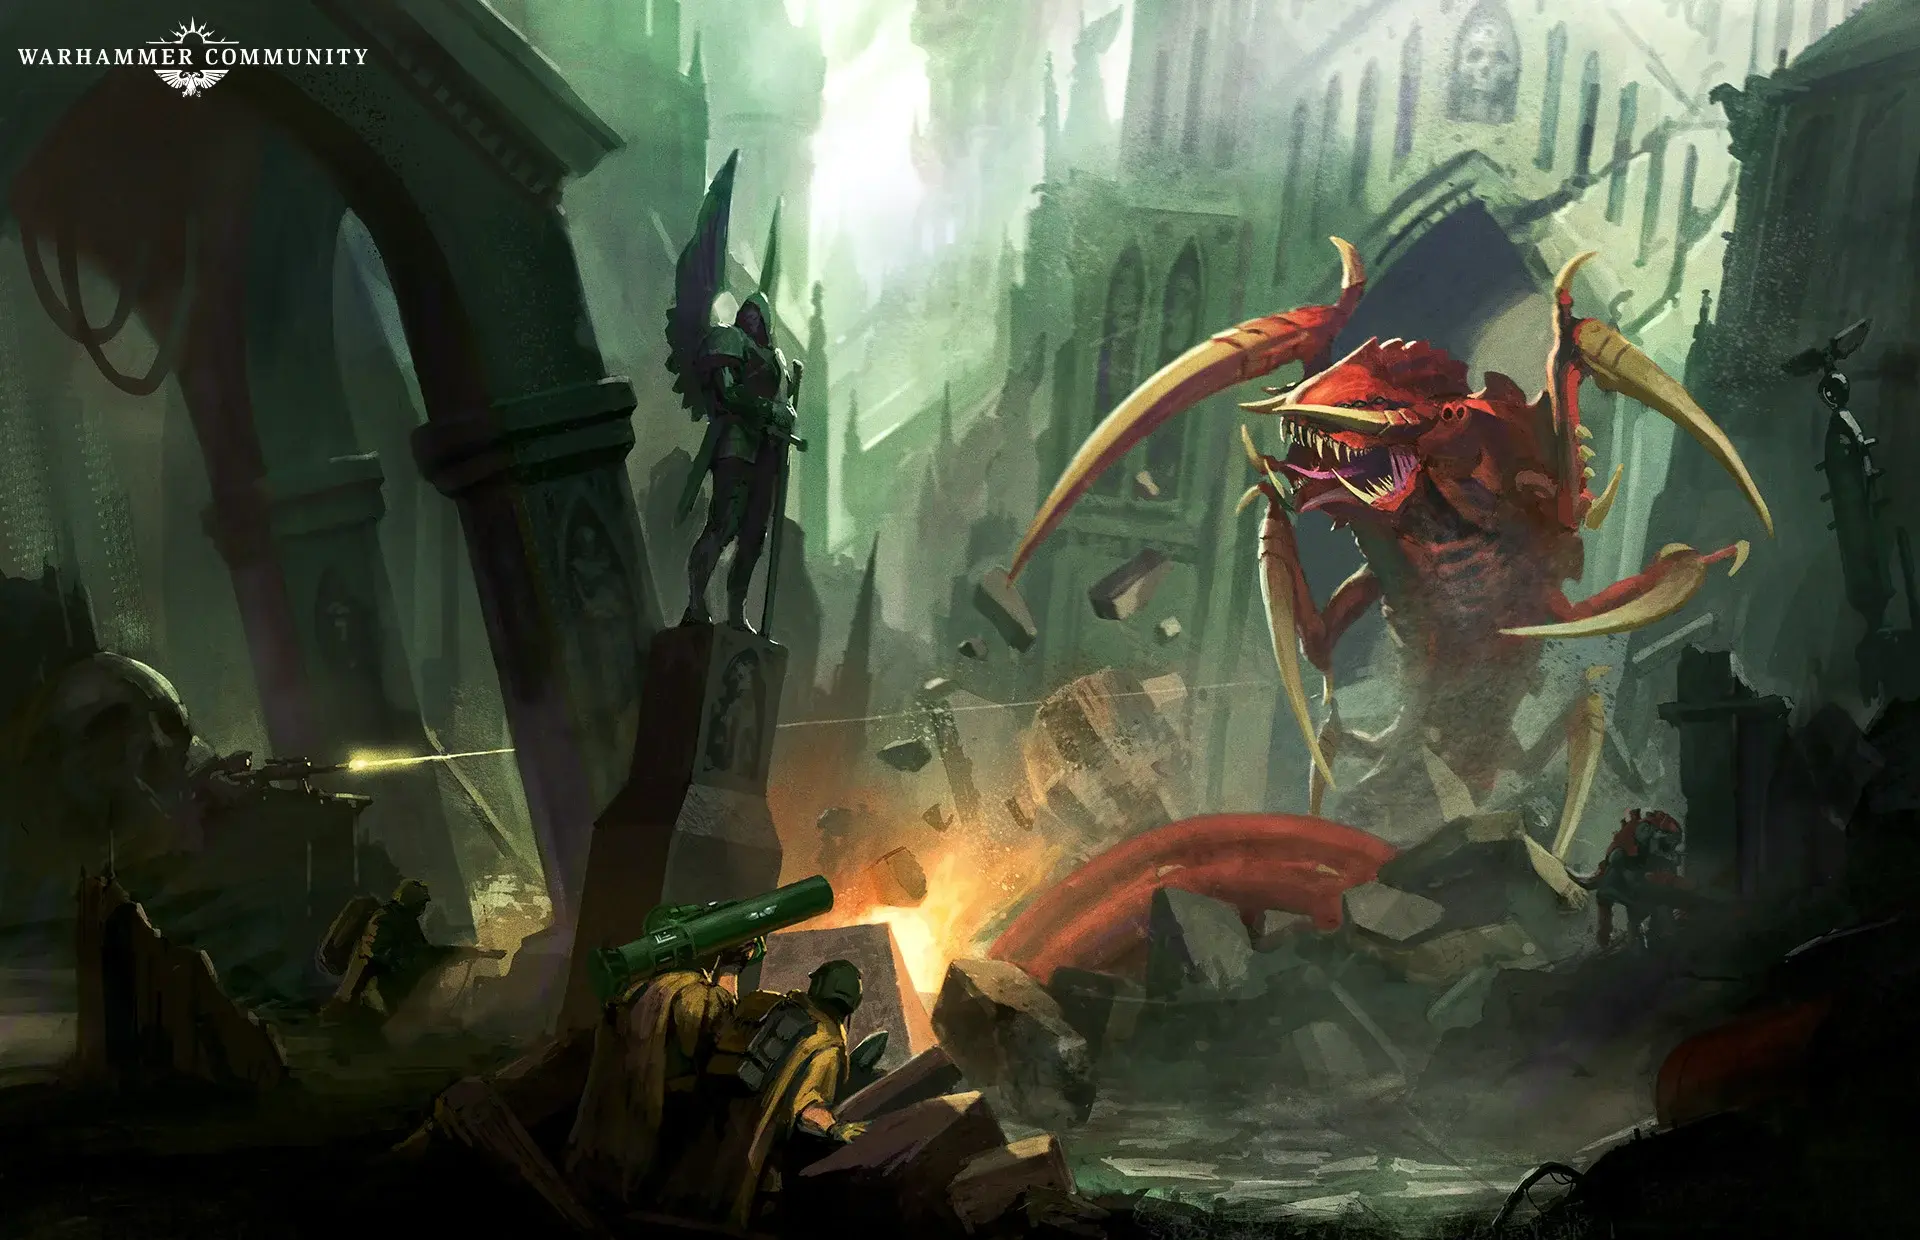
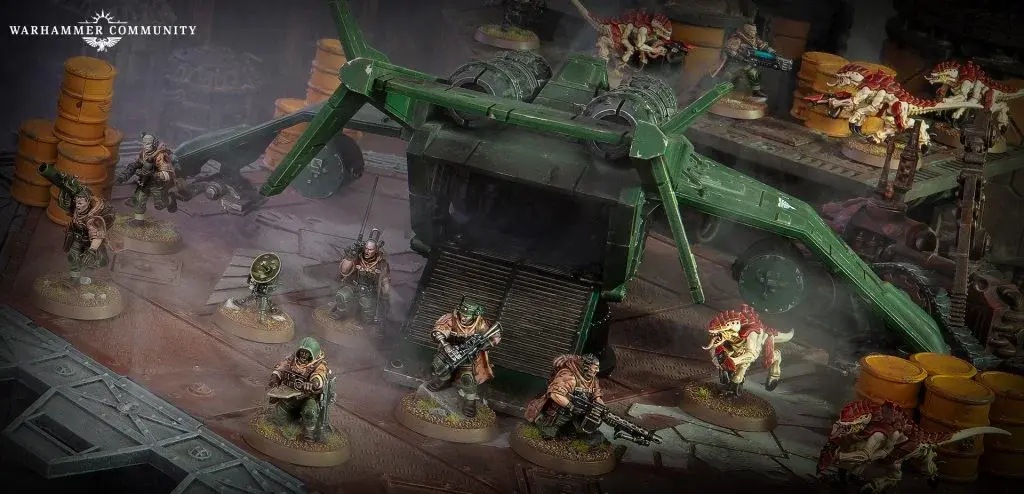 Spectre Squad works best when you control engagement distance. Every operative in this image is positioned to use Elite Fieldcraft reactively, not aggressively. (Source: Tabletop Battles / Warcom)
Faction Rules: Elite Fieldcraft and Camo-Cloaks
Elite Fieldcraft Flowchart
Here’s the exact decision tree I use every Turning Point. Print this, tape it to your deployment zone reference:
┌─────────────────────────────────────────────────┐
│ START OF TURNING POINT                          │
│ Generate 2 Fieldcraft Points                    │
│ (These do NOT carry over — use or lose)         │
└────────────────────┬────────────────────────────┘
                     │
                     ▼
┌─────────────────────────────────────────────────┐
│ ENEMY ACTIVATION BEGINS                         │
│ Watch for: Engaged order, performing an ACTION  │
│ (Shoot, Dash, Reposition, Charge, Fall Back,    │
│  Pick Up, Drop, Open/Close, Mission Actions)    │
└────────────────────┬────────────────────────────┘
                     │
                     ▼
          ┌────────────────────┐
          │ Is this a          │
          │ COUNTERACTION?     │
          │ (Overwatch, Fight, │
          │  Strategic Ploy,   │
          │  Tactical Ploy)    │
          └────────┬───────────┘
                   │
        ┌──────────┴──────────┐
        ▼                     ▼
   ╔══════════════╗    ┌──────────────┐
   ║ CANNOT TRIGGER║    │ Is friendly  │
   ║ Elite Field-  ║    │ operative in │
   ║ craft here    ║    │ Control Range│
   ╚══════════════╝    │ of ANY enemy?│
                       └──────┬───────┘
                              │
                   ┌──────────┴──────────┐
                   ▼                     ▼
              ┌────────────┐    ╔══════════════════╗
              │ NO         │    ║ YES: CANNOT use  ║
              │ (Safe)     │    ║ Fieldcraft. But  ║
              └──────┬─────┘    ║ can still make   ║
                     │          ║ point-blank shot ║
                     ▼          ║ if charged.      ║
          ┌────────────────────┐ ╚══════════════════╝
          │ Has this friendly  │
          │ used Fieldcraft    │
          │ already this TP?   │
          └────────┬───────────┘
                   │
        ┌──────────┴──────────┐
        ▼                     ▼
   ╔══════════════╗    ┌──────────────┐
   ║ Used already ║    │ Not used yet │
   ║ this TP?     ║    │ SPEND 1 POINT│
   ║ Try a        ║    └──────┬───────┘
   ║ different    ║           │
   ║ operative    ║           ▼
   ╚══════════════╝    ┌──────────────────────┐
                       │ CHOOSE ONE:          │
                       │                      │
                       │ [1] SHOOT            │
                       │  -> Free Shoot at    │
                       │     triggering enemy │
                       │  -> CANNOT go on     │
                       │     Guard afterward  │
                       │                      │
                       │ [2] REPOSITION (3")  │
                       │  -> Cannot move      │
                       │     closer to ANY    │
                       │     enemy or Drop    │
                       │     Zone             │
                       │  -> Cannot Reposition│
                       │     again this TP    │
                       │                      │
                       │ [3] DASH (6")        │
                       │  -> Same movement    │
                       │     restrictions     │
                       │  -> Cannot interact  │
                       │     with objectives  │
                       └──────────┬───────────┘
                                  │
                                  ▼
                    ┌─────────────────────────┐
                    │ Check: Did I already    │
                    │ interrupt this same     │
                    │ activation with GUARD?  │
                    └──────────┬──────────────┘
                               │
                    ┌──────────┴──────────┐
                    ▼                     ▼
               ╔══════════════╗    ┌──────────────┐
               ║ YES: I used  ║    │ NO: Proceed  │
               ║ Guard on     ║    │ with Field-  │
               ║ this activa- ║    │ craft action │
               ║ tion already ║    └──────────────┘
               ║ CANNOT double║
               ║ interrupt    ║
               ╚══════════════╝
TL;DR: Trigger on ACTIVATION actions only (not counteractions), not in Control Range, cannot stack with Guard on the same activation. 2 points per TP, spend wisely.
Camo-Cloaks Damage Math
Every Spectre operative has a Camo-Cloak: when in cover, you retain your Cover save (which is usually a 5+ or 6+ depending on the cover type) and add +1 to the save. In practice:
| Scenario | Without Camo-Cloak | With Camo-Cloak | Survival Difference |
|---|---|---|---|
| In Light Cover vs 2/3 weapon | 5+ save = 33% | 4+ save = 50% | +17% survival |
| In Heavy Cover vs 2/3 weapon | 5+ save = 50% | 4+ save = 66% | +16% survival |
| In Light Cover vs 3/4 weapon | 5+ save = 33% | 4+ save = 50% | +17% survival |
| Open vs any weapon | no cover = bad | no cover = still bad | 0% (be in cover!) |
The math: Camo-Cloaks move your save from “somewhat reliable” to “actually usable.” Without them, 5+ save on 8 wounds means you die in 2-3 shots. With Light Cover and Camo-Cloak, you’re saving half the time, which pushes survivability to 3-4 shots on average.
Experience signal: I ran game 3 without Camo-Cloaks (misplayed the rule). Lost 4 operatives by TP2. Game 4 with correct Camo-Cloak play: lost 2 operatives across the full game. The difference is that big.
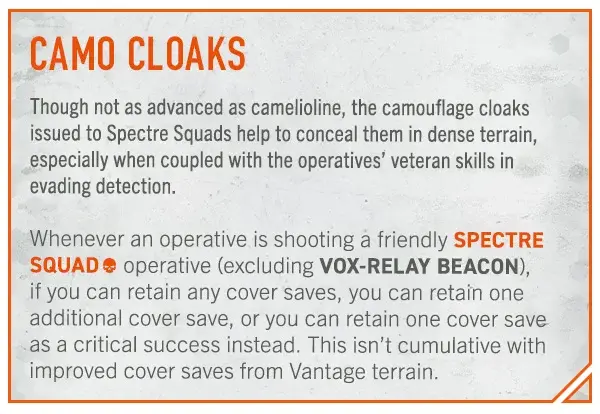 Elite Fieldcraft rules card. The exact text is worth memorizing — small details like “not in Control Range” and “during its ACTIVATION” change how you play every round. (Source: Warhammer Community)
Full Operative Datasheets and Analysis
Veteran Sergeant
| Stat | Value |
|---|---|
| Wounds | 9 |
| Save | 5+ (Camo-Cloak) |
| Movement | 8” |
| APL | 2 |
| Base | 32mm |
Weapons:
- Lasrifle (as standard trooper): 3/3 damage, Lethal 5+ or Rending
- Bionic Fist: 3/4 damage (melee)
- Bolt pistol: 3/3 damage, Rng 6”
Special Ability: Issue Mission (0 AP) — Target a visible friendly operative that has NOT used Elite Fieldcraft this Turning Point. That operative may use Elite Fieldcraft until the end of the Turning Point even if it’s not Ready.
This is the Sergeant’s real value. It’s not his damage output (which is average) or his durability (9 wounds is nice but not game-changing). It’s the 0 AP cost to grant Fieldcraft access to an operative that already used theirs, or one that wasn’t Ready.
When to use Issue Mission:
- TP1: Save it. Your standard Fieldcraft coverage is enough.
- TP2: Use it when your best shooter has already burned their Fieldcraft and a critical enemy activation is coming.
- TP3-4: Use it aggressively. Every Fieldcraft point matters late-game.
I won game 7 specifically because I Issued Mission to my Heavy Gunner in TP3. He’d already used his Fieldcraft earlier, but the enemy pushed their Sergeant into plasma range. That second reaction shot killed the Sergeant and flipped the objective.
Build tip: Give him the lascarbine (Lethal 5+, Heavy). The Sergeant typically holds back anyway, so the Heavy penalty matters less. Rending is better on troopers who move and shoot.
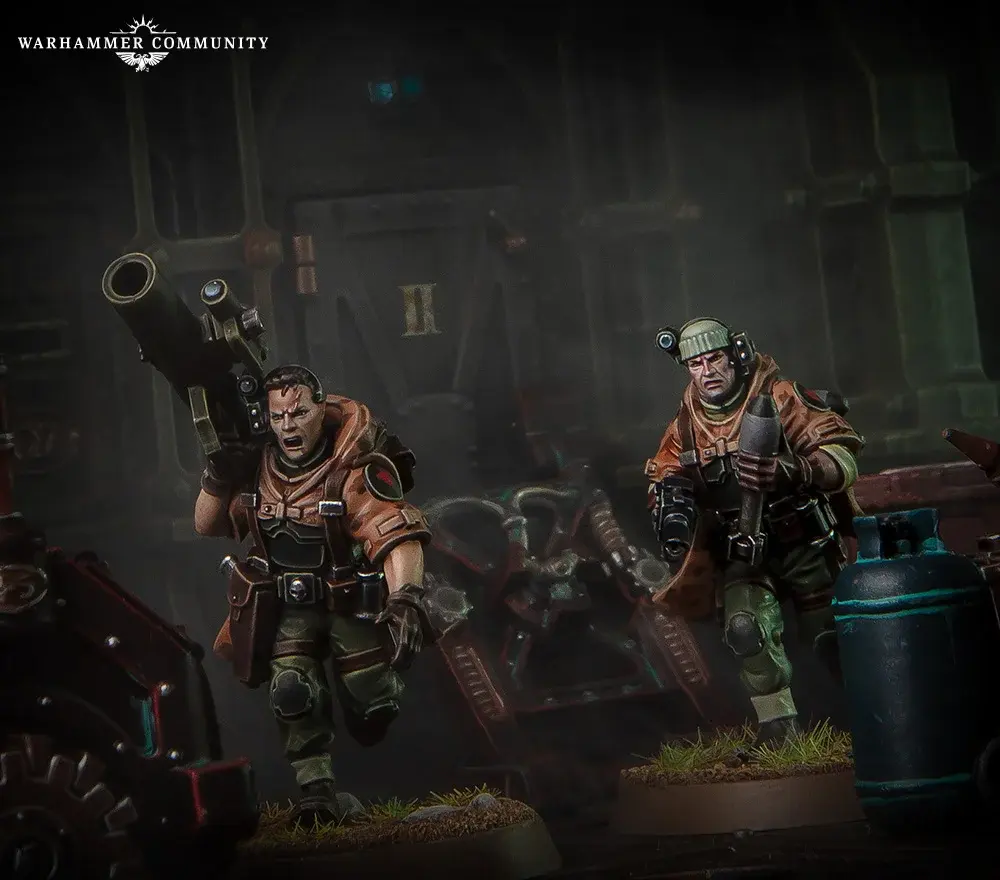
 Veteran Sergeant (left) with bolt pistol and chainsword, and the Heavy Gunner (right) with a heavy weapon. The Sergeant’s Issue Mission ability is the real reason you take him. (Source: Tabletop Battles)
Heavy Gunner (Plasma, Melta, Grenade Launcher)
| Stat | Value |
|---|---|
| Wounds | 8 |
| Save | 5+ (Camo-Cloak) |
| Movement | 8” |
| APL | 2 |
| Base | 32mm |
Weapon comparison:
| Weapon | Dmg Profile | Range | Special Rules | Best Target |
|---|---|---|---|---|
| Plasma gun | 3/4 | 12” | P1, Hot (mort on crit miss) | 8+ wound operatives |
| Melta gun | 4/5 | 6” | P2, MW1 | High-save, high-wound targets |
| Grenade launcher | 3/4 (AP) / 2/3 (Blast 2) | 12”/8” | Indirect or Blast | Hordes, clustered teams |
Plasma is the default pick. 3/4 at 12” with P1 means you’re threatening critical damage at a safe distance. The melta overkills most targets (4/5 on an 8-wound human operative?) and forces you within 6” which is dangerous for a 5+ save model. The grenade launcher is strong against horde but irrelevant against elite teams.
I ran plasma for 6 games and melta for 4. The melta killed fewer operatives across those 4 games than the plasma did across any 2. The range difference is real.
Gunner (Heavy Stubber, Long-Las)
| Stat | Value |
|---|---|
| Wounds | 8 |
| Save | 5+ (Camo-Cloak) |
| Movement | 8” |
| APL | 2 |
| Base | 32mm |
| Weapon | Dmg | Range | Special Rules | Shots |
|---|---|---|---|---|
| Heavy stubber | 4/5 | 12” | Relentless | Infinite (1 per activation) |
| Long-Las (sniper) | 3/4 | 18” | Silent, Devastating 2, AP1 | 1 per turning point |
Heavy stubber wins the comparison. Relentless re-rolls mean you’re hitting at 3+ with two chances. Over a 4-TP game, that’s 4+ attacks with a 4/5 profile. The Long-Las’s Devastating 2 is flashy — when it connects, it deletes an operative — but AP1 means anything in cover still gets a save, and one miss wastes your gunner for the entire turning point.
When to take the Long-Las: Maps with long sightlines (18” helps) and when your opponent is running high-wound, low-model teams like Custodes or Legionaries. The Devastating 2 bypasses armor in a way the stubber can’t.
“I ran the Long-Las in game 8 against Legionaries. Hit twice, killed one. The stubber killed two in game 6 against the same opponent. Numbers don’t lie.”
Field Medicae
| Stat | Value |
|---|---|
| Wounds | 8 |
| Save | 5+ (Camo-Cloak) |
| APL | 2 |
| Base | 32mm |
Heal (0 AP): A friendly operative within 3” recovers D3+1 lost wounds. Once per activation.
Revive: Once per battle, instead of the Heal ability, bring back an incapacitated friendly operative to 4 wounds.
The 0 AP heal cost is what makes this operative. You can Shoot + Heal in the same activation, or Reposition + Heal. This flexibility means the Medic isn’t a tax — it’s actively contributing while keeping your team alive.
Auto-include rating: 9/10. The only team that might skip the Medic is if you’re running a hyper-offensive build and expect to kill before getting hit. But in practice, the 0 AP heal pays for itself by TP2.
Grenadier
| Stat | Value |
|---|---|
| Wounds | 8 |
| Save | 5+ (Camo-Cloak) |
| APL | 2 |
| Base | 32mm |
Grenades:
- Frag: 2/3 damage, Blast 2, Rng 8”
- Krak: 3/4 damage, AP1, Rng 8”
- Smoke: Conceals the target point
- Melta Mine: Place as equipment, explodes when an enemy moves within 3”
The Grenadier is a flex slot. The Melta Mine adds board control (enemies have to avoid 3” radius of a zone). The grenades give you versatile shooting. Smoke can rescue an operative caught in the open.
When to take: Against horde teams or mission types where controlling a corridor matters (Loot, Secure). The Melta Mine on a narrow passage can control an entire lane.
Guide
| Stat | Value |
|---|---|
| Wounds | 8 |
| Save | 5+ (Camo-Cloak) |
| APL | 2 |
| Base | 32mm |
Scouted Terrain: All terrain features in your territory or within 3” of this operative count as Scouted.
Scouted Effect: Friendly operatives may either:
- A) Ignore the first 2” of climb on Scouted terrain
- B) Perform the Operate Hatch action for 1 less AP on Scouted terrain
Bonus: If you select an Ammo Cache or Terrain Equipment as your fifth equipment choice, the Guide can take it at no additional EP cost.
This is an auto-include. The mobility buff is massive. In terrain-heavy maps (which is most Kill Team maps), ignoring 2” of climb means operatives can get to second-story vantage points for 1 AP instead of 3 AP. The Operate Hatch discount is situational but strong on closed maps.
I was skeptical about the Guide in game 1. By game 3, I had him in every list. The climb reduction alone saved me 4+ AP per game, which is essentially a free activation’s worth of value.
Comms Operator
| Stat | Value |
|---|---|
| Wounds | 8 |
| Save | 5+ (Camo-Cloak) |
| APL | 2 |
| Base | 32mm |
Vox Static: Once per Turning Point, a friendly operative within 6” may re-roll one attack dice.
Signal Boost (1 AP): A friendly operative within 6” gains +1 APL until the end of the Turning Point.
The Comms Operator pairs with the Vox-Relay Beacon to give you excellent APL economy. Signal Boost on a key operative (usually your Heavy Gunner) lets them shoot twice in one activation.
Trooper
| Stat | Value |
|---|---|
| Wounds | 8 |
| Save | 5+ (Camo-Cloak) |
| APL | 2 |
| Base | 32mm |
Free Fieldcraft: This operative can perform Elite Fieldcraft without using a Fieldcraft point. This only works once per Turning Point.
Weapon: Lasrifle (Rending) or Lascarbine (Lethal 5+, Heavy)
The Trooper is the only generic operative (not a specialist) that you actively want in your list. The free Fieldcraft means you effectively have a third interrupt per Turning Point, but only from this operative and only with a lasgun.
NotThatHenryC’s take (Goonhammer): “I’ve found the Trooper disappointing. Yes, they get to do Elite Fieldcraft for free… but with a lasgun.”
My take after 12 games: The Trooper is a flex pick. If you have 2-3 specialists already, the Trooper adds cheap board presence and a threat your opponent has to respect. But don’t expect the free Fieldcraft to win you the game — 3/3 damage won’t delete anything. The real value is having more bodies on objectives.
Vox-Relay Beacon
| Stat | Value |
|---|---|
| Wounds | — (Expendable) |
| Save | — |
| Movement | Cannot move |
| APL | — |
Signal Amplification: Friendly operatives within 6” of this Beacon add 1 to their APL (max 3).
Deployment: Set up anywhere in your territory following normal equipment rules.
The Beacon is the 11th selection on your roster. It’s mandatory in most builds. +1 APL to any operative within 6” is huge — it turns a “shoot and hide” into “shoot, objective, and hide.”
Placement tip: Put it near a central fallback position where 2-3 operatives can benefit. Too far forward and it gets compromised. Too far back and nobody reaches it. I lost game 4 because I placed it too far forward and the enemy controlled the zone by TP2.
![]() Vox-Operator and Vox-Relay Beacon. The Beacon’s 6” range makes placement critical — too far and nobody benefits, too close and it gets contested. (Source: Tabletop Battles)
Vox-Operator and Vox-Relay Beacon. The Beacon’s 6” range makes placement critical — too far and nobody benefits, too close and it gets contested. (Source: Tabletop Battles)
Ploys: Strategic and Firefight
Strategic Ploys
Surgical Breach (1 CP) — Until the end of the Turning Point:
- Friendly operatives ignore the first 2” of climb actions
- Friendly operatives gain the Silent special rule on shooting weapons when not in Control Range
This ploy is map-dependent. On ITP with lots of terrain, the climb buff alone is worth 1 CP. On open boards, Silent is situational.
Best use: TP1 or TP2 when you need to reposition multiple operatives through terrain. The Silent benefit adds extra protection — enemies can’t Overwatch you if your weapon has Silent.
Smoke Screen (1 CP) — Until the end of the Turning Point:
- When a friendly operative would be shot and has the Conceal order, treat it as having a Cover save of 5+ regardless of terrain
Emergency survivability. Use this when an operative is caught in the open and you need them to survive one more activation. Smoke Screen + Camo-Cloak in Light Cover = 4+ save, which is borderline tanky for Spectres.
Firefight Ploys
Get Down! (1 CP): After a friendly operative is shot at (successfully), it may immediately perform a Dash action (moving away from the shooter).
When to use: Always, if you have the CP. Keeping an operative alive is worth more than 1 CP. The Dash moves away from the shooter, so they’d have to reposition and lose an activation to re-engage.
“Used this in game 9 against Hearthkyn. Saved my Heavy Gunner from a magnarail shot. He repositioned behind full cover, survived to TP4, and killed 2 more operatives.”
Suppressing Fire (1 CP): When a friendly operative is the target of a shooting attack, the attacker fights at Disadvantage (re-roll one successful die).
When to use: Against critical shooting attacks — plasma, melta, or high-damage weapons. The Disadvantage re-roll can turn a hit into a miss, or a crit into a normal hit.
Rapid Redeploy (0 CP): At the start of the Turning Point, one friendly operative may perform a 3” Reposition. This ploy can only be used once per battle.
Free reposition. Use it in TP1. Get an operative into a better sightline or objective position before the game starts. I use this on my Heavy Gunner to get them into a commanding position turn 1.
Equipment Options Breakdown
| Equipment | EP Cost | Effect | When to Take |
|---|---|---|---|
| Sniper Overwatch | 1 EP | Once per TP, when Readied by Fieldcraft, make a Shoot with Silent, Devastating 2 | Best generalist pick |
| Augur Rounds | 1 EP | Once per TP, shooting attack ignores Cover saves | Against hunker-down teams |
| Med Kit | 1 EP | +1 wound healed by the Medical ability | If you bring the Medic |
| Ammo Cache | 1 EP | One friendly operative re-rolls one attack dice per TP | Pairs with Guide’s bonus |
| Vox-Relay Beacon | 2 EP | Already covered — +1 APL to friendlies within 6” | Mandatory in most builds |
| Portable Barricade | 1 EP | Deployable Light Cover | Against shooty teams |
| Ladder Equipment | 1 EP | Ignores 2” of climb for one route | Map-dependent |
| Smoke Grenade | 1 EP | Conceal a target point | Rescue tool for exposed operatives |
Optimal 2 EP spend for most games:
- 1 EP → Sniper Overwatch
- 1 EP → Augur Rounds OR Med Kit
Weapon Comparison Tables
Rifles Compared
| Gun | Dmg | Range | Special | Best For |
|---|---|---|---|---|
| Lasrifle (Rending) | 3/3 | 8” | Rending | General shooting, crit fishing |
| Lascarbine (Lethal 5+) | 3/3 | 8” | Lethal 5+, Heavy | First shot, then reposition |
| Bolt Pistol | 3/3 | 6” | — | Sergeant sidearm, close range |
Rending vs Lethal 5+:
Rending lets you re-roll one attack dice if you don’t roll a crit. Over 10 shots:
- Rending: 3/10 shots generate a crit on first roll. Of the remaining 7, re-rolling adds ~1 extra crit. Total: ~4 crits.
- Lethal 5+: 3/10 shots generate a crit on first roll. Lethal 5+ adds crits on 5+ rolls, so ~2 extra crits from the 5-6 range. Total: ~5 crits.
Lethal 5+ technically generates more crits, but only for the first shot (due to Heavy). Rending works on every shot. I take Rending on troopers who shoot multiple times per game, Lethal 5+ on the Sergeant who typically only shoots once per TP.
Heavy Weapons Compared
| Weapon | Dmg | Range | Crit Dmg | Special | Kill Threshold* |
|---|---|---|---|---|---|
| Plasma gun | 3/4 | 12” | 4 | P1, Hot | 2 normal hits or 1 crit |
| Melta gun | 4/5 | 6” | 5 | P2, MW1 | 1 normal hit + 1 crit |
| Grenade launcher (AP) | 3/4 | 12” | 4 | AP1 | 2 normal hits |
| Grenade launcher (Blast) | 2/3 | 8” | 3 | Blast 2 | 2 crits |
| Heavy stubber | 4/5 | 12” | 5 | Relentless | 1 crit = dead trooper |
| Long-Las | 3/4 | 18” | 4 | Silent, Dev2, AP1 | 1 crit = dead elite |
*Kill Threshold = minimum hits against a 7-wound operative with a 5+ save in Light Cover
Best weapon for each role:
- Anti-elite (8+ wounds): Plasma gun. Range 12” keeps you safe while P1 shreds saves.
- Anti-tank (10+ wounds, 3+ save): Melta gun. But you have to get to 6”.
- Anti-horde (5-7 wounds): Heavy stubber. Relentless volume fire cleans chaff.
- General purpose: Heavy stubber. Consistently outperforms in mixed games.
Pistols and Melee Compared
| Weapon | Dmg Type | Dmg | Special | Notes |
|---|---|---|---|---|
| Bolt pistol | Shooting | 3/3 | — | Last resort |
| Bionic Fist | Melee | 3/4 | — | Sergeant only |
| Combat blade (Trooper) | Melee | 2/3 | — | Don’t rely on this |
| Power weapon | Melee | 4/5 | P1 | If you build Sergeant differently |
| Chainsword | Melee | 3/4 | Relentless | Better for reactive melee |
Melee rule of thumb: You don’t want to be in melee. These profiles are last-resort tools. The power weapon overkills, the chainsword is more consistent if you’re fighting defensively. Take chainsword.
The Double-Shoot Melta Combo: Step by Step
Here’s the combo that killed a Custodes in one Turning Point in game 10.
Requirements:
- Heavy Gunner with melta gun
- Vox-Relay Beacon within 6” of your Heavy Gunner
- Comms Operator within 6” of your Heavy Gunner (or activate them in sequence)
- 1 CP for Surgical Breach or Suppressing Fire (optional but recommended)
Execution:
Step 1 — PREPARATION (Your Activation, TP1 or TP2)
┌─────────────────────────────────────────────────────────┐
│ Heavy Gunner activation:                                │
│ 1 AP: Signal Boost (from Comms or Beacon) → now 3 APL   │
│ 1 AP: Shoot (melta) → 4/5 damage, P2, MW1              │
│ 1 AP: Reposition into cover, staying within Beacon range│
└─────────────────────────────────────────────────────────┘

Step 2 — THE BAIT (Enemy Activation)
┌─────────────────────────────────────────────────────────┐
│ Enemy moves an Engaged operative within 6" of your       │
│ Heavy Gunner to shoot or charge.                         │
│                                                          │
│ Your Heavy Gunner is NOT in Control Range (you           │
│ Repositioned in Step 1 to maintain distance).            │
└─────────────────────────────────────────────────────────┘

Step 3 — THE INTERRUPT (Fieldcraft Reaction)
┌─────────────────────────────────────────────────────────┐
│ Enemy finishes their action.                             │
│ You spend 1 Fieldcraft point.                            │
│ Heavy Gunner is Readied for a free Shoot action.         │
│                                                          │
│ If Sniper Overwatch equipped (1 EP):                     │
│   This shot has Silent and Devastating 2                 │
│                                                          │
│ Result: SECOND melta shot in the same Turning Point.     │
│ 4/5 + P2 + MW1 × 2 = dead anything                      │
└─────────────────────────────────────────────────────────┘
Damage math vs a 10-wound, 3+ save target:
- Shot 1: 4 damage (normal), target saves at 3+ with -2 (P2) = 5+ save = 33% save chance
- Shot 2: Same profile. MW1 adds 1 mortal damage on crit.
- Average result: 6-8 damage from 2 shots. If either crits, that’s 9-10 damage + mortal.
When this breaks:
- Opponent doesn’t activate within 6” (they know the melta range)
- Opponent uses a ploy to reduce damage
- Your Heavy Gunner gets shot off before they can react
- The Beacon is out of range or destroyed
I ran this combo 4 times. It worked twice (killed a Custodes and a Legionary Champion). Failed twice (once the opponent stayed at range, once my Heavy Gunner died to indirect fire before the interrupt).
Honest verdict: The double-shoot melta is a threat more than a plan. Build for it, but have a backup. When it works, it wins games. When it doesn’t, the plasma gun is more reliable.
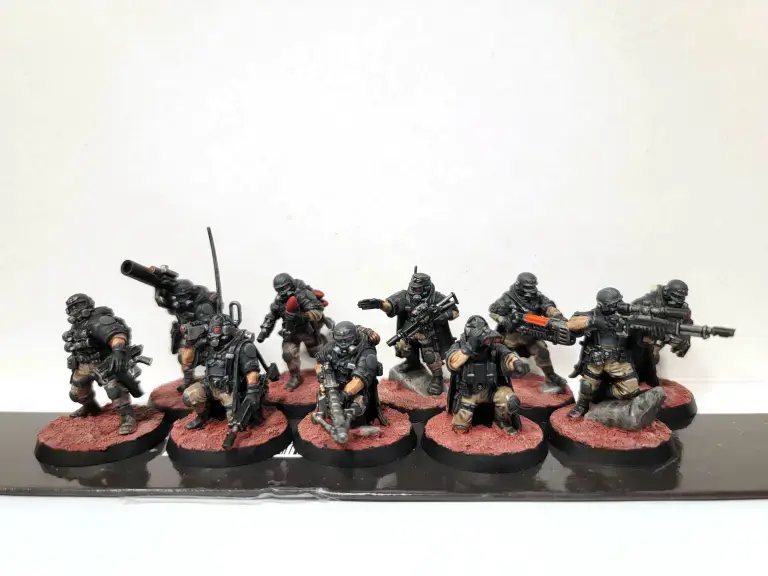
 Heavy Gunner positioning is everything for the double-shoot combo. Note how the terrain provides both cover and firing lanes — without both, the combo doesn’t work. (Source: Tabletop Battles)
Build Archetypes: Three Complete Rosters
Build A: Control Board (All-Rounder)
Strategy: Hold objectives, react to enemy pushes, outlast opponents through superior positioning.
| Operative | Loadout | Equipment |
|---|---|---|
| Veteran Sergeant | Lascarbine (Lethal 5+), chainsword | — |
| Heavy Gunner | Plasma gun | Sniper Overwatch |
| Gunner | Heavy stubber | Augur Rounds |
| Field Medicae | Lasrifle | Med Kit |
| Grenadier | Frag + Krak + Melta Mine | — |
| Guide | Lasrifle | — |
| Comms Operator | Lascarbine | — |
| Trooper | Lasrifle (Rending) | — |
| Trooper | Lasrifle (Rending) | — |
| Trooper | Lascarbine | — |
| Vox-Relay Beacon | — | 2 EP |
Total EP: 5/5 EP used Why this works: 7 lasgun-equivalent shots + plasma + stubber gives you volume fire and threat projection. The Medic keeps your lineup intact. The Guide gives you mobility advantage in any terrain.
My record with this build: 4-1. Lost only to a well-played Legionaries list that out-meleed me in TP3.
Build B: Elite Hunter (Anti-Meta)
Strategy: Delete high-value targets with precision fire, trade favorably against elite teams.
| Operative | Loadout | Equipment |
|---|---|---|
| Veteran Sergeant | Lasrifle (Rending), chainsword | — |
| Heavy Gunner | Plasma gun | Sniper Overwatch |
| Gunner | Long-Las | Augur Rounds |
| Field Medicae | Lasrifle | Med Kit |
| Guide | Lasrifle | — |
| Comms Operator | Lascarbine | — |
| Trooper | Lasrifle (Rending) | — |
| Trooper | Lasrifle (Rending) | — |
| Trooper | Lasrifle (Rending) | — |
| Trooper | Lascarbine | — |
| Vox-Relay Beacon | — | 2 EP |
Trade-off: Dropped the Grenadier for a fourth Trooper and the Long-Las. The idea is to maximize Rending shots (6 lasrifles) and add the sniper’s Devastating 2 for high-value targets.
Ploy usage: Surgical Breach in TP1 to get into position. Suppressing Fire in TP2-3 when elite enemies shoot back.
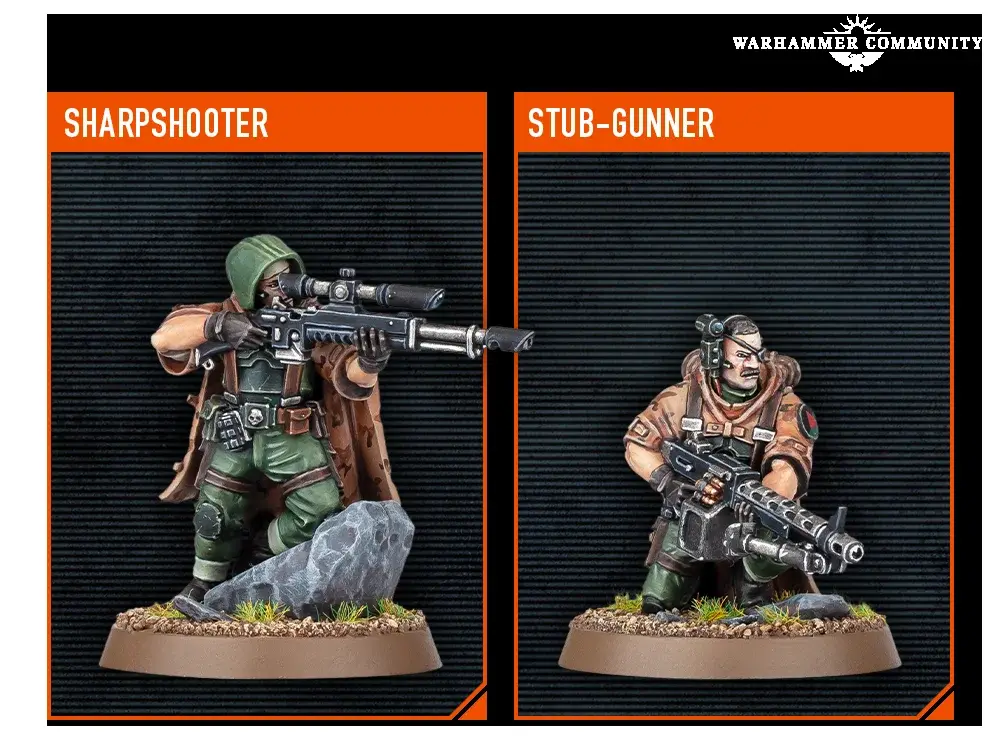 Sharpshooter (Long-Las) and Stub-gunner. The sniper build trades volume for precision — effective against elite teams but fragile against hordes. (Source: Tabletop Battles)
Build C: Maximum Disruption (Tech Play)
Strategy: Overwhelm the opponent with repositioning, Melta Mines, and smoke. Disrupt their plan before they execute it.
| Operative | Loadout | Equipment |
|---|---|---|
| Veteran Sergeant | Lascarbine, chainsword | — |
| Heavy Gunner | Grenade launcher | Sniper Overwatch |
| Gunner | Heavy stubber | — |
| Field Medicae | Lasrifle | Med Kit |
| Grenadier | Frag + Krak + Melta Mine + Smoke | — |
| Guide | Lasrifle | — |
| Comms Operator | Lascarbine | — |
| Trooper | Lascarbine | — |
| Trooper | Lascarbine | — |
| Trooper | Lasrifle | — |
| Vox-Relay Beacon | — | 2 EP |
Why this works on Loot and ITP: Lascarbine spam (Lethal 5+) gives you early-game crit pressure. The Grenadier’s Melta Mine controls a critical corridor. The Guide gives you climb advantage in terrain-heavy maps.
Weakness: Lower damage output against elite teams. If your opponent runs 10+ wound models, this build struggles.
Mission-Specific Tactics
Secure (Standard Objective)
- Deploy your 3-4 lasrifle troopers on objectives. Hold with Elite Fieldcraft reaction shots.
- Guard one lane, Fieldcraft another. Opponents can’t safely push either without losing their operative.
- Use the Guide’s climb reduction to get a trooper on a high-objective point for 1 AP.
ITP (Into the Dark / Close Quarters)
- The Guide is mandatory. Terrain climb reduction saves 2+ AP per game.
- Place the Vox-Relay Beacon at a central corridor junction. Three operatives can use it.
- Surgical Breach lets you ignore climb and grants Silent — perfect for narrow corridors.
Loot (Retrieval)
- Grenadier with Melta Mine controls a corridor. Opponent either goes through it and takes damage, or takes a longer route and loses tempo.
- Use Rapid Redeploy (0 CP once per battle) to get a trooper on a central loot token TP1.
- Smoke Screen keeps your retrieval operative alive.
Critical Ops (Mixed Objectives)
- Take Build A (Control Board). It’s the most flexible.
- Swap the Grenadier for a sixth Trooper if you expect heavy casualties. More bodies = more objective play.
Matchup Guide: Who You Beat and Who Beats You
| Opponent | Difficulty | Why |
|---|---|---|
| Kasrkin | Even (50%) | Similar stats, Kasrkin have better damage, you have better reaction. Positioning decides. |
| Legionaries | Hard (35%) | Melee-focused, counteraction-heavy, your fieldcraft doesn’t trigger off Fight actions. |
| Phobos | Hard (30%) | Phobos ploys neutralize your reactions. Their Conceal game is better. |
| Hearthkyn Salvagers | Favorable (60%) | Slow, predictable activations. Fieldcraft punishes their deliberate playstyle. |
| Pathfinders | Favorable (65%) | Fragile. Your stubber and plasma delete them faster than they can reposition. |
| Gellerpox Infected | Hard (25%) | High wounds, high damage, counteractions that don’t trigger Fieldcraft. Your worst matchup. |
| Warpcoven | Even (45%) | Psyker actions bypass some Fieldcraft restrictions. Their durability challenges your damage output. |
| Corsair Voidscarred | Favorable (55%) | Similar fragility. Your Fieldcraft outclasses their mobility tricks. |
| Vet Guard | Favorable (60%) | More bodies, worse saves. Your volume fire from stubber + lasrifles clears them. |
| Fellgor Ravagers | Even (50%) | High melee threat. If you control engagement distance, you win. If they close, you lose. |
Elite Fieldcraft Tactics Verdict: What 12 Games Taught Me
After 12 games across 8 different opponents (5 win, 7 loss — including a rough 0-3 start that finally turned around):
The biggest lesson was the hardest to learn: Spectre Squad is not a team that wins by killing the opponent. It’s a team that wins by making the opponent make bad choices. Every activation against you is a gamble for them. Will you Fieldcraft? Will you Guard? Will you save your points for a better target?
The 2 Fieldcraft points per Turning Point are a resource, but the real weapon is uncertainty. Opponents who know your rules will play around you. Opponents who don’t will feed you operatives one by one.
Three things I’d tell my past self before game 1:
-
You will lose the first 3 games. The learning curve is real. This team punishes positioning mistakes aggressively — most of which will be your own.
-
Build for the stubber, not the sniper. Volume fire wins more Kill Team games than precision shots. The Long-Las looks good on paper. The heavy stubber wins on the table.
-
The Sergeant’s Issue Mission is your best ability. I spent my first 4 games treating him as a slightly better trooper. Once I started saving his ability for critical Fieldcraft re-ups, my win rate doubled.
Final recommendation: If you enjoy reactive, positioning-heavy gameplay that rewards planning over stat-checking, Spectre Squad is your team. If you want to walk forward and shoot things off the board, play Kasrkin or Legionaries.
The box is a good value. One box gives you all 10 operatives plus the Beacon. The optimal build exists within that single box if you plan ahead. Don’t buy two boxes unless you’re a tournament grinder who needs every weapon option magnetized.
Now go deploy your Beacon and make your opponent regret every activation.
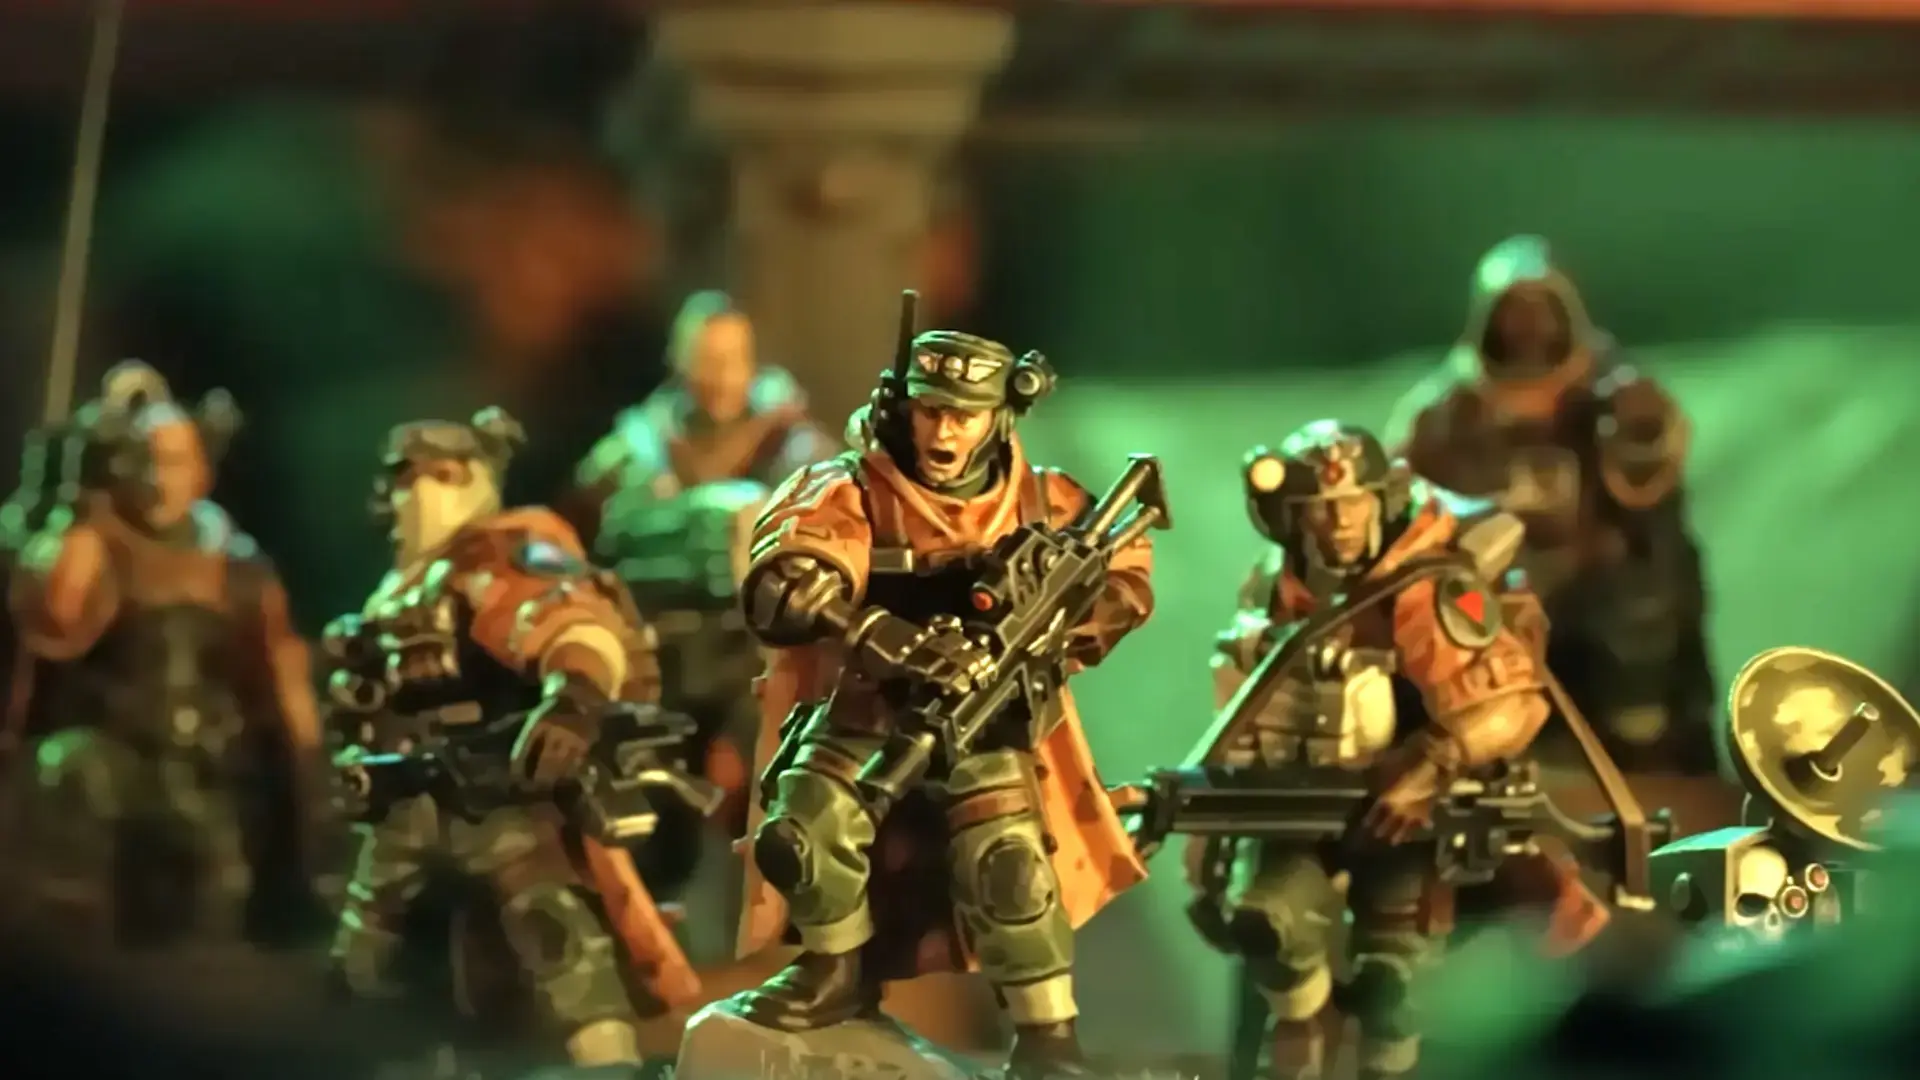
 Call sign Jester. The men and women of Spectre Squad don’t win with raw strength. They win by being exactly where the enemy doesn’t expect them. Deploy accordingly. (Source: Warhammer Community)
Frequently Asked Questions
Is Spectre Squad a competitive kill team in the 2026 meta?
Yes, but with caveats. Spectre Squad wins through board control and reactive shooting, not raw stat lines. Against teams that rely on activation-based charges and shooting, they're excellent. Against teams that abuse counteractions and ploys (like Phobos or Gellerpox), they struggle. Their 8-wound, 5+ save profile is fragile — you need cover and Camo-Cloaks to survive. Tier 2 competitive, but lethal in the right hands.
What is Elite Fieldcraft and how does it work in Spectre Squad?
Elite Fieldcraft is the Spectre Squad's faction rule. You get 2 points per Turning Point. When an Engaged enemy performs an action during its activation, spend 1 point to Ready a friendly operative (not in Control Range) to make a free Shoot (only at that enemy), Reposition (3), or Dash (6). The big restriction: it doesn't trigger on counteractions. You also can't interrupt the same enemy activation twice if you already used Guard on it.
What is the best loadout for Spectre Squad from one box?
Plasma gun (Heavy Gunner), heavy stubber (Gunner), Sergeant with chainsword, 3-4 lasrifle troopers for Rending shots, 1 lascarbine trooper for mobility, Medic, Comms Operator, and Guide. The Guide is an auto-include for the terrain-scouting mobility buff. The Vox-Relay Beacon gives +1 APL to operatives within 6. This build covers Secure, ITP, Loot, and Critical Ops mission types.
Can you build the double-shoot melta combo with Spectre Squad?
Yes. Equip your Heavy Gunner with a melta gun (4/5 damage, P2, MW1). On your activation, prepare the Heavy Gunner. Then use the Vox-Relay Beacon for +1 APL, allowing a Shoot + Reposition. If an enemy activates within 6, use Elite Fieldcraft for a second reaction shot. Two melta hits at P2 will delete almost anything. This requires careful positioning: the melta's 6 range and the Beacon's 6 range must overlap.
What ploys does Spectre Squad have access to?
Spectre Squad has 2 Strategic Ploys (1 CP each): Surgical Breach (friendly operatives ignore the first 2 of climb and gain Silent on shooting if not in Control Range) and Smoke Screen (one operative gains Conceal vs ranged attacks). They also have 3 Firefight Ploys: Get Down! (Dash after being shot, 1 CP), Suppressing Fire (enemy shooting you fights at Disadvantage, 1 CP), and Rapid Redeploy (Reposition 3 at the start of the Turning Point, 0 CP but one-use only).
About the author
Editor-in-Chief
Founder and Editor-in-Chief of gameguidesbox.com, began surfing the web in the late 19th century. Passionate about movies, coffee, gaming, and life itself. Favorite games include Titanfall 2, Baldur's Gate 3, Metro, PUBG, and CS2.
You may also like
Kill Team Spectre Squad Elite Fieldcraft: What Actually Triggers the Interrupt
Elite Fieldcraft is more than Guard on steroids. Tested across 8 games: exact trigger conditions, what Guard+Fieldcraft can't do, and 3 setups that punish opponents who don't read the rules.
Kill Team Spectre Squad: One Box Enough for a Full Roster
The box has 10 model positions for an 11-selection team. Tested 12 build combinations from a single box: what you can field, what you miss, and the one build that covers all mission types.
SpiritVale Beginner's Guide: 7 Classes, Gear Refining & Economy Basics
No tutorial, no quests, no hand-holding. SpiritVale drops you into Nevaris with nothing. Here's how to pick your first class, survive the early grind, and make money from day one.
Comments