Arc Raiders Grenade & Trap Tier List: Best Explosives Ranked
Which grenades and traps are worth crafting in Arc Raiders? We've ranked every explosive from S-tier to D-tier based on damage, utility, and cost efficiency. Wolfpack, Trigger 'Nade, Deadline, and more.
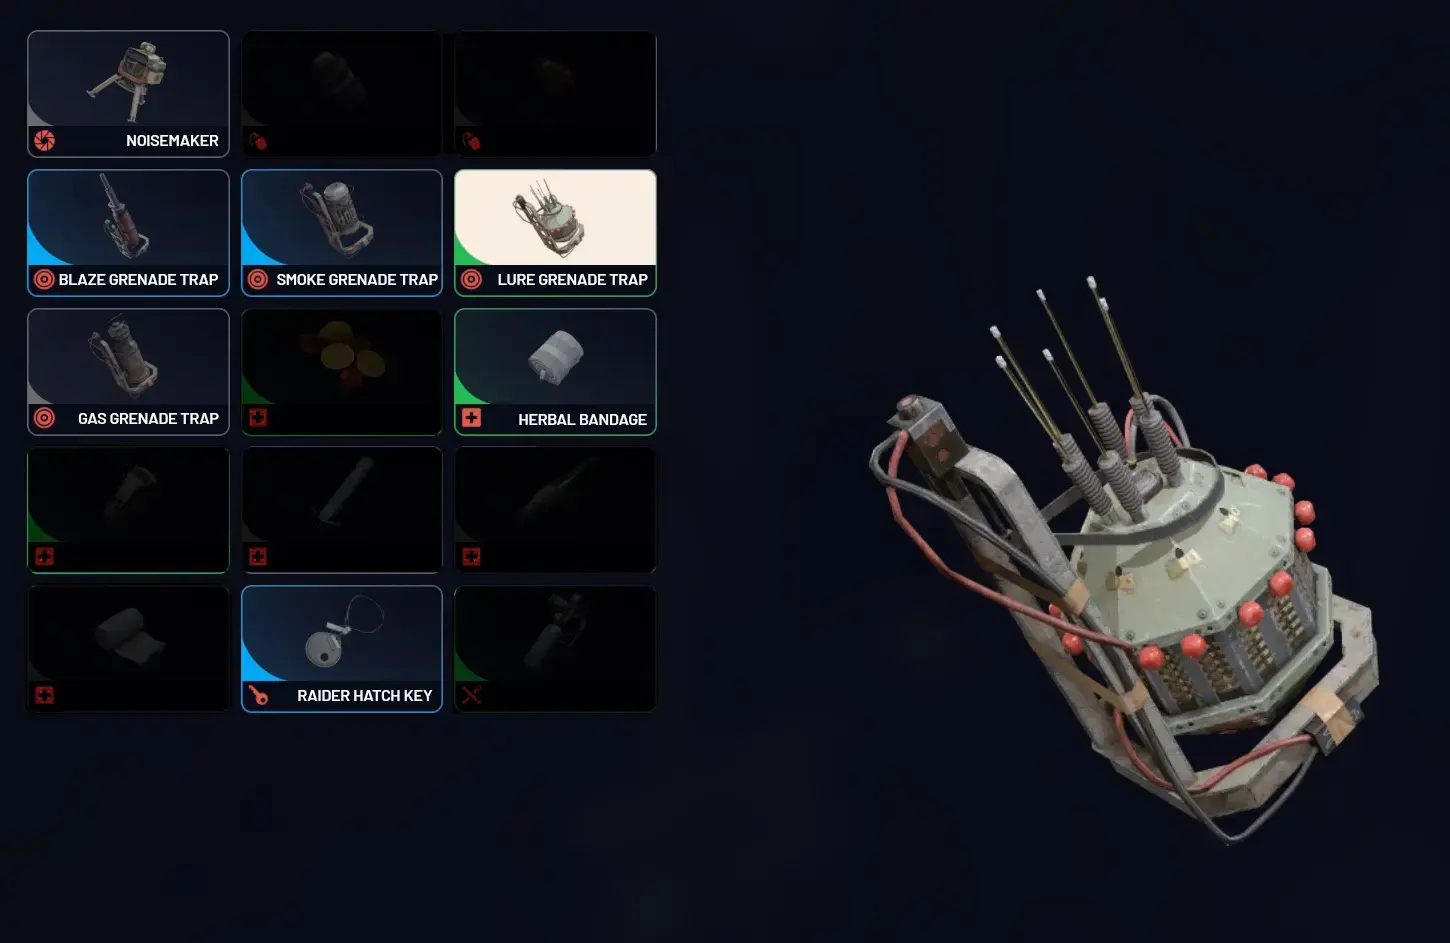
Table of Contents
- Quick Tier List Summary
- S-Tier Explosives (Must Use)
- A-Tier Explosives (Strong Picks)
- B-Tier Explosives (Situational)
- C-Tier Explosives (Avoid)
- Explosives by Use Case
- Crafting Cost Analysis
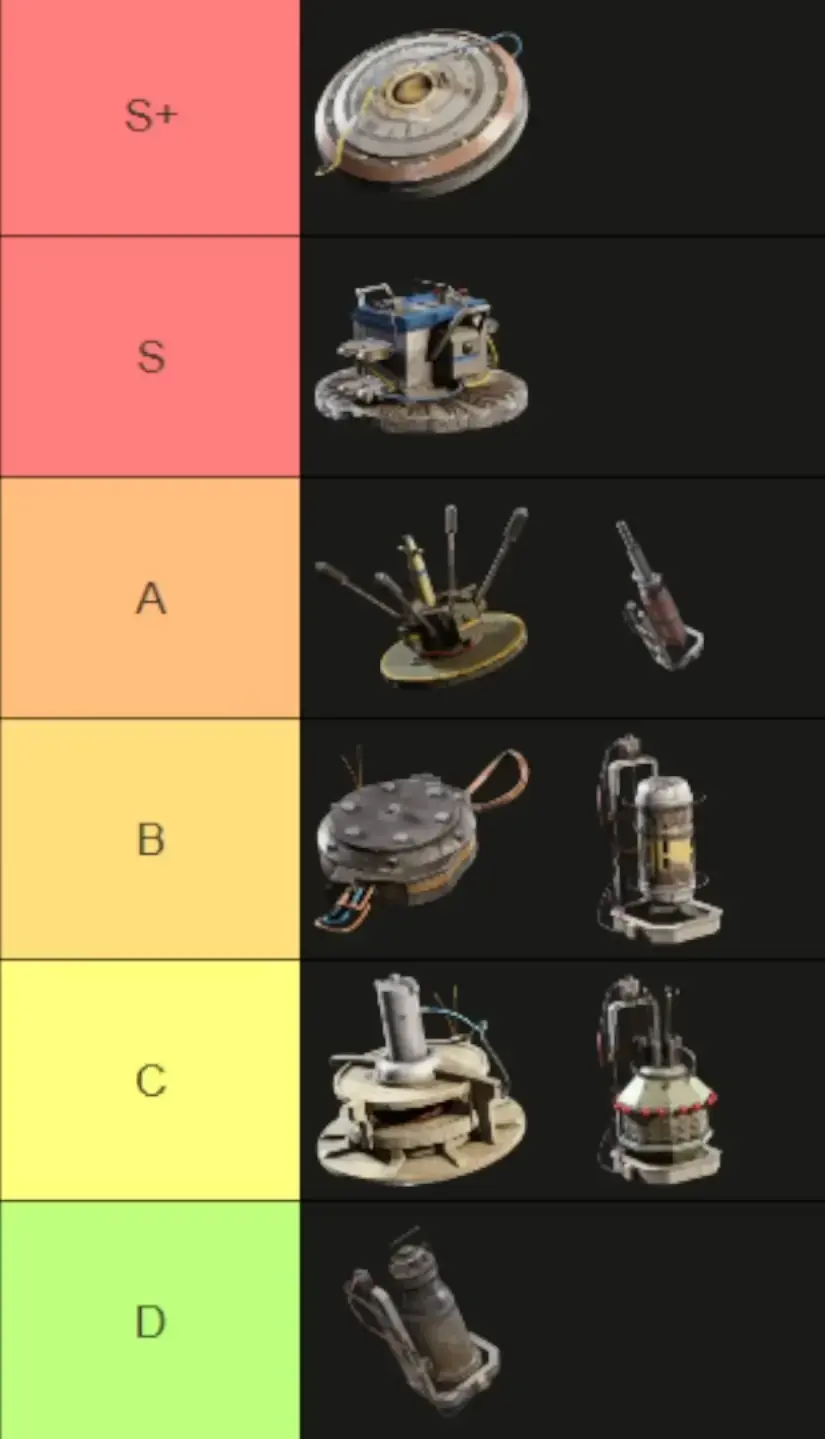
Quick Tier List Summary
S-Tier (Must Use)
| Explosive | Type | Cost | Best For |
|---|---|---|---|
| Wolfpack | Grenade | High | Bosses, heavy ARC |
| Trigger ‘Nade | Grenade | Medium | Area denial, PvP |
| Deadline | Trap | High | Zone control, building clears |
| Blaze Grenade | Grenade | Medium | ARC crowds, DoT |
| Jolt Mine | Trap | Medium | Area denial, stun |
| Showstopper | Trap | High | Elite target deletion |
| Snap Blast Grenade | Grenade | Low | ARC stagger, interrupts |
| Smoke Grenade | Grenade | Low | Escape, stealth |
A-Tier (Strong Picks)
| Explosive | Type | Cost | Best For |
|---|---|---|---|
| Light Impact | Grenade | Low | General purpose, budget |
| Explosive Mine | Trap | Medium | Defensive positioning |
| Seeker Grenade | Grenade | Medium | Flying ARC, homing |
| Surge Coil | Trap | High | Area electrification |
B-Tier (Situational)
| Explosive | Type | Cost | Best For |
|---|---|---|---|
| Pulse Mine | Trap | Low | Detection, utility |
| Smoke Grenade Trap | Trap | Low | Static area denial |
| Lure Grenade | Grenade | Low | Distraction, positioning |
C-Tier (Avoid)
| Explosive | Type | Cost | Why Avoid |
|---|---|---|---|
| Gas Grenade | Grenade | Medium | Inconsistent, situational |
| Crude Explosives | Grenade | Low | Outclassed by Light Impact |
| Hornet Driver Trap | Trap | Medium | Unreliable, niche |
| Fireball Burner Trap | Trap | Medium | Too situational |
S-Tier Explosives (Must Use)
Wolfpack Grenade
Type: Homing Grenade Cost: ~1,500 coins per unit (crafting) Explosives Station: Level 3 required
| Stat | Value |
|---|---|
| Damage | Extreme |
| Range | Long (homing) |
| Blast Radius | Medium |
| Cost Efficiency | A-tier (high cost, high reward) |
Best For:
- Boss ARC (Matriarch, Queen)
- Heavy ARC clusters
- Elite PvP targets
- Emergency escapes (fire and run)
How to Use:
- Lock onto target (1-second lock time)
- Fire—missiles track automatically
- Multiple Wolfpacks = faster deletion
- Can be used while moving/retreating
Wolfpacks are the great equalizer. I’ve soloed Matriarch with 6 Wolfpacks + Heavy Ammo. They’re expensive, but they print boss loot. Always carry 3-5 for serious runs.
Pros:
- Homing = easy to use
- Massive damage vs heavy targets
- Can fire multiple for burst
- Works while retreating
Cons:
- Expensive to craft
- Overkill for light ARC
- Lock time delays deployment
Verdict: Mandatory for boss hunting. Craft Explosives Station to Level 3 ASAP.
Trigger ‘Nade
Type: Proximity Grenade Cost: ~800 coins per unit (crafting) Explosives Station: Level 3 required
| Stat | Value |
|---|---|
| Damage | High |
| Range | Medium (throw) |
| Blast Radius | Large |
| Cost Efficiency | S-tier |
Best For:
- Building clears
- Area denial
- PvP ambushes
- ARC crowd control
How to Use:
- Throw into room/area
- 2-second fuse, then proximity trigger
- Anything in radius takes massive damage
- Can combo with other explosives
Pros:
- Large blast radius
- Proximity trigger (no timing needed)
- Great for clearing buildings
- Reasonable cost
Cons:
- Can trigger prematurely
- Less damage than Wolfpack
- Requires positioning
Verdict: Best all-around grenade for PvP and PvE. Stock up on these.
Deadline
Type: Delayed Explosion Trap Cost: ~1,200 coins per unit (crafting) Explosives Station: Level 3 required
| Stat | Value |
|---|---|
| Damage | Extreme |
| Range | N/A (placed) |
| Blast Radius | Very Large |
| Cost Efficiency | A-tier |
Best For:
- Zone control
- Building denial
- Boss arena setup
- Escape route blocking
How to Use:
- Place in strategic location
- 3-5 second delay before explosion
- Massive damage to everything in radius
- Use to clear rooms before entering
Pros:
- Enormous blast radius
- Deletes entire areas
- Great for defensive setups
- Forces enemy repositioning
Cons:
- Delay gives time to escape
- Expensive
- Can’t be moved once placed
Verdict: Best trap for area denial. Essential for squad defense and boss setups.
Blaze Grenade
Type: DoT Grenade Cost: ~600 coins per unit (crafting) Explosives Station: Level 2 required
| Stat | Value |
|---|---|
| Damage | High (over time) |
| Range | Medium (throw) |
| Blast Radius | Medium |
| Cost Efficiency | S-tier |
Best For:
- ARC crowds
- Area denial
- Damage over time
- Choking points
How to Use:
- Throw at enemy cluster
- Creates fire zone (5-second duration)
- Enemies in zone take continuous damage
- Blocks pathways effectively
Pros:
- DoT ticks through armor
- Area denial for 5 seconds
- Great vs ARC clusters
- Affordable
Cons:
- Lower burst than other grenades
- DoT can be avoided
- Less effective vs mobile targets
Verdict: Best value grenade for PvE. Stock 5-10 for ARC-heavy runs.
Jolt Mine
Type: Electric Stun Trap Cost: ~700 coins per unit (crafting) Explosives Station: Level 3 required
| Stat | Value |
|---|---|
| Damage | Moderate |
| Range | N/A (placed) |
| Blast Radius | Small (stun is large) |
| Cost Efficiency | A-tier |
Best For:
- Area denial
- Stun locking
- Defensive setups
- Escape routes
How to Use:
- Place in doorway/corridor
- Enemies trigger on proximity
- Stuns + damages everything in range
- Combo with other explosives
Pros:
- Stun effect is powerful
- Great for defensive setups
- Affordable
- Synergizes with team
Cons:
- Lower damage than Deadline
- Small blast radius
- Requires placement time
Verdict: Best defensive trap. Essential for squad holds and solo escape routes.
Showstopper
Type: Elite Trap Cost: ~1,800 coins per unit (crafting) Explosives Station: Level 3 required
| Stat | Value |
|---|---|
| Damage | Extreme |
| Range | N/A (placed) |
| Blast Radius | Medium |
| Cost Efficiency | B-tier (high cost) |
Best For:
- Elite target deletion
- Boss arena setup
- High-value ambushes
- PvP choke points
How to Use:
- Place in expected enemy path
- Trigger manually or on proximity
- Massive single-target damage
- Best used as finisher
Pros:
- Highest single-target trap damage
- Can delete elites instantly
- Manual trigger option
- Psychological deterrent
Cons:
- Very expensive
- Single-use
- Requires good prediction
Verdict: Niche but devastating. Use for boss setups and high-value PvP ambushes.
Snap Blast Grenade
Type: Stun Grenade Cost: ~400 coins per unit (crafting) Explosives Station: Level 2 required
| Stat | Value |
|---|---|
| Damage | Low |
| Range | Medium (throw) |
| Blast Radius | Medium |
| Stun Duration | 2-3 seconds |
| Cost Efficiency | S-tier |
Best For:
- ARC stagger
- Interrupting attacks
- Escape windows
- Setup for heavy weapons
How to Use:
- Throw at target/enemy cluster
- 1-second fuse, then stun blast
- 2-3 second stun window
- Follow up with heavy damage
Pros:
- Cheap and spammable
- Reliable stun
- Interrupts boss attacks
- Great setup tool
Cons:
- Low damage
- Short stun duration
- Requires follow-up
Verdict: Best utility grenade. Carry 5-10 for boss fights and emergency escapes.
Smoke Grenade
Type: Visibility Denial Cost: ~300 coins per unit (crafting) Explosives Station: Level 2 required
| Stat | Value |
|---|---|
| Damage | None |
| Range | Medium (throw) |
| Duration | 8-10 seconds |
| Cost Efficiency | S-tier (for utility) |
Best For:
- Escape
- Stealth approaches
- Revive cover
- Repositioning
How to Use:
- Throw between you and enemies
- Smoke cloud blocks LOS for 8-10 seconds
- Use to escape or reposition
- Can combo with other grenades
Pros:
- Extremely cheap
- Reliable escape tool
- No skill required
- Universal application
Cons:
- No damage
- Temporary effect
- Can be shot through (reduced accuracy)
Verdict: Mandatory for solo players. 4 smoke grenades = 4 guaranteed escapes.
A-Tier Explosives (Strong Picks)
Light Impact Grenade
Type: Basic Grenade Cost: ~200 coins per unit (crafting) Explosives Station: Level 1 required
| Stat | Value |
|---|---|
| Damage | Moderate |
| Range | Medium (throw) |
| Blast Radius | Small-Medium |
| Cost Efficiency | S-tier |
Best For:
- Budget loadouts
- ARC crowd control
- Spam throwing
- Forcing enemies from cover
Pros:
- Extremely cheap
- Can spam throw
- Decent damage for cost
- Unlocks at Level 1
Cons:
- Low damage vs heavy targets
- Small blast radius
- Outclassed by late-game options
Verdict: Best budget grenade. Stock 10-15 for early-game runs.
Explosive Mine
Type: Basic Trap Cost: ~400 coins per unit (crafting) Explosives Station: Level 2 required
| Stat | Value |
|---|---|
| Damage | Moderate-High |
| Range | N/A (placed) |
| Blast Radius | Medium |
| Cost Efficiency | A-tier |
Best For:
- Defensive positioning
- Doorway denial
- Escape route protection
- Budget area control
Pros:
- Affordable
- Good damage
- Easy to place
- Reliable trigger
Cons:
- Outclassed by Jolt Mine/Deadline
- No utility (pure damage)
- Visible to observant enemies
Verdict: Solid budget trap. Upgrade to Jolt Mine when possible.
Seeker Grenade
Type: Homing Grenade Cost: ~700 coins per unit (crafting) Explosives Station: Level 2 required
| Stat | Value |
|---|---|
| Damage | Moderate |
| Range | Long (homing) |
| Blast Radius | Small |
| Cost Efficiency | A-tier |
Best For:
- Flying ARC (Hornets, Wasps)
- Hard-to-reach targets
- Moving targets
- Budget homing option
Pros:
- Homing = easy to use
- Great vs flying enemies
- Affordable Wolfpack alternative
- Works while moving
Cons:
- Lower damage than Wolfpack
- Small blast radius
- Can miss agile targets
Verdict: Best anti-air grenade. Carry 3-5 for maps with heavy flying ARC.
Surge Coil
Type: Area Electrification Trap Cost: ~1,000 coins per unit (crafting) Explosives Station: Level 3 required
| Stat | Value |
|---|---|
| Damage | Moderate (over time) |
| Range | N/A (placed) |
| Duration | 10-15 seconds |
| Cost Efficiency | A-tier |
Best For:
- Area denial
- Squad defense
- Boss arena setup
- Choke point control
Pros:
- Long duration
- Continuous damage
- Great for team setups
- Psychological deterrent
Cons:
- Expensive
- Stationary
- Can be avoided with positioning
Verdict: Strong squad trap. Less valuable for solo players.
B-Tier Explosives (Situational)
Pulse Mine
Type: Detection Trap Cost: ~300 coins per unit (crafting) Explosives Station: Level 2 required
| Stat | Value |
|---|---|
| Damage | Low |
| Range | N/A (placed) |
| Detection Radius | Large |
| Cost Efficiency | B-tier |
Best For:
- Enemy detection
- Early warning
- Map awareness
- Budget utility
Pros:
- Cheap
- Large detection radius
- Alerts to enemy presence
- Useful for solo awareness
Cons:
- Minimal damage
- Only alerts, doesn’t stop enemies
- Better alternatives exist
Verdict: Situational. Take for solo stealth builds, skip otherwise.
Smoke Grenade Trap
Type: Static Smoke Trap Cost: ~400 coins per unit (crafting) Explosives Station: Level 2 required
Best For:
- Static area denial
- Pre-planned smoke coverage
- Defensive setups
Pros:
- Automatic trigger
- Good for pre-planned routes
- Decent duration
Cons:
- Less flexible than thrown smoke
- Requires setup time
- Thrown smoke is better for most uses
Verdict: Thrown Smoke Grenades are more versatile. Skip unless you have specific trap setups.
Lure Grenade
Type: Distraction Grenade Cost: ~350 coins per unit (crafting) Explosives Station: Level 2 required
Best For:
- Enemy distraction
- Positioning tricks
- Squad coordination
Pros:
- Creates audio distraction
- Can redirect enemies
- Useful for stealth
Cons:
- No damage
- AI doesn’t always respond
- Skill-intensive to use effectively
Verdict: Niche utility. Most players won’t find enough value.
C-Tier Explosives (Avoid)
Gas Grenade
Type: DoT Grenade Cost: ~500 coins per unit (crafting)
Why Avoid:
- Inconsistent damage
- Enemies can walk out of cloud
- Blaze Grenade does the job better
- Situational at best
Better Alternative: Blaze Grenade (more reliable DoT)
Crude Explosives
Type: Basic Grenade Cost: ~150 coins per unit (crafting)
Why Avoid:
- Outclassed by Light Impact
- Minimal damage increase over nothing
- Not worth the inventory slot
Better Alternative: Light Impact Grenade (+50 coins for +100% value)
Hornet Driver Trap
Type: Niche Trap Cost: ~600 coins per unit (crafting)
Why Avoid:
- Requires Hornet Drivers (farm-intensive)
- Unreliable damage
- Too situational
Better Alternative: Explosive Mine or Jolt Mine
Fireball Burner Trap
Type: Niche Trap Cost: ~600 coins per unit (crafting)
Why Avoid:
- Requires Fireball Burners (farm-intensive)
- Inconsistent activation
- Better traps available
Better Alternative: Blaze Grenade or Deadline
Explosives by Use Case
Boss Hunting
| Priority | Explosive | Quantity |
|---|---|---|
| 1 | Wolfpack | 5-8 |
| 2 | Snap Blast | 3-5 |
| 3 | Blaze Grenade | 2-3 |
| 4 | Trigger ‘Nade | 2-3 |
Strategy: Wolfpacks for burst damage. Snap Blasts for stun windows. Blaze for DoT. Trigger ‘Nades for add control.
Solo Stealth
| Priority | Explosive | Quantity |
|---|---|---|
| 1 | Smoke Grenade | 4-6 |
| 2 | Pulse Mine | 2-3 |
| 3 | Light Impact | 2-3 |
| 4 | Lure Grenade | 1-2 |
Strategy: Smoke for escapes. Pulse for awareness. Light Impact for emergency ARC. Lure for distraction.
Squad Defense
| Priority | Explosive | Quantity |
|---|---|---|
| 1 | Deadline | 3-4 |
| 2 | Jolt Mine | 4-5 |
| 3 | Surge Coil | 2-3 |
| 4 | Showstopper | 1-2 |
Strategy: Deadline for zone denial. Jolt Mines for stuns. Surge Coils for area control. Showstopper for elite threats.
Budget Runs
| Priority | Explosive | Quantity |
|---|---|---|
| 1 | Light Impact | 8-10 |
| 2 | Smoke Grenade | 2-3 |
| 3 | Snap Blast | 2-3 |
| 4 | Explosive Mine | 2-3 |
Strategy: Light Impact for damage. Smoke for escapes. Snap Blast for utility. Mines for defense.
Crafting Cost Analysis
Cost per Effectiveness Rating
| Explosive | Cost | Effectiveness | Value Rating |
|---|---|---|---|
| Light Impact | 200 | 6/10 | S-tier (cheap + reliable) |
| Smoke Grenade | 300 | 8/10 (utility) | S-tier (escapes are priceless) |
| Snap Blast | 400 | 7/10 | S-tier (stun is powerful) |
| Blaze Grenade | 600 | 8/10 | S-tier (DoT + area denial) |
| Seeker Grenade | 700 | 7/10 | A-tier (good vs flyers) |
| Jolt Mine | 700 | 8/10 | A-tier (stun + damage) |
| Trigger ‘Nade | 800 | 9/10 | S-tier (best all-around) |
| Deadline | 1,200 | 9/10 | A-tier (expensive but devastating) |
| Wolfpack | 1,500 | 10/10 | S-tier (boss deletion) |
| Showstopper | 1,800 | 9/10 | B-tier (niche, expensive) |
Recommended Crafting Quantities
| Game Stage | Light Impact | Smoke | Wolfpack | Trigger ‘Nade | Other |
|---|---|---|---|---|---|
| Early (0-25) | 15-20 | 3-4 | 0 | 0 | 5 Snap Blast |
| Mid (26-50) | 10-15 | 4-5 | 3-5 | 3-4 | 5 Blaze, 3 Jolt |
| Late (51+) | 5-10 | 5-6 | 8-10 | 5-6 | Full toolkit |
After testing every explosive across 150+ raids, here’s what matters:
- Wolfpack is mandatory for boss hunting. No exceptions. The damage output justifies the cost.
- Smoke Grenades are the best value explosive. 300 coins for a guaranteed escape is unbeatable ROI.
- Trigger ‘Nade is the best all-around grenade. Great for both PvP and PvE, reasonable cost.
- Budget players should spam Light Impact. 200 coins each means you can throw 10 for the price of 1 Wolfpack.
What to do next:
- Craft 15-20 Light Impact Grenades as your foundation
- Add 4-5 Smoke Grenades for escapes
- Upgrade to Wolfpacks once you’re boss hunting
- Keep a mixed toolkit (3-4 types) for versatility
Explosives in Arc Raiders aren’t just damage—they’re force multipliers. The right grenade at the right time wins fights that weapons can’t.
If you take one thing from this guide: Carry more grenades than you think you need. The “perfect time” to use them always comes sooner than expected.
Looking for more Arc Raiders guides? Head to the Arc Raiders Complete Guide Hub for builds, crafting, enemy weak points, skill trees, and everything else in one place.
Frequently Asked Questions
What is the best grenade in Arc Raiders?
Wolfpack Grenade (S-tier). Homing missiles delete heavy ARC and bosses. Expensive but unmatched for elite targets. Trigger 'Nade is the budget alternative.
What grenades should beginners craft?
Light Impact Grenades. Cheap, effective, and versatile. Craft 10-15 per raid until you can afford Wolfpacks or Trigger 'Nades.
Are traps worth using in Arc Raiders?
Yes, for specific situations. Deadline and Jolt Mine are S-tier for area denial. Smoke Grenade Traps are essential for solo stealth builds.
How many grenades should I bring per raid?
3-5 for budget runs, 5-8 for mid-game, 8-12 for boss hunting. Grenades win fights that weapons can't.
What's the difference between grenades and traps?
Grenades are thrown for immediate effect. Traps are placed for delayed/triggered effect. Both have their place—grenades for offense, traps for defense.
About the author
Editor-in-Chief
Founder and Editor-in-Chief of gameguidesbox.com, began surfing the web in the late 19th century. Passionate about movies, coffee, gaming, and life itself. Favorite games include Titanfall 2, Baldur's Gate 3, Metro, PUBG, and CS2.
You may also like

Arc Raiders - Complete Guide Hub
Your ultimate resource for Arc Raiders. Find complete beginner loadouts, solo build guides, ARC machine weak points, crafting walkthroughs, skill tree breakdowns, grenade tier lists, and safe extraction strategies — all in one place.
Arc Raiders All ARC Machine Weak Points & How to Kill Each
Struggling against ARC machines? We've documented every enemy type with weak points, attack patterns, and proven kill strategies. From Leapers to Matriarch—everything you need to know.
Arc Raiders Best Budget Loadout for Beginners
Broke in Arc Raiders? We've tested every budget option to find the absolute best free and cheap loadouts for beginners. Weapons, armor, and strategies that cost under 5,000 coins.
Comments