Subnautica 2 Database — Items, Blueprints, Creatures & Biomods
Complete interactive database with 224 items, 245 blueprints, 70 creatures, 69 biomods, and more.
Plan your crafting with our interactive Subnautica 2 crafting calculator and blueprint tracker — manage all 245 blueprints, check off collected ingredients, and track your progress in real time.
Last updated:

Advanced Wiring Kit
Resources
Atacamite
Resources
Axum Bacterial Culture
Resources
Celestine
Resources
Conduit Crystal
Resources
Copper
Resources
Copper Ingot
Resources
Copper Wire
Resources
Crab Feces
Resources
Creature Enamel
Resources
Dedicated Core
Resources
Deepwing Egg Clump
Resources
Enameled Glass
Resources
Fiber Mesh
Resources
Germanium Ingot
Resources
Glass
Resources
Gold
Resources
Grease
Resources
Lead
Resources
Lithium
Resources
Marrowbreach
Resources
Mild Acid
Resources
Pent
Resources
Plasteel Ingot
Resources
Political Consciousness
Resources
Quartz
Resources
Rubber
Resources
Salt
Resources
Silver
Resources
Sulfur
Resources
System Chip
Resources
Titanium
Resources
Titanium Ingot
Resources
Troilite
Resources
Wiring Kit
Resources
Advanced Battery
Power
Basic Battery
Power
Entangled Power Cell
Power
Power Cell
Power
Basic First Aid Kit
Consumables
Cooked Black Hoverthorn
Consumables
Cooked Bluemoon
Consumables
Cooked Electric Geordie
Consumables
Cooked Geordie
Consumables
Cooked Halfmoon
Consumables
Cooked Harvestmoon
Consumables
Cooked Hoverthorn
Consumables
Cooked Quadrate
Consumables
Coral Mash
Consumables
Enhanced First Aid Kit
Consumables
Halfmoon Jerky
Consumables
Isotonic Water
Consumables
Nutrient Block
Consumables
Oily Salad
Consumables
Water
Consumables
Water Slug
Consumables
Air Bladder
Tools
Biosampling Kit
Tools
Bioscanner
Tools
Broken Welder
Tools
Distraction Flare
Tools
EMT
Tools
Feedback Resonator
Tools
Flashlight
Tools
Glowstick
Tools
Habitat Builder
Tools
Lightstick
Tools
Repair Tool
Tools
Scanner
Tools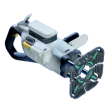
Sonic Resonator
Tools
Survival Multitool
Tools
Wakemaker
Tools
Basic Fins
Equipment
High Capacity Air Tank
Equipment
Improved Fins
Equipment
Rebreather
Equipment
Standard Air Tank
Equipment
Ultra High Capacity Air Tank
Equipment
Acid Raion
Base Building
Axum Jar
Base Building
Axum Pot
Base Building
Axum Seat
Base Building
Axum Street Lamp
Base Building
Axum Trashcan
Base Building
Axum Wall Lamp
Base Building
Battery Terminal
Base BuildingBeacon
Base Building
Biobed
Base Building
Biolab
Base Building
Bioreactor
Base Building
Bulb Floor Lamp
Base Building
CHBC Live Poster
Base Building
Community Poster 02
Base Building
Coral Jar
Base Building
Current Ring
Base Building
Cyclops Poster
Base Building
Dining Chair
Base Building
Dining Table
Base Building
Dive Elevator
Base Building
Duplex Solar Panel
Base Building
Expanded Deployable Locker
Base Building
Fabricator
Base Building
Floor Locker
Base Building
Freesia Flower
Base Building
Geothermal Recharger
Base Building
Hanging Tailing Jar
Base Building
High Capacity Deployable Locker
Base Building
Hydroelectric Turbine
Base Building
Just Keep Swimming Poster
Base Building
Keep Calm Poster
Base Building
Lab Chair
Base Building
Lost River Poster
Base Building
Macaron Sponge
Base Building
Metal Farm
Base Building
Mimic Pylon
Base Building
Modification Station
Base Building
New Life Poster
Base Building
NoA Terminal
Base Building
Painted Tree Poster
Base Building
Pioneer Hull Plate
Base Building
Pioneer Program Poster
Base Building
Portable Locker
Base Building
Portable Oxygen Generator
Base Building
Power Cell Bank
Base Building
Power Cell Terminal
Base Building
Power Plant Part A
Base Building
Power Storage
Base Building
Power Transmitter
Base Building
Processor
Base Building
Reaper Leviathan
Base Building
Rectangular Ceiling Light
Base Building
Resonance Fountain
Base Building
Roof Antenna
Base Building
Roof Antenna Large
Base Building
Roof Cylinder
Base Building
Roof Listening Dish
Base Building
Roof Panel Large
Base Building
Roof Pump
Base Building
Roof Pump Double
Base Building
S Shelf
Base Building
Safety First Poster
Base Building
Scanner Station
Base Building
Scout Ray Poster
Base Building
Sea Dragon Poster
Base Building
Sea Emperor Poster
Base Building
Seamoth Model
Base Building
Short Range Scanner Station
Base Building
Sign
Base Building
Single Bed
Base Building
Small Axum Jar
Base Building
Small Coral Jar
Base Building
Solar Panel
Base Building
Spotlight
Base Building
Stabilizer
Base Building
Stool
Base Building
Tailing Barrel
Base Building
Tailing Chest
Base Building
Tailing Jar
Base Building
Tailing Rug
Base Building
Tailing Table
Base Building
Tall Axum Jar
Base Building
Thermal Plant
Base Building
Time of Day Display
Base Building
Trashcan
Base Building
Wall Light Large
Base Building
Wall Light Small
Base Building
Wall Locker
Base Building
Wall Panel
Base Building
Wall Rack
Base Building
Wall Unit
Base Building
Wall Unit Small
Base Building
Wall Vent
Base Building
Wall Vent Large
Base Building
Work Light
Base Building
World Tree Relic
Base Building
Zezura Poster
Base Building
Cavitation Muffler
Vehicles & Upgrades
Echo Location
Vehicles & Upgrades
Engine Efficiency
Vehicles & Upgrades
Photovoltaic Charger
Vehicles & Upgrades
Scout Ray Chassis
Vehicles & Upgrades
Strike Armor
Vehicles & Upgrades
Tadpole
Vehicles & Upgrades
Tadpole Depth Module Mk. 1
Vehicles & Upgrades
Tadpole Depth Module Mk. 2
Vehicles & Upgrades
Tadpole Haul Chassis
Vehicles & Upgrades
Acidic Raion Pouch
Flora & Fauna
Black Hoverthorn
Flora & Fauna
Bluemoon
Flora & Fauna
Cherimoya Rotsac
Flora & Fauna
Cooked Pneuma
Flora & Fauna
Coral Shavings
Flora & Fauna
Electric Geordie
Flora & Fauna
Fiber
Flora & Fauna
Fibrous Pulp
Flora & Fauna
Flash Slug
Flora & Fauna
Geordie
Flora & Fauna
Halfmoon
Flora & Fauna
Harvestmoon
Flora & Fauna
Hoverthorn
Flora & Fauna
Lucifer Rotsac
Flora & Fauna
Medical Gel Sac
Flora & Fauna
Necrolei Cyst
Flora & Fauna
Pneuma
Flora & Fauna
Quadrate
Flora & Fauna
Axum Resonator
Salvage
Biobed Capsule
Salvage
Metal Salvage
Salvage
Wakemaker Salvage
Salvage
Biofuel Block
Crafting Components
Gold Ingot
Crafting Components
Mangalloy Ingot
Crafting Components
Silver Ingot
Crafting Components
Strong Acid
Crafting Components
Strontium
Crafting Components
Sugar of Saturn
Crafting Components
Algae Block
Misc
Cherimoya Chutney
Misc
Houndgar
Misc
Pavlova
Misc
Sandspear
Misc
Shiver Leviathan
Misc
Threemoon Temaki
Misc
Unobtainium
Misc
Mild Acid
Fabrication Station
Salvaged Titanium
Fabrication Station
Glass
Fabrication Station
Enameled Glass
Fabrication Station
Fiber
Fabrication Station
Fiber Mesh
Fabrication Station
Rubber
Fabrication Station
Grease
Fabrication Station
Alcohol
Fabrication Station
Silica Dust
Fabrication Station
Powdered Shell
Fabrication Station
Sugar of Saturn
Fabrication Station
Halfmoon Jerky
Fabrication Station
Threemoon Temaki
Fabrication Station
Hoverthorn Souvlaki
Fabrication Station
Cherimoya Chutney
Fabrication Station
Pavlova
Fabrication Station
Cooked Halfmoon
Fabrication Station
Oily Salad
Fabrication Station
Cooked Harvestmoon
Fabrication Station
Cooked Bluemoon
Fabrication Station
Cooked Quadrate
Fabrication Station
Cooked Geordie
Fabrication Station
Cooked Electric Geordie
Fabrication Station
Macaron Crisp
Fabrication Station
Urchin Pudding
Fabrication Station
Cooked Hoverthorn
Fabrication Station
Cooked Black Hoverthorn
Fabrication Station
Nutrient Block
Fabrication Station
Coral Mash
Fabrication Station
Rebreather
Fabrication Station
Basic Fins
Fabrication Station
Improved Fins
Fabrication Station
Standard Air Tank
Fabrication Station
High Capacity Air Tank
Fabrication Station
Ultra High Capacity Air Tank
Fabrication Station
Survival Multitool
Fabrication Station
Flashlight
Fabrication Station
Scanner
Fabrication Station
Habitat Builder
Fabrication Station
Repair Tool
Fabrication Station
Sonic Resonator
Fabrication Station
Wakemaker
Fabrication Station
Air Bladder
Fabrication Station
Isotonic Water
Fabrication Station
Mineralized Water Tablet
Fabrication Station
Water
Fabrication Station
Lithium Grains
Fabrication Station
Basic First Aid Kit
Fabrication Station
Enhanced First Aid Kit
Fabrication Station
Distraction Flare
Fabrication Station
Basic Battery
Fabrication Station
Advanced Battery
Fabrication Station
Copper Wire
Fabrication Station
Power Cell
Fabrication Station
Entangled Power Cell
Fabrication Station
Wiring Kit
Fabrication Station
Advanced Wiring Kit
Fabrication Station
System Chip
Fabrication Station
Dedicated Core
Fabrication Station
Axum Interface Chip DNL
Fabrication Station
Biosampling Kit
Fabrication Station
Heat Resistance Chip
Fabrication Station
Political Consciousness
Fabrication Station
Titanium Ingot
Fabrication Station
Lightstick
Fabrication Station
Cyan Glowstick
Fabrication Station
Glowstick
Fabrication Station
Growbed
Builder Tool
Metal Farm
Builder Tool
Acid Raion
Builder Tool
Cherimoya Rotsac
Builder Tool
Cradle Shootroot
Builder Tool
Freesia Flower
Builder Tool
Macaron Sponge
Builder Tool
Mimic Pylon
Builder Tool
Pent
Builder Tool
Corridor
Builder Tool
Room
Builder Tool
Window
Builder Tool
Half Round Room
Builder Tool
Moonpool
Builder Tool
Standard Foundation
Builder Tool
Superconducting Foundation
Builder Tool
Interior Wall
Builder Tool
Interior Arch
Builder Tool
Tadpole Dock
Builder Tool
Vehicle Fabricator
Builder Tool
Dining Chair
Builder Tool
Lab Chair
Builder Tool
Stool
Builder Tool
Dining Table
Builder Tool
Single Bed
Builder Tool
S Shelf
Builder Tool
Trashcan
Builder Tool
Small Crate
Builder Tool
Sign
Builder Tool
Pioneer Hull Plate
Builder Tool
Reaper Leviathan
Builder Tool
Seamoth Model
Builder Tool
Tailing Table
Builder Tool
Tailing Drum
Builder Tool
Tailing Barrel
Builder Tool
Coral Jar
Builder Tool
Small Coral Jar
Builder Tool
Tailing Jar
Builder Tool
Hanging Tailing Jar
Builder Tool
Tailing Rug
Builder Tool
Small Axum Jar
Builder Tool
Axum Jar
Builder Tool
Tall Axum Jar
Builder Tool
World Tree Relic
Builder Tool
Axum Pot
Builder Tool
Axum Seat
Builder Tool
Axum Trashcan
Builder Tool
Keep Calm
Builder Tool
Just Keep Swimming
Builder Tool
Safety First
Builder Tool
Scout Ray
Builder Tool
Zezura
Builder Tool
New Life
Builder Tool
Painted Tree
Builder Tool
CHBC Live
Builder Tool
Pioneer Program
Builder Tool
Community Poster 02
Builder Tool
Sea Dragon
Builder Tool
Lost River
Builder Tool
Sea Emperor
Builder Tool
Cyclops
Builder Tool
Wall Unit Small
Builder Tool
Wall Panel
Builder Tool
Wall Unit Large
Builder Tool
Wall Vent
Builder Tool
Wall Vent Large
Builder Tool
Roof Pump
Builder Tool
Roof Pump Double
Builder Tool
Roof Cylinder
Builder Tool
Roof Panel Large
Builder Tool
Roof Antenna
Builder Tool
Roof Antenna Large
Builder Tool
Roof Listening Dish
Builder Tool
Battery Terminal
Builder Tool
Solar Panel
Builder Tool
Duplex Solar Panel
Builder Tool
Power Cell Terminal
Builder Tool
Bioreactor
Builder Tool
Hydroelectric Turbine
Builder Tool
Thermal Plant
Builder Tool
Power Storage
Builder Tool
Power Transmitter
Builder Tool
Fabricator
Builder Tool
Processor
Builder Tool
Biolab
Builder Tool
Modification Station
Builder Tool
Wall Locker
Builder Tool
Floor Locker
Builder Tool
Storage Cache
Builder Tool
Tailing Chest
Builder Tool
Wall Rack
Builder Tool
Biobed
Builder Tool
NoA Terminal
Builder Tool
Scanner Station
Builder Tool
Time of Day Display
Builder Tool
Exterior Wall Light
Builder Tool
Small Ceiling Light
Builder Tool
Rectangular Ceiling Light
Builder Tool
Wall Light Small
Builder Tool
Spotlight
Builder Tool
Wall Light Large
Builder Tool
Axum Street Lamp
Builder Tool
Axum Wall Lamp
Builder Tool
Current Ring
Builder ToolHabitat Beacon
Builder ToolBeacon
Builder Tool
Portable Locker
Builder Tool
Expanded Deployable Locker
Builder Tool
High Capacity Deployable Locker
Builder Tool
Portable Oxygen Generator
Builder Tool
Power Cell Bank
Builder Tool
Work Light
Builder Tool
Dive Elevator
Builder Tool
Bioscanner
Modification Station
Feedback Resonator
Modification Station
Cavitation Muffler
Modification Station
Echo Location
Modification Station
Engine Efficiency
Modification Station
Photovoltaic Charger
Modification Station
Strike Armor
Modification Station
Tadpole Depth Module Mk 1
Modification Station
Tadpole Depth Module Mk 2
Modification Station
Titanium Ingot
Processor
Copper Ingot
Processor
Silver Ingot
Processor
Gold Ingot
Processor
Germanium from Silver
Processor
Germanium from Lead
Processor
Plasteel Ingot
Processor
Mangalloy Ingot
Processor
Strontium
Processor
Axum Etching Acid DNL
Processor
Strong Acid
Processor
Copper
Processor
Quartz
Processor
Titanium
Processor
Copper from Titanium
Processor
Copper from Silver
Processor
Silver from Gold
Processor
Biofuel Block from Fibrous Pulp
Processor
Biofuel Block from Pents
Processor
Biofuel Block from Crab Feces
Processor
Glass from Salt
Processor
Water from Fibrous Pulp
Processor
Grease from Halfmoons
Processor
First Aid from Medical Gel
Processor
Mild Acid at a Processor
Processor
Mild Acid from Pents
Processor
Strong Acid from Sulfur Gold
Processor
Tadpole
Vehicle Fabricator
Scout Ray Chassis
Vehicle Fabricator
Tadpole Haul Chassis
Vehicle Fabricator
Bulb Floor Lamp
Builder Tool
Cicada Scrap Pile
Builder Tool
Elevator Pole
Builder Tool
Generic Locker
Builder Tool
Geothermal Recharger
Builder Tool
Hydro-Electric Turbine Scrap
Builder Tool
Medkit Fabricator
Builder Tool
Mining Platform
Builder Tool
Mining Platform Copper
Builder Tool
Pillar
Builder Tool
Power Plant Building Project
Builder Tool
Radio
Builder Tool
Scrap
Builder Tool
Solar Panel Scrap
Builder Tool
Fabricator Pillar
Builder Tool
Floating Support
Builder Tool
Hatch
Builder Tool
Interior Door
Builder Tool
Ladder
Builder Tool
Nook
Builder Tool
Resonance Fountain
Builder Tool
Vintage Wanted Poster
Builder Tool
Zezura Poster
Builder ToolBiolab
Builder Tool
Biolab 2
Builder Tool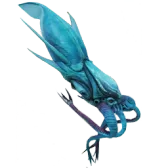
Collector Leviathan
Cephalopods
Cerathecan
Crustaceans
Sandspear
Crustaceans
Coral Crab
Crustaceans
Jetocaris
Crustaceans
Tongue Thief
Crustaceans
Shiver Leviathan
Fish
Epicurean
Fish
Needler Mango
Fish
Twin Sitaray
Fish
Waxmoon
Fish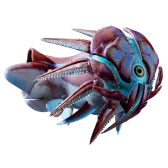
Hammerhead
Fish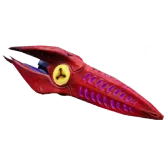
Bullethead
Fish
Foureye
Fish
Halfmoon
Fish
Hoverthorn
Fish
Pneuma
Fish
Bluemoon
Fish
Harvestmoon
Fish
Houndgar
Fish
Hycean
Jellies
Jelly Ring
Jellies
Surge Jelly
Jellies
Jelly Lei
Jellies
Marrowbreach
Mangos
Nibbler Mango
Mangos
Water Slug
Molluscs
Black Hoverthorn
Other
Electric Geordie
Salpapods
Geordie
Salpapods
Quadrate
Salpapods
Flash Slug
Water Slug
Aster Scyllid
Algae
Pent
Anomalies
Branching Coral
Coral
Cage Gorgon
Coral
Curtain Gorgon
Coral
Dragon's scale coral
Coral
Listening Gorgon
Coral
False Fission Drum
Kelp
Feather Kelp
Kelp
Wort Wort
Kelp
Angel Comb Juvenile
Plant
Bloom Canker
Plant
Freesia Flower
Plant
Gateway Spire
Plant
Titan Rockbore
Plant
Mimic Pylon
Pylons
Acid Raion
Raions
Donut of Worms
Raions
Donut No Worms
Raions
Flagon Spraion
Raions
Tripe-bowl Raion
Raions
Whip Gorgon
Raions
Cherimoya Rotsac
Rotsacs
Lucifer Rotsac
Rotsacs
Aeroshell Sponge
Sponges
Amphora Sponge
Sponges
Apocalypse Sponge
Sponges
Jack Sponge
Sponges
Macaron Sponge
Sponges
Pebbled Sporal
Sponges
Poison Tube Cluster
Sponges
Toxic Sponge
Sponges
Cabbage Shootroot
Starfish
Cradle Shootroot
Starfish
Dangling Salp
Tunics
Hecaton Tunic
Tunics
Oxygen Tunic
Tunics
Fridge Worm
Worms
Chum Cloud
Active Active
Dash
Active Active
Electric Discharge
Active Active
Pathfinder
Active Active
Sonic Echo
Active Active
Bioluminescence
Passive Passive
Camouflage
Passive Passive
Dermal Garden
Passive Passive
Homing Sense
Passive Passive
Oxygen Control
Passive Passive
Sea Skimmer
Passive Passive
Slow Metabolism
Passive Passive
Threat Sense
Passive Passive
Water Retention
Passive Passive
Water Secretion
Passive Passive
Aerated Feast
Positive Positive
Aquatic Reserves
Positive Positive
Battery Charger
Positive Positive
Chitin Layer
Positive Positive
Coolant Exhalation
Positive Positive
Copper Finder
Positive Positive
Current Exit Boost
Positive Positive
Current Rider
Positive Positive
Dash Grab
Positive Positive
Deep Dive
Positive Positive
Diving Reflex
Positive Positive
Enhanced Pupils
Positive Positive
Fast-twitch Optimization
Positive Positive
Food Bank
Positive Positive
Gold Finder
Positive Positive
Heat Resistance
Positive Positive
Heavy Gills
Positive Positive
Hyper Mitochondria
Positive Positive
Hypnotize
Positive Positive
Invisible
Positive Positive
Invisible Dash
Positive Positive
Lit Lamp
Positive Positive
Litholfactory Sense
Positive Positive
Metabolic Oxygenation
Positive Positive
Mineral Nibbler
Positive Positive
Oxygen Adsorption
Positive Positive
Oxygen Reprieve
Positive Positive
Oxygenated Heat Resistance
Positive Positive
Plankton Breathing
Positive Positive
Plant Based
Positive Positive
Powerful Kicks
Positive Positive
Powerful Kicks - Cave Variant
Positive Positive
Powerful Kicks - Temperature Variant
Positive Positive
Pressurized Lungs
Positive Positive
Pseudo Gills
Positive Positive
Regeneration
Positive Positive
Regenerative Breath
Positive Positive
Restore Water in Heat
Positive Positive
Roar
Positive Positive
Shock Absorber
Positive Positive
Shock Proof
Positive Positive
Silver Finder
Positive Positive
Slow-twitch Optimization
Positive Positive
Suit Gills
Positive Positive
Temperature Reprieve
Positive Positive
Tidal Defense
Positive Positive
Titanium Generator
Positive Positive
Fast Urology
Negative Negative
Gelatinous Skin
Negative Negative
Hemophiliac
Negative Negative
Jellied Legs
Negative Negative
Maladapted
Negative Negative
Small Stomach
Negative Negative
So Hungry
Negative NegativeDrag the canvas to pan · Ctrl+scroll to zoom
Frequently Asked Questions
How many items are in Subnautica 2?
The Subnautica 2 database currently catalogs 224 items across 11 categories: Resources (35), Power (4), Consumables (17), Tools (16), Equipment (6), Base Building (98), Vehicles & Upgrades (10), Flora & Fauna (19), Salvage (4), Crafting Components (7), and Misc (8).
How many blueprints are available in Subnautica 2?
There are 244 blueprints across 5 crafting stations: Fabrication Station, Builder Tool, Modification Station, Processor, and Vehicle Fabricator. These range from basic material refining to advanced vehicle construction.
How many creatures are in Subnautica 2?
The database catalogs 70 creatures divided into Mobile Life (Cephalopods, Crustaceans, Fish, Jellies, Mangos, Molluscs, Salpapods) and Sessile Life (Coral, Kelp, Plants, Raions, Sponges, Starfish, Tunics, and more). This includes leviathans like the Collector Leviathan and Shiver Leviathan.
What are Biomods in Subnautica 2?
Biomods are genetic modifications that alter your physiology. There are 69 biomods across 4 types: Active (5 triggered abilities like Dash and Electric Discharge), Passive (10 always-on traits like Bioluminescence), Positive (47 legacy buffs), and Negative (7 legacy drawbacks). Some require a Bio Lab to craft.
What is the Tadpole vehicle in Subnautica 2?
The Tadpole is the core vehicular mobility suite with a base crush depth of 250m and 4 upgrade slots. It can be upgraded with Depth Modules Mk.1 (450m) and Mk.2 (800m), plus modules like Engine Efficiency, Strike Armor, Cavitation Muffler, Echo Location, and Photovoltaic Charger. Chassis options include the Scout Ray and Haul variants.