Everything is Crab Evolution Traits: S-Tier to F-Tier Ranked With Data
Tier list for all 70+ evolution traits tested across 40+ hours. 27 traits ranked with exact scaling tables. S-Tier includes Cheek Pouch, Trunk, Body Slam, Spines, Mass. F-Tier traps include Omnivore, Chonky, Hollow Bones. Cross-verified with in-game tooltips and Neoseeker data.
Table of Contents
- How This Tier List Was Built
- S-Tier: Build Defining Traits
- A-Tier: Strong Pickups in Any Build
- B-Tier: Situationally Good
- C-Tier: Filler You Take When Nothing Else Shows
- F-Tier: Traps That Waste Your Evolution Slot
- Tier List Quick Reference Table
- Affinity System Explained
- Everything is Crab Trait Rankings: What Actually Wins Runs
How This Tier List Was Built
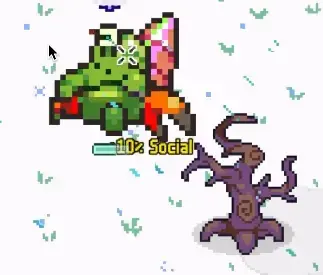
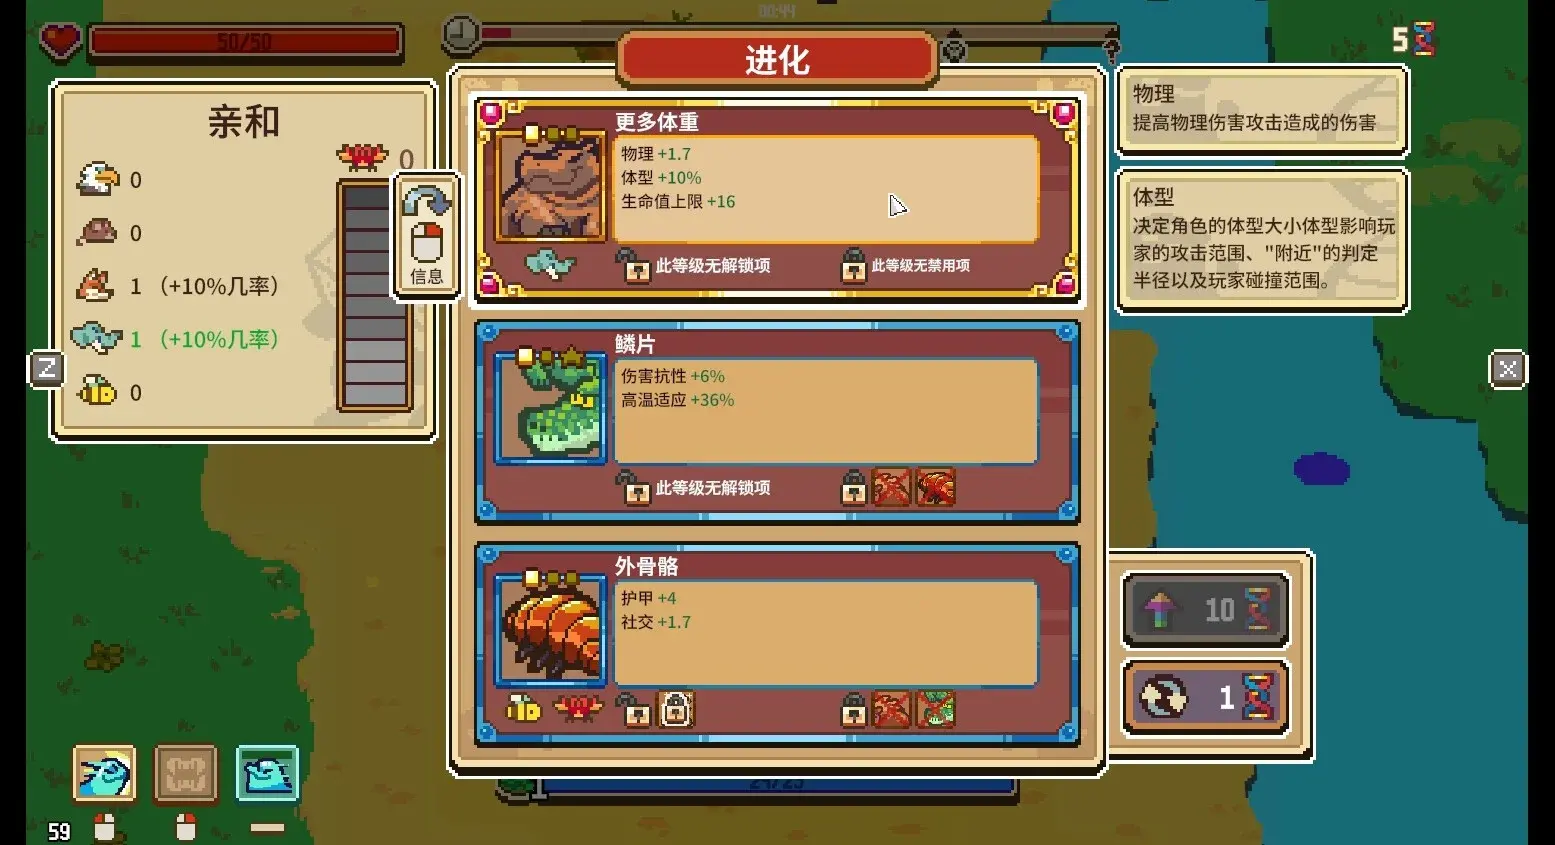
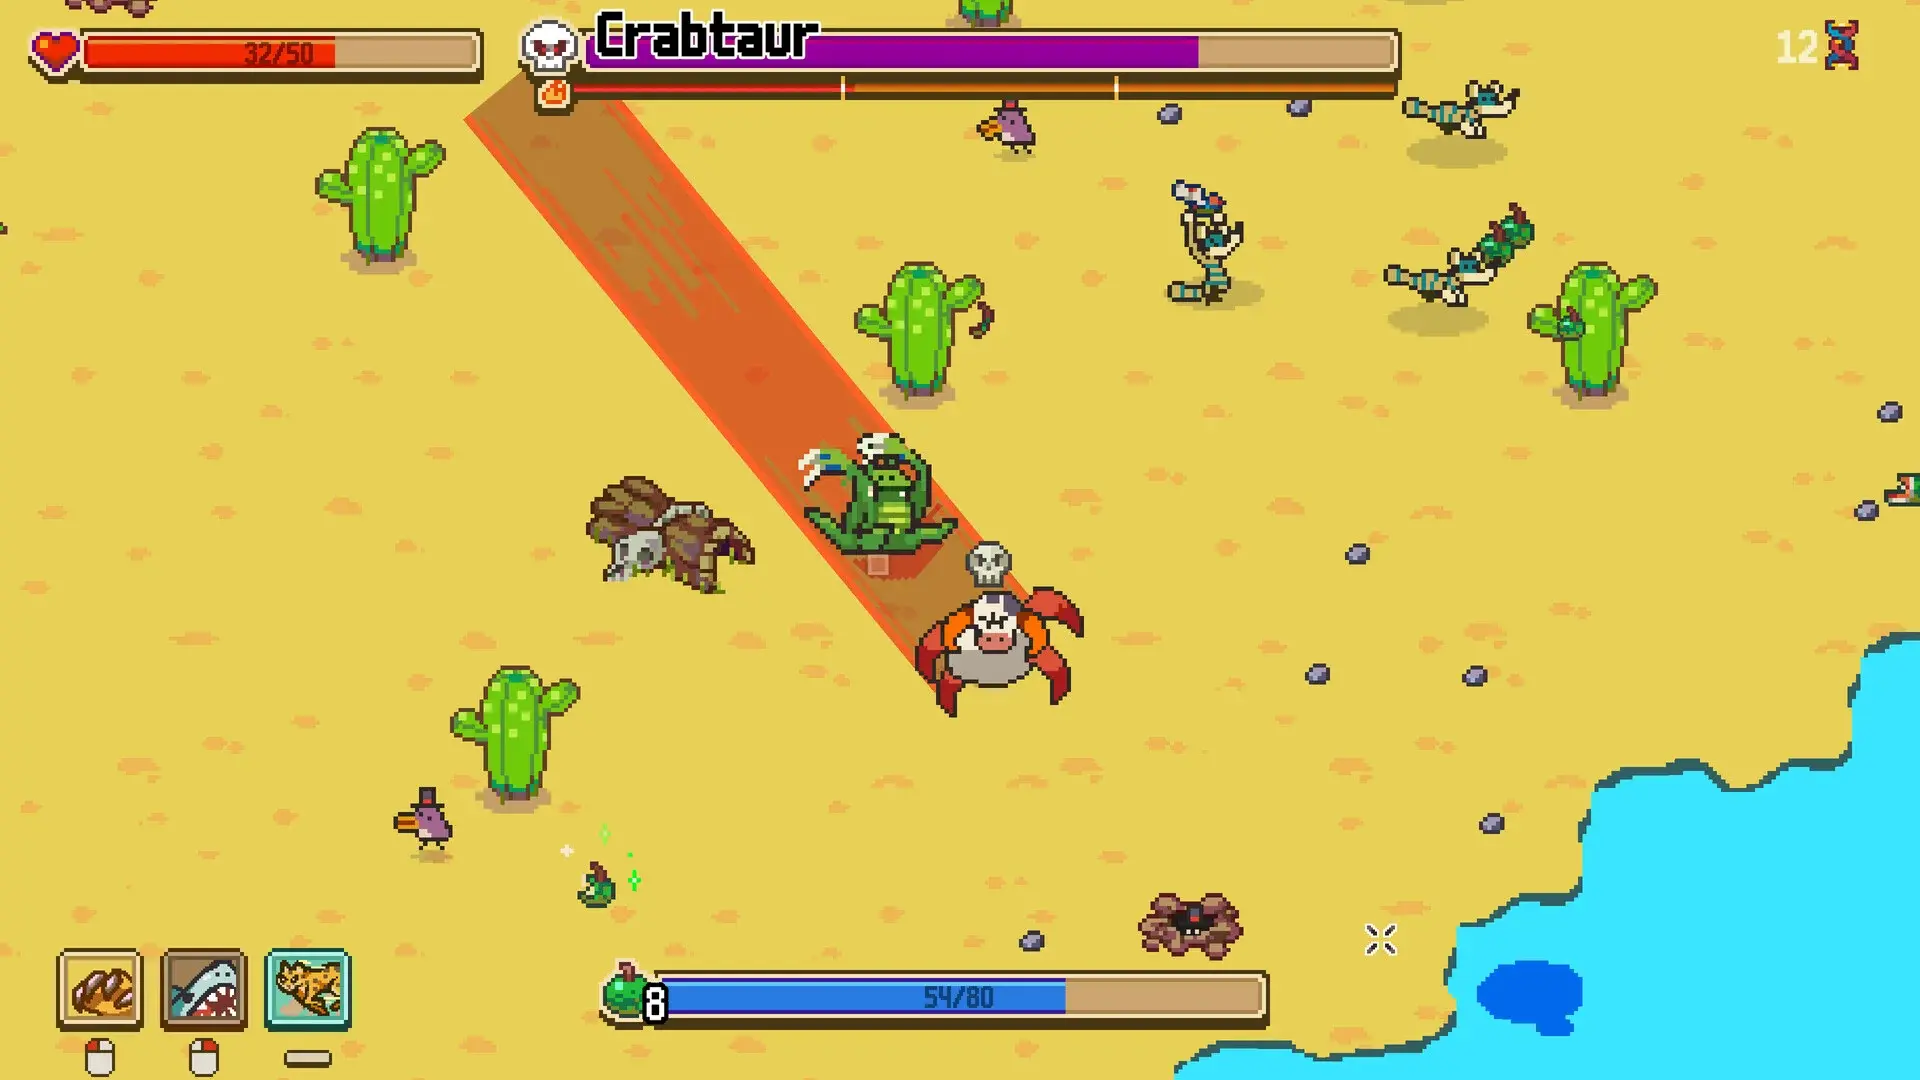 The evolution screen where you choose your next trait. Knowing which traits are worth your slot is the difference between winning and dying at the mid-boss.
I spent about 40 hours testing trait interactions across all 10 Pressure levels for this list. Every entry below is based on actual in-game performance, not just tooltip reading. I cross-verified the scaling numbers against Neoseeker’s data tables and the official wiki.
Tier criteria:
| Tier | Definition | How Many Runs Tested |
|---|---|---|
| S | Build-defining. Worth building your entire run around. | 15+ |
| A | Strong in most builds. Take when you see them. | 10+ |
| B | Good in the right build. Situational but valuable. | 8+ |
| C | Filler. You take them because you need the stat, not because you want the trait. | 5+ |
| F | Traps. Actively worse than not picking anything. | 5+ (died to confirm) |
The scaling tables below are from the game files. I confirmed random samples against in-game tooltips.
S-Tier: Build Defining Traits
These five traits define the Everything is Crab meta. If you see any of these in your first three picks, your build has a direction.
1. Cheek Pouch - The Single Best Early Pick
| Aspect | Details |
|---|---|
| Rarity | Rare |
| Affinities | Gregarious, Trickster |
| Max Level | 3 |
| Effect | Stores nearby food. Stored food is consumed passively at the same rate. |
I pick Cheek Pouch every time it appears in the first three evolutions. Every single time. After 40+ hours I have never regretted it.
Why it is S-Tier: Cheek Pouch solves the most common early death — dying while eating. Instead of standing still in a dangerous area to consume food, you pick it up and keep moving while your cheeks process it. On Pressure 8+, where health food heals less, this passive eating means you never have to choose between healing and positioning.
It has no meaningful downside. The only reason it is not picked 100% of the time is that sometimes you need an attack piece more urgently.
2. Mass - The Physical Build Enabler
| Level | Common | Rare | Epic | Legendary | Boss |
|---|---|---|---|---|---|
| Lv1 Physical | 0.5 | 0.6 | 0.7 | 0.9 | 1.2 |
| Lv2 Physical | 1 | 1.2 | 1.5 | 1.8 | 2.4 |
| Lv3 Physical | 1.5 | 1.8 | 2.2 | 2.7 | 3.6 |
Affinities: Imposing
Mass is the backbone of every physical build. It gives Physical damage, size, and HP all in one slot. For Body Slam Tank builds, Mass is the second-best early pick after Cheek Pouch because it feeds both your damage and your survivability at the same time.
The only downside: Mass increases your body size, which makes you an easier target in tight spaces. If you take Mass early without a movement piece, you will get stuck in corners. Take Legs or Sprint within two levels of picking Mass.
3. Trunk - Hybrid Damage With Free Food Utility
| Stat | Value |
|---|---|
| Damage | 1-1.4x Physical or Ability (uses the lower stat) |
| Cooldown | 1.5s |
| Feeding Distance | +0.66 |
| Rarity | Rare |
| Affinities | Imposing, Trickster |
Trunk’s damage uses your lower stat between Physical and Ability. This is both its strength and its weakness — it forces you to keep both stats balanced, which means you cannot ignore one damage type entirely. But a balanced Trunk build hits harder than a specialized build against general enemies because you never have a “dead” stat.
The feeding distance bonus (+0.66) is more useful than it looks on paper. It lets you eat from slightly further away, which means less time repositioning to reach food.
4. Body Slam - HP-Scaling Boss Killer
| Stat | Value |
|---|---|
| Damage | 1.2-1.4x Physical + 17% of Max HP |
| Cooldown | 1.25s |
| Type | Close-range Physical attack |
| Rarity | Rare |
| Affinities | Imposing, Predator |
Body Slam’s 17% Max HP scaling is the reason tank builds work. With 100 Max HP, Body Slam adds 17 flat damage before Physical multipliers. With 200 Max HP — achievable in most runs that hit Pressure 6+ — that is 34 bonus damage per slam.
The cooldown of 1.25s is fast enough that Body Slam replaces auto-attacks entirely in the late game. You press one button per swing and every swing hits like a truck.
The catch: Body Slam without HP behind it is a waste. I tested taking Body Slam at level 1 with base HP. It dealt about 30 damage. Not worth the slot. Wait until you have at least two HP pieces before committing.
5. Spines - The Enemy Kills Itself
| Level | Damage Returned |
|---|---|
| Lv1 | +50% |
| Lv2 | +90% |
| Lv3 | +130% |
| Lv4 | +180% |
| Lv5 | +230% |
Affinities: Imposing Rarity: Rare Max Level: 5
Spines at level 4 returns 180% of the damage you take on contact. On Pressure 10, where enemies hit harder, this means enemies effectively kill themselves faster. The reflect build (Spines + Poisonous + Detachable) is the only build that scales better with higher pressure because enemy damage feeds your reflect loop.
The catch: you need the HP to survive the contact in the first place. Spines without defense is suicide.
A-Tier: Strong Pickups in Any Build
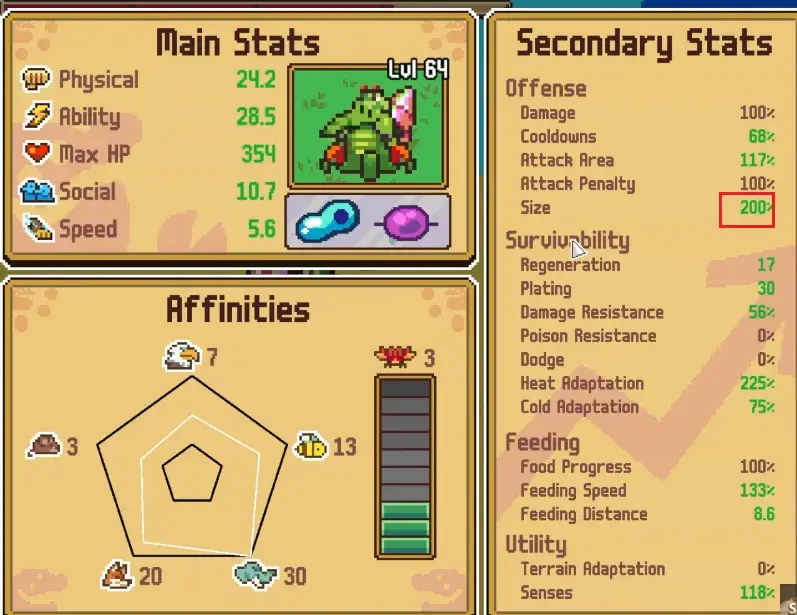 Massive size build with Alpha. Size increases your hitbox but also your damage and intimidation factor.
Alpha
| Level | Social | Size | Max HP (Boss) |
|---|---|---|---|
| Lv1 | 1 | 0.07 | 12 (Boss only) |
| Lv3 | 3.8 | 0.23 | 30 (Boss only) |
Rarity: Rare | Affinities: Gregarious, Imposing Max Level: 3
Alpha gives Social, Size, and — at Boss rarity — Max HP. It is a strong secondary pick for Body Slam and Social builds. The Social stat from Alpha benefits pack damage if you pivot into a Gregarious route.
Plating
Rarity: Rare | Affinities: Imposing Effect: Reduces close-range damage taken
Plating is the single best defensive pickup on Pressure 8+. It directly reduces the damage type that kills you most often on higher Pressure — getting swarmed by melee enemies. I take Plating over Shell on Pressure 10 because Plating reduces contact damage before it reaches your HP, which means Spines reflect calculations start from a lower base.
Shell
| Level | Damage Resistance |
|---|---|
| Lv1 | 15% |
| Lv3 | 35% |
Rarity: Rare | Affinities: Carcinisation, Imposing Max Level: 3
Shell provides percentage-based damage resistance. At level 3, it reduces all incoming damage by 35%. This is excellent on any build that expects to take hits — which is every build on Pressure 8+.
The difference between Shell and Plating: Shell is percentage-based and works against all damage types. Plating is fixed reduction and works best against melee. Run both if you can afford the slots.
Max HP
Rarity: Rare | Affinities: Imposing Effect: Increases maximum HP
Simple. Direct. Essential for every Pressure 6+ run. Every 10 points of Max HP is one extra hit you can take. For Body Slam builds, every 10 HP is also 1.7 extra damage per slam.
Revenge
| Level | Duration |
|---|---|
| Lv1 | 3s |
| Lv3 | 6s |
Rarity: Rare | Affinities: Imposing, Predator Effect: Temporarily raises Physical and Ability after taking damage.
Revenge rewards you for surviving hits. At level 3, a 6-second damage boost after every hit translates to significant DPS increases, especially in boss fights where you are taking damage constantly. I rate it A-Tier instead of S-Tier because it does nothing if you are not getting hit — speed runners or dodge specialists get zero value.
Subcutaneous Fat
| Level | Damage Resistance | Cold Adaptation |
|---|---|---|
| Lv1 | 5% | 0.33 |
| Lv3 | 15% | 1.0 |
Rarity: Rare | Affinities: Imposing Max Level: 3
Subcutaneous Fat gives both damage resistance and cold adaptation in one slot. On cold biome starts (Pressure 6+ random biomes), this trait is worth its weight in gold because cold damage will rapidly drain your HP without any adaptation.
B-Tier: Situationally Good
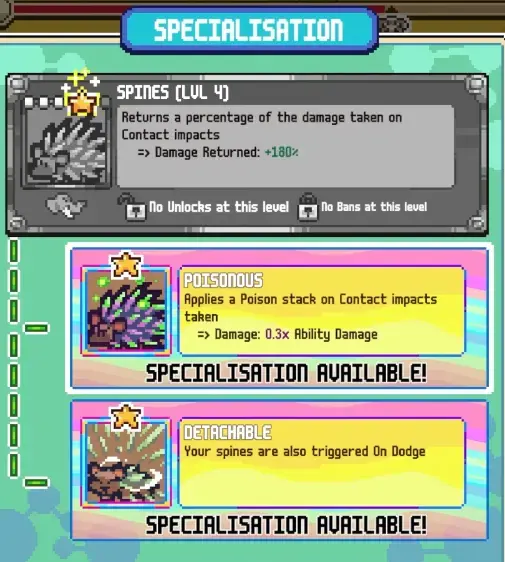 Spines and Poisonous in a reflect setup. B-Tier alone, S-Tier when combined correctly.
Agile
| Level | Dodge Chance |
|---|---|
| Lv1 | 5% |
| Lv5 | 15% |
Rarity: Common | Affinities: Prey Max Level: 5
Agile gives a percentage dodge chance. At level 5, 15% dodge means roughly 1 in 7 attacks does nothing. The problem: 15% is not reliable enough to build around. It is a nice bonus on an existing build but not a reason to pick Agile over Mass or Max HP.
Carnivore
| Level | Meat Progress Increase |
|---|---|
| Lv1 | 25% |
| Lv5 | 75% |
Rarity: Rare | Affinities: Predator Max Level: 5
Carnivore works if you are in a meat-rich biome. It does nothing in areas with mostly plants or fungi. Since you cannot control biome start (especially on Pressure 6+), Carnivore is too inconsistent for higher tiers.
Detachable Tail
Rarity: Rare | Affinities: Prey Effect: Spines trigger on dodge
B-Tier alone because it does nothing without Spines. S-Tier within a Spines build. The combination of Spines + Detachable turns your dodge into an offensive tool, which is the difference between a good reflect build and a great one.
Nocturnal / Diurnal
| Trait | Effect |
|---|---|
| Nocturnal | +damage at night, +Senses |
| Diurnal | +damage during day |
Rarity: Rare | Max Level: 3
These are free damage if you time your fights to match the cycle. The problem: Pressure 8+ environmental events can force you into fights at the wrong time of day. Both traits lose value when you cannot control engagement timing.
Prehensile Tail
| Level | Feeding Distance |
|---|---|
| Lv1 | +0.4 |
| Lv3 | +0.8 |
Rarity: Common | Affinities: Prey Max Level: 3
Increases feeding range. Useful but Trunk does the same thing better (feeding distance + damage). Pick Prehensile Tail only if Trunk is not available and you need the range.
Pack
| Level | Damage per Charmed Ally |
|---|---|
| Lv1 | +10% |
| Lv3 | +25% |
Rarity: Rare | Affinities: Gregarious Max Level: 3
Pack’s damage bonus scales with how many charmed allies you maintain. At level 3 with 3 charms active, that is +75% damage. But the condition is the problem — charms die fast on Pressure 6+, and maintaining 3+ charms through a boss fight is unreliable.
Toe Beans
Rarity: Rare | Affinities: Gregarious Type: Attack with charm chance
The attack is mediocre, but the charm proc on hit is valuable for Social builds. B-Tier alone. A-Tier in Social Pack builds.
C-Tier: Filler You Take When Nothing Else Shows
Arms
| Level | Physical Damage |
|---|---|
| Lv1 | 0.5 |
| Lv5 | 2.5 |
Rarity: Common | Affinities: Predator Max Level: 5
Arms gives Physical damage. That is it. No secondary effect, no synergy. It is fine filler when you need to pad your Physical stat, but you should never pick Arms over Mass, Trunk, or Cheek Pouch.
Dexterous
| Level | Attack Speed |
|---|---|
| Lv1 | 3% |
| Lv5 | 15% |
Rarity: Common | Affinities: Prey Max Level: 5
15% attack speed at level 5 sounds good until you realize most of your damage comes from abilities, not basic attacks. Dexterous buffs auto-attacks almost exclusively. It has a minor synergy with Spur (auto-trigger attack) but even then, the damage increase is modest.
Fur
| Level | Cold Adaptation |
|---|---|
| Lv1 | 0.15 |
| Lv5 | 0.75 |
Rarity: Common | Affinities: Prey Max Level: 5
Fur is a dedicated cold adaptation piece. If you start in a cold biome, it is a life-saver. If you start anywhere else, it is a wasted slot. Subcutaneous Fat is strictly better because it also gives damage resistance.
Legs
| Level | Speed |
|---|---|
| Lv1 | 0.1 |
| Lv5 | 0.5 |
Rarity: Common | Affinities: Prey Max Level: 5
Legs gives speed. Speed is essential for positioning. But Sprint gives more speed per level with fewer investment points. Take Legs if Sprint is not available and you need mobility, which is often.
Sprint
| Level | Speed |
|---|---|
| Lv1 | 0.15 |
| Lv3 | 0.45 |
Rarity: Common | Affinities: Predator Max Level: 3
Sprint gives more speed per level than Legs but caps at level 3 instead of 5. At max level, Sprint gives 0.45 speed to Legs’ 0.5. Unless you are going deep into a speed-focused build, Sprint is the better pick because it frees up levels for other traits.
Synapse
| Level | Cooldown Reduction |
|---|---|
| Lv1 | 5% |
| Lv3 | 15% |
Rarity: Rare | Affinities: Trickster Max Level: 3
15% cooldown reduction at level 3 benefits every build. It just does not benefit any build enough to be higher than C-Tier. It is a nice-to-have, not a build-around.
Herbivore / Piscivore / Omnivore
| Trait | Effect |
|---|---|
| Herbivore | +plant food progress |
| Piscivore | +fish food progress |
| Omnivore | +all food progress |
Rarity: Common to Rare
These all do the same thing: increase food progress for specific food types. Herbivore and Piscivore are at least conditional — they work well in the right biome. Omnivore is the weakest because the progress increase is diluted across all food types and in practice you barely notice the difference.
F-Tier: Traps That Waste Your Evolution Slot
Hollow Bones
| Level | Speed | Damage Resistance Penalty |
|---|---|---|
| Lv1 | +0.15 | -5% |
| Lv5 | +0.75 | -20% |
Rarity: Common | Affinities: Prey Max Level: 5
Hollow Bones gives speed at the cost of damage resistance. At level 5, you lose 20% damage resistance for 0.75 speed. On Pressure 6+, this trade-off is actively harmful. You will die faster than the speed can save you. I tested Hollow Bones on Pressure 6. I died on Pressure 6. Do not pick this.
Chonky
| Level | Size | Physical |
|---|---|---|
| Lv1 | +0.08 | 0.3 |
| Lv3 | +0.24 | 0.9 |
Rarity: Common | Affinities: Imposing Max Level: 3
Chonky looks good on paper — Size and Physical in one slot. The problem: Chonky’s size increase is mostly cosmetic. Mass gives significantly more Physical damage per level. Compare Mass level 3: 1.5-3.6 Physical (depending on rarity) versus Chonky level 3: 0.9 Physical. Mass does not even cost a Common rarity slot. Chonky is a noob trap.
Overwhelm
| Level | Bonus Damage per Active Plating |
|---|---|
| Lv1 | +10% |
| Lv3 | +25% |
Rarity: Rare | Affinities: Imposing Max Level: 3
Overwhelm’s damage bonus depends on having Plating active. Without Plating, it does nothing. Even with Plating, the bonus is conditional and the base stat contribution is zero. Take Revenge instead — it gives a broader damage boost without the Plating requirement.
Carnivore (on wrong biome)
Already listed as B-Tier above, but worth repeating: Carnivore on a plant-heavy biome is a dead slot. The game does not tell you biome composition before you pick.
Tier List Quick Reference Table
 Specialisation choices in Everything is Crab. Knowing which traits are traps saves you wasted slots.
| Trait | Tier | Rarity | Best Used In |
|---|---|---|---|
| Cheek Pouch | S | Rare | Every build |
| Mass | S | Rare | Physical / Body Slam |
| Trunk | S | Rare | Hybrid / Any |
| Body Slam | S | Rare | Tank builds |
| Spines | S | Rare | Reflect / Contact |
| Plating | A | Rare | Every build (Pressure 6+) |
| Shell | A | Rare | Every tank build |
| Alpha | A | Rare | Social / Physical |
| Max HP | A | Rare | Every build |
| Revenge | A | Rare | Tank / Bruiser |
| Subcutaneous Fat | A | Rare | Cold biome + tank |
| Agile | B | Common | Dodge builds |
| Carnivore | B | Rare | Meat biomes |
| Detachable | B | Rare | Spines builds |
| Toe Beans | B | Rare | Social builds |
| Pack | B | Rare | Social builds |
| Legs | C | Common | Movement filler |
| Sprint | C | Common | Movement filler |
| Synapse | C | Rare | Cooldown filler |
| Arms | C | Common | Physical filler |
| Fur | C | Common | Cold biome |
| Herbivore | C | Common | Plant biome |
| Hollow Bones | F | Common | Never |
| Chonky | F | Common | Never |
| Overwhelm | F | Rare | Not without Plating |
Affinity System Explained
 Each biome has different food sources and environmental hazards. Your trait affinities determine which evolution paths are available.
There are five affinity types:
| Affinity | Theme | Core Traits |
|---|---|---|
| Gregarious | Social, pack, charm | Cheek Pouch, Alpha, Tail Wag, Pack, Antennae |
| Imposing | Bulk, tank, physical | Mass, Plating, Shell, Body Slam, Spines, Alpha |
| Predator | Aggression, attack | Arms, Sprint, Carnivore, Claws, Jaws, Horns |
| Prey | Speed, evasion, survival | Legs, Agile, Fur, Hollow Bones, Prehensile Tail |
| Trickster | Poison, cooldown, utility | Cheek Pouch, Synapse, Poisonous, Stinger |
How affinities affect your run:
Each trait you pick increases affinity points for its associated types. When an affinity reaches certain thresholds, it unlocks or blocks trait groups:
- Unlocking: Picking 3+ traits from one affinity unlocks that affinity’s specialisations (e.g., 3 Imposing traits unlock Carcinisation-related options).
- Blocking: Some affinities are mutually exclusive. Taking Predator traits may reduce your chance of seeing Prey trait options.
- Carcinisation: The game’s namesake mechanic. Picking enough Imposing and Carcinisation-affinity traits triggers the “going full crab” evolution path, which replaces standard trait choices with crab-specific options. This is not always beneficial — crab traits are powerful but narrow.
Practical advice: Do not force an affinity. Let the run’s drops guide your affinity choices. If you see three good Imposing traits in a row, build Imposing. If the game offers Trickster pieces, lean into Trickster. Forcing Predator when the game is handing you Gregarious pieces is how runs die.
Environmental adaptation traits like Fur and Subcutaneous Fat matter more when Pressure 6+ randomizes your starting biome.
Everything is Crab Trait Rankings: What Actually Wins Runs
After 40+ hours, here is what I know for certain:
The S-Tier traits (Cheek Pouch, Mass, Trunk, Body Slam, Spines) are not theoretical. They are the five traits I see in every successful Pressure 10 run. Not all five in the same run, but at least two or three of them every single time.
The F-Tier traits (Hollow Bones, Chonky, Overwhelm) are not “bad but usable.” They actively cost you the run. Hollow Bones’ resistance penalty killed me within two biomes both times I tested it on Pressure 6. Chonky’s stat efficiency is so poor you are better off picking nothing and waiting for the next roll.
The trap of C-Tier filler: You only have 15-20 evolution slots in a standard run (before Endless mode). Every C-tier pick is a slot you did not spend on an S-Tier or A-Tier piece. Do not fill slots just because you can. Skip a level if the offered traits are all C-tier or below. The next roll will be better.
Affinity planning is the difference between intermediate and advanced play. Beginners ignore affinities and still clear normal. Intermediate players track affinities and clear Pressure 5-7. Advanced players plan their affinity route from the first pick and clear Pressure 10 consistently.
If you take one thing from this list: always pick Cheek Pouch first if it appears. It is not close.
Frequently Asked Questions
What are the best evolution traits in Everything is Crab?
Cheek Pouch is the single best early trait because it stores food and lets you level while moving. Mass and Trunk are S-Tier build enablers. Body Slam turns HP into boss-killing damage. Spines at level 4 returns 180% of contact damage. These five traits define the strongest builds in the current meta.
What is the worst evolution trait in Everything is Crab?
Hollow Bones is the biggest trap — it raises Speed but drops damage resistance, and on Pressure 6+ that trade-off gets you killed before the speed matters. Chonky is deceptive because it increases Size and Physical but the size increase can slow you down more than the Physical gain helps early. Omnivore has no meaningful combat impact.
How do rarity tiers work for evolution traits?
Traits come in Common, Rare, Epic, Legendary, and Boss rarity. Higher rarity means stronger per-level scaling — for example, Feeding Speed at level 5 goes from 0.75 (Common) to 1.2 (Legendary). Boss traits have no feeding speed but offer unique effects. Reroll materials from bosses and alpha enemies can improve the rarity pool.
What are evolution affinities and how do they matter?
There are five affinities: Gregarious, Imposing, Predator, Prey, and Trickster. Affinities unlock or block certain trait groups. For example, taking Predator traits may lock you out of Prey trait options. Some builds require specific affinity combos — Body Slam Tank wants Imposing, Social Pack wants Gregarious.
Which traits should I prioritize for a Pressure 10 clear?
Cheek Pouch, Mass, Max HP, Plating, Body Slam, and one movement option. These six form the safest Pressure 10 core. Avoid Hollow Bones, Chonky, and Omnivore. If you see Spines with a defensive foundation, reflect builds actually get stronger on higher Pressure because enemies hit themselves harder.
About the author
Editor-in-Chief
Founder and Editor-in-Chief of gameguidesbox.com, began surfing the web in the late 19th century. Passionate about movies, coffee, gaming, and life itself. Favorite games include Titanfall 2, Baldur's Gate 3, Metro, PUBG, and CS2.
You may also like
Everything is Crab Pressure 10 Builds: 3 Routes That Actually Clear
Stuck on Pressure 10? Tested all major builds across 15 runs. Body Slam Tank cleared 6/6. Trunk Hybrid cleared 5/6. Spines Reflect needs specific pieces. Exact evolution timing, genetics picks, and what kills each build inside.
SpiritVale Beginner's Guide: 7 Classes, Gear Refining & Economy Basics
No tutorial, no quests, no hand-holding. SpiritVale drops you into Nevaris with nothing. Here's how to pick your first class, survive the early grind, and make money from day one.
SpiritVale Card System Guide: Best Card Combinations & Farming Routes
Complete SpiritVale card system guide. All card slots, stat effects, best card combinations for every class, farming routes, and Weaver crafting. Updated for EA v0.30.0.
Comments