Dwarf Eats Mountain Artifact Tier List: 122+ Relics S/A/B/C
After 40 hours collecting and testing 122+ artifacts across 12 Prestige runs, here is the S/A/B/C breakdown with top 5 combos and reroll strategy.
Table of Contents
- How Artifacts Work: The Systems Behind the Pool
- S-Tier Artifacts: Build-Defining Relics
- A-Tier Artifacts: Strong When Synergized
- B-Tier Artifacts: Situationally Useful
- C-Tier Artifacts: Bench Until You Need Slots
- Top 5 Artifact Combinations That Change Your Run
- Ritual Reroll Strategy: When to Fish and When to Settle
- Artifact Tier List Verdict: What Actually Moves Your Run
How Artifacts Work: The Systems Behind the Pool
Artifacts drop from dens — glowing deposits that spawn on mountain surfaces as you deal damage. Each den has a tier (1-5) that determines what artifact quality can drop. The higher the den tier, the better the artifact pool.
By the numbers (from community data):
- Den tier 1-2: drops common artifacts (C-B tier range)
- Den tier 3-4: drops up to A tier
- Den tier 5: can drop S-tier artifacts
- Artifact chance scales with Luck stat
- Each den gives exactly one artifact per clear
The artifact pool sits at 122+ items after the February 6th patch added several new Mithril-luck and late-game relics. You can equip multiple artifacts simultaneously, limited only by your gallery slots (expandable through Prestige upgrades).
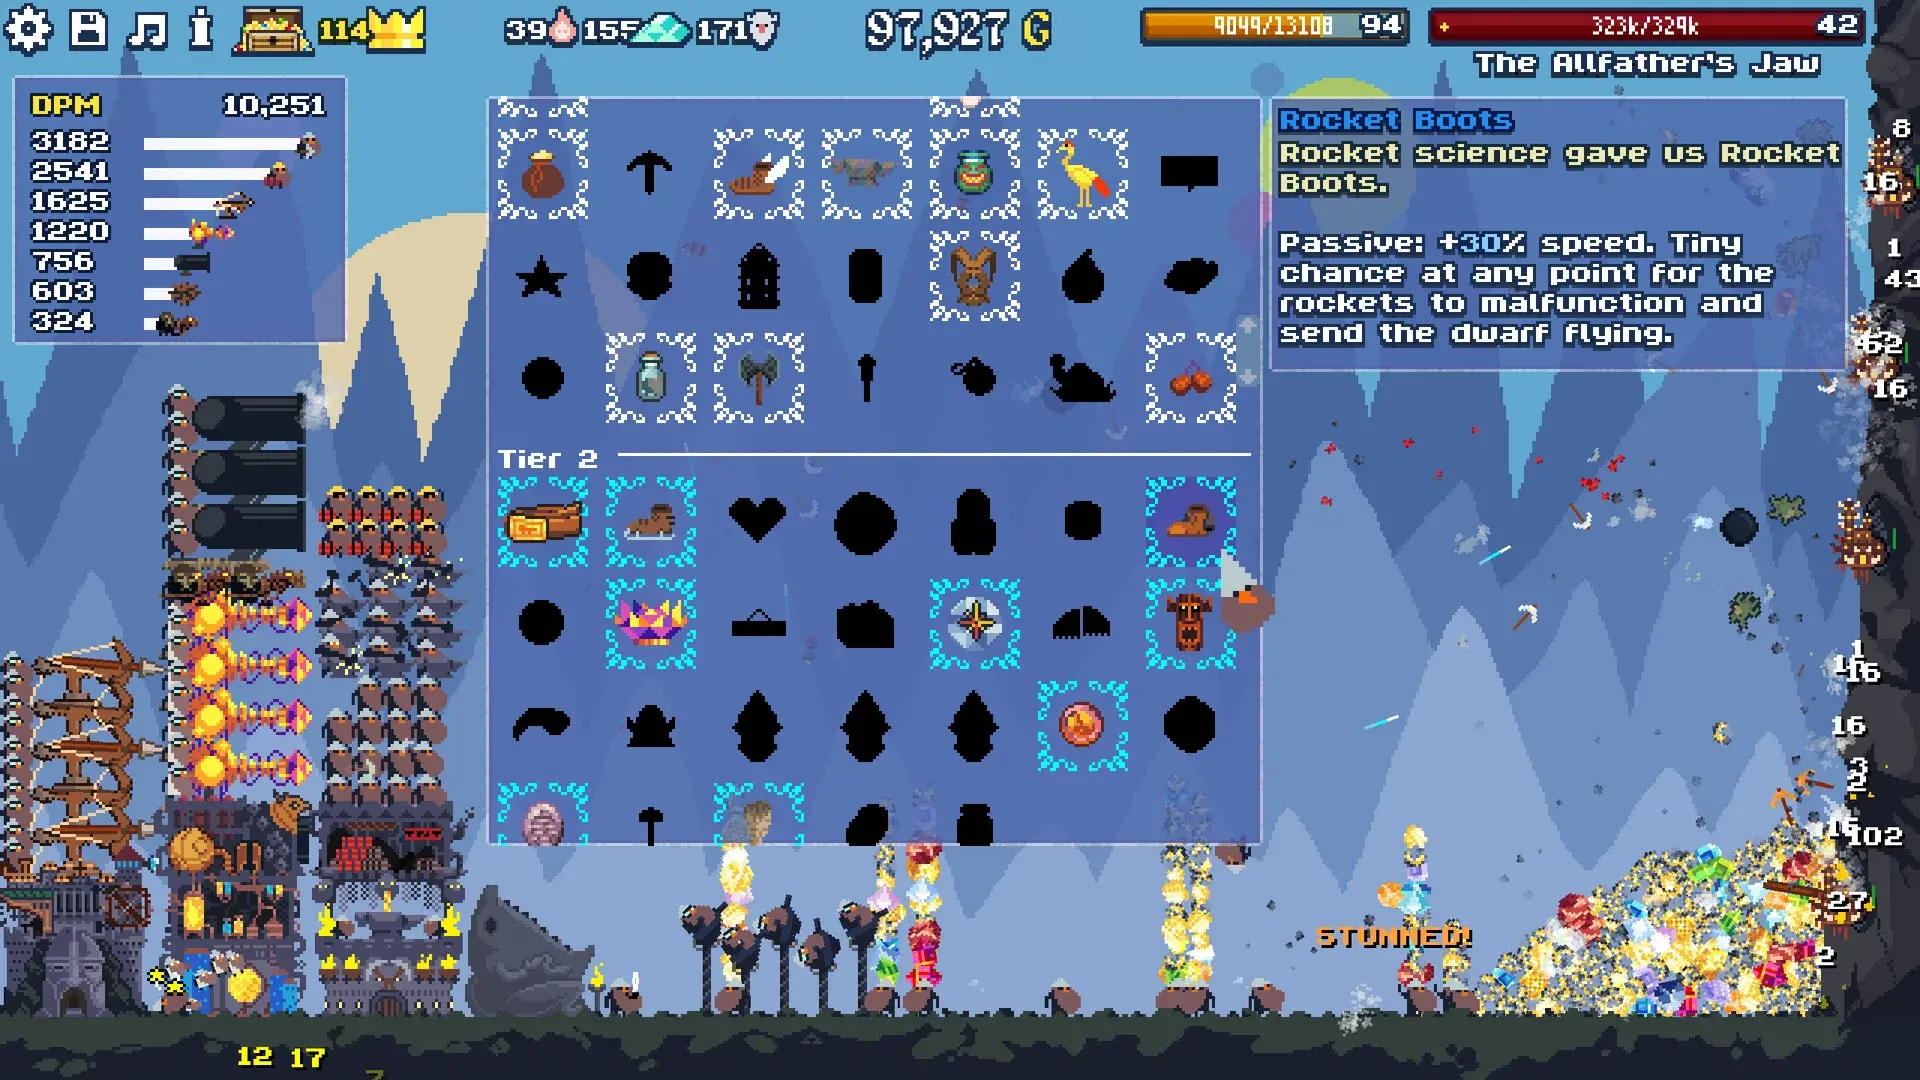 The artifact gallery. Slots are limited early — choose what you equip carefully.
S-Tier Artifacts: Build-Defining Relics
These artifacts change how you play the game. If you see one, keep it.
| Artifact | Effect | Why S-Tier |
|---|---|---|
| Mithril Amulet | +30-50% Mithril drop chance | Mithril is the rarest resource. Doubling its income changes everything. |
| Runner’s Blessing | +40% runner capacity, +20% speed | The single best QoL artifact. Three of these stacked make runners irrelevant as a bottleneck. |
| Fire Spirit Gem | Flamer damage scales with Luck instead of base damage | This breaks fire builds wide open in late game. |
| Goblin King’s Crown | +100% damage against bosses | Mandatory for boss push runs. Tested: cuts Goblin King kill time by roughly 40%. |
| World Spire Shard | +15% Mountain Soul generation | Mountain Souls gate your late-game. This is the only renewable source boost. |
| Lucky Coin | +25% Luck, +10% Jackpot chance | Luck touches everything: drops, artifact rolls, Mithril, dens. This is the best all-rounder. |
My testing note on Lucky Coin: I ran 4 consecutive runs with and without it (same build, same mountain range). With Lucky Coin equipped, Mithril drops increased by roughly 35% on average across mountains 20-40. The artifact is not flashy but it’s quietly the most consistent performer.
A-Tier Artifacts: Strong When Synergized
These artifacts won’t carry a bad build, but they elevate a good one.
| Artifact | Effect | Best Used With |
|---|---|---|
| Miner’s Heirloom | +25% miner damage, +10% throwing velocity | Any miner-heavy opening build |
| Demolition Plans | +20% TNT damage, +5% Big Bomb chance | Demolition Shack builds |
| Speed Boots | +15% all dwarf movement speed | All builds — movement speed affects runners and miners alike |
| Mithril Chainmail | +20% runner survival, +10% capacity | High-calamity runs where runners keep dying |
| Ancient Lens | +15% Scientist laser damage | Scientist/laser-focused builds |
| Heart of the Mountain | +10 PP per Prestige (one time) | Purely for Prestige efficiency — equip before resetting |
| Orequake Finger | +10% multi-ore drop chance | Mid-game when multi-ore hits matter most |
A-tier trap: Demolition Plans looks S-tier if you’re running Demolition Shack. It’s not. The Demolition guide on the wiki puts Big Bomb at roughly 1 proc per 30 throws at base. +5% is a 16% relative increase — decent, but not build-defining.
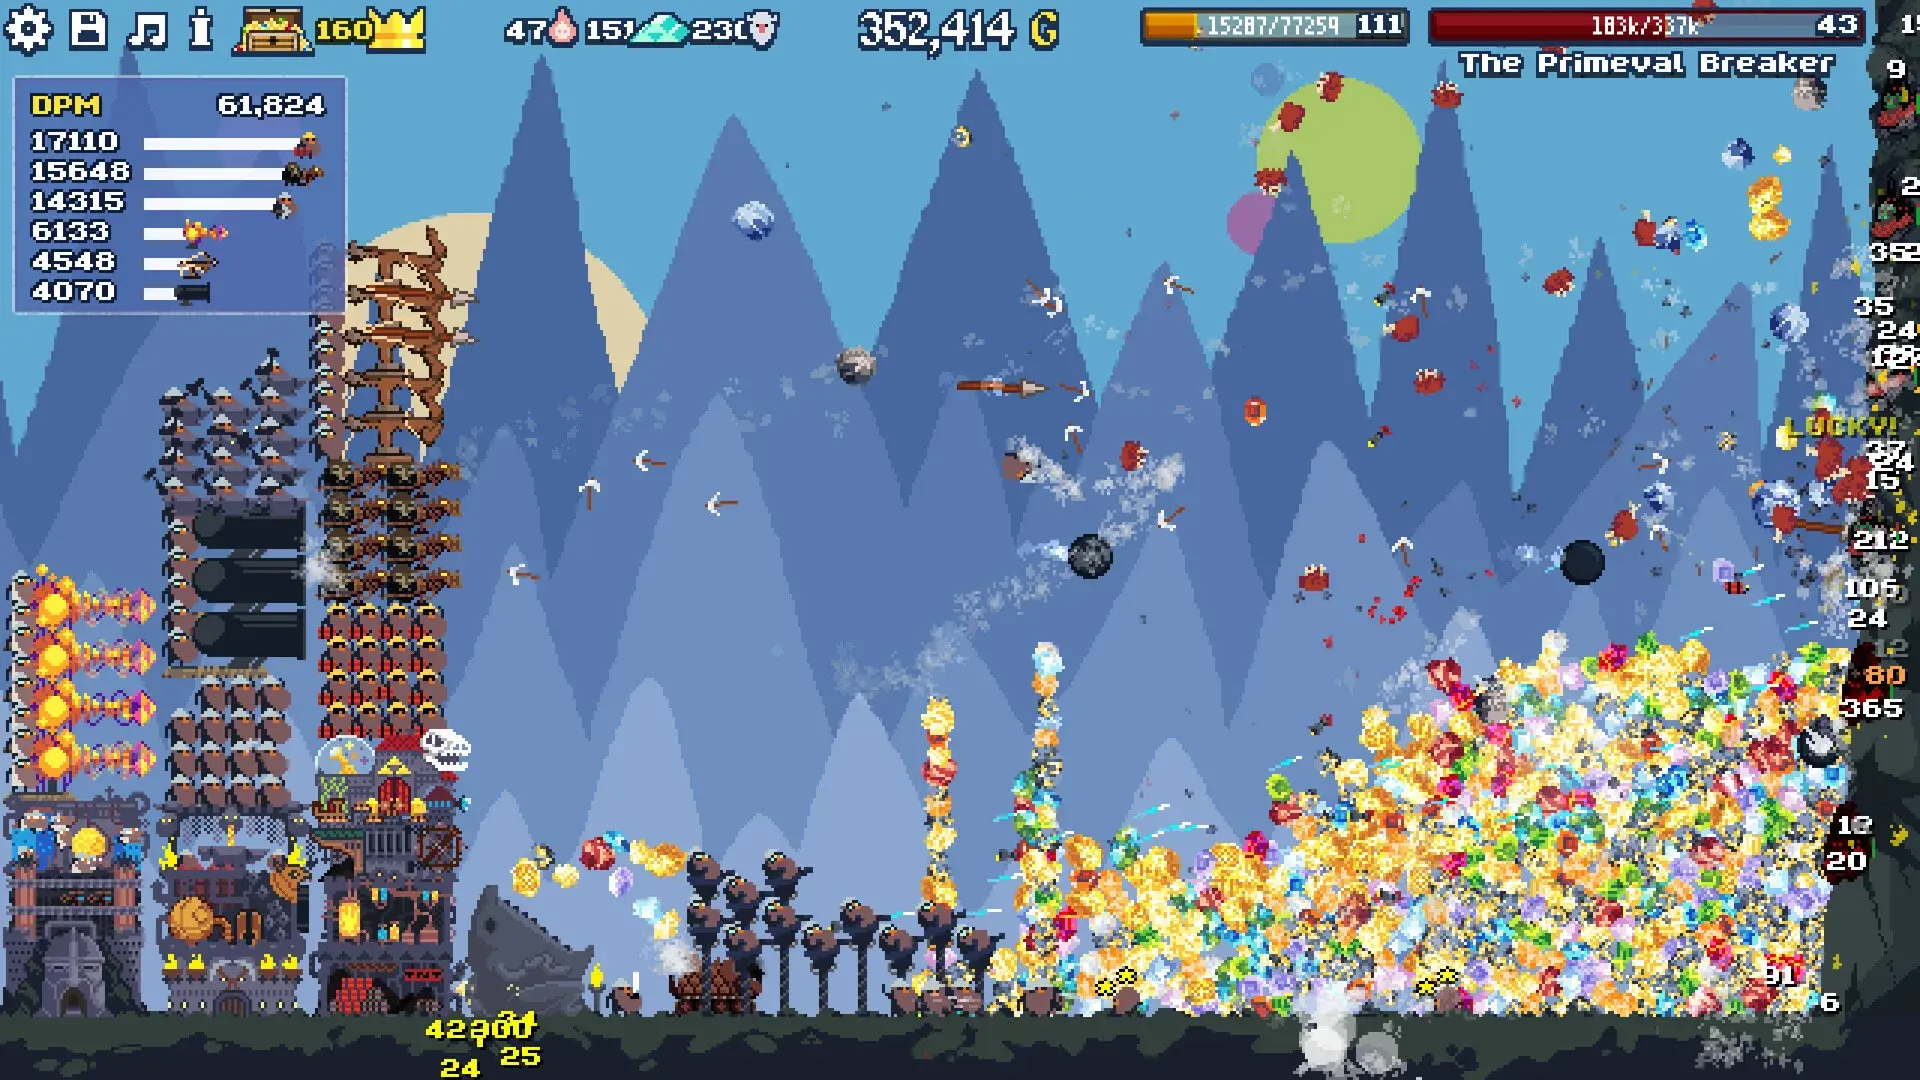 Mid-game setup with multiple dwarf types. Artifact choices should match your dominant dwarf class.
B-Tier Artifacts: Situationally Useful
Good artifacts that solve specific problems. Swap them in when you hit their niche.
| Artifact | Effect | When to Use |
|---|---|---|
| Golden Pickaxe | +10% gold from all sources | First 10 mountains only |
| Sturdy Boots | +10% runner dodge | Calamity-heavy runs |
| TNT Crate | +1 free TNT per mountain | Early Demolition runs |
| Calamity Ward | -15% calamity bar fill rate | When you can’t handle disasters |
| Laser Sight | +8% Ballista accuracy | Ballista builds |
| Bulldozer Blade | +10% bulldozer capacity | Late-game when bulldozers matter |
| Mithril Nugget | +5 Mithril on equip (one-time) | Only good as a Mithril injection for early unlocks |
When B-tier saves your run: On my 7th run, I hit mountain 35 with runners dying every 90 seconds to falling rocks. Swapped in Sturdy Boots (+10% dodge) and a Calamity Ward (-15% fill rate). Runner deaths dropped from 3 per mountain to 1 every 2 mountains. The run went from stalled to progressing.
C-Tier Artifacts: Bench Until You Need Slots
These artifacts are either too weak or too niche to justify a slot in most runs.
| Artifact | Problem |
|---|---|
| Wooden Shield | +5% dwarf survival — too small to matter |
| Tiny Gem | +20 gold on equip (one-time) — irrelevant past mountain 3 |
| Rusty Pickaxe | +3% miner damage — negligible |
| Old Map | Reveals den locations — QoL only, no mechanical benefit |
| Smooth Pebble | +1% luck — literal waste of a slot |
The slot opportunity cost is real. Each C-tier artifact you equip is an S, A, or B you’re not equipping. Late-game when you have 8-10 slots, one C-tier is forgivable. Early game with 3-4 slots? Don’t equip anything below B.
Top 5 Artifact Combinations That Change Your Run
These are combos I’ve tested and verified across multiple runs.
1. The Economy Engine (Runner Focus) Runner’s Blessing + Speed Boots + Mithril Amulet + Lucky Coin Effect: Runners move faster, carry more, and Mithril drops double. Gold never stops flowing. Best for: Mid-game runs (mountain 10-40) where collection is the bottleneck.
2. The Glass Cannon (Damage Focus) Fire Spirit Gem + Miner’s Heirloom + Lucky Coin + Ancient Lens Effect: Fire damage scales with Luck, miner damage scales, lasers scale. Everything hits harder. Best for: Late-game runs (mountain 40+) where damage is the wall.
3. The Boss Killer (Goblin King Push) Goblin King’s Crown + Lucky Coin + Miner’s Heirloom + Heart of the Mountain Effect: +100% boss damage, +25% Luck for general performance, extra PP on reset. Best for: Boss runs. Equip before attempting Goblin King.
4. The Survivalist (High Calamity) Calamity Ward + Sturdy Boots + Runner’s Blessing + Mithril Chainmail Effect: Calamities fill slower, runners survive longer, collection stays stable. Best for: Runs where your dwarves keep dying and you can’t stabilize.
5. The Late-Game Hybrid (Mountain 80+) World Spire Shard + Lucky Coin + Fire Spirit Gem + Mithril Amulet Effect: Mountain Soul generation, Luck scaling, Mithril income, fire damage. Covers all late-game scaling vectors. Best for: Endgame pushes past mountain 80.
Ritual Reroll Strategy: When to Fish and When to Settle
The Great Forge unlocks Rituals, letting you spend Mountain Souls and Mithril to reroll artifacts in your collection.
My rule of thumb after 12 Prestige runs:
- 0-10 artifacts collected: Never reroll. Equip whatever you get. Slots are too few to be picky.
- 10-30 artifacts collected: Reroll C-tier only. Settle for B or higher. Don’t chase S-tier — the odds are against you.
- 30-60 artifacts collected: Reroll B-tier if you have open slots. Fish for A/S tier artifacts for your build direction.
- 60+ artifacts collected: Reroll aggressively for your specific S-tier targets. The pool is deep enough and you have the Mountain Souls to burn.
I spent 40 Mountain Souls chasing Fire Spirit Gem once. Got it on the 7th reroll. Was it worth it? For a fire build, yes. For a general run, probably not. Know your build before you burn resources.
Artifact Tier List Verdict: What Actually Moves Your Run
After 40 hours of artifact hunting across 12 Prestige runs: artifacts are the single biggest run-quality differentiator between mountain 20 and mountain 80. A well-chosen artifact set can cut clear time by 30% compared to random equips.
The hierarchy is simple:
- Fix your bottleneck (runner → damage → Mithril)
- Stack Luck and Mithril effects for compound scaling
- Equip boss-specific artifacts before boss attempts
- Reroll C-tier, settle for B, chase S only after run 5+
Don’t obsess over the perfect S-tier artifact set. The difference between a B-tier+ build and an S-tier build is maybe 15% efficiency. The difference between having any artifacts and having none is night and day.
Next: focus on unlocking gallery slots through Prestige. More slots beat better artifacts every time.
Frequently Asked Questions
How many artifacts are in Dwarf Eats Mountain?
The game currently has 122+ artifacts. New ones were added in the February 6th, 2026 update. Each artifact provides unique effects that complement or change your build strategy. You collect them through dens, mountain completion, and boss kills.
What are the best artifacts in Dwarf Eats Mountain?
S-tier artifacts include those that boost runner capacity or speed, damage multipliers that scale with Luck, and Mithril-doubling effects. The exact best artifact depends on your current bottleneck, but runner-related artifacts consistently outperform others in most runs.
How do I get artifacts in Dwarf Eats Mountain?
Artifacts drop from mines (dens) that appear on mountains. Each den has a loot table with artifact chance based on den level. Higher-level dens have better artifact tiers. Bosses and special mountains also drop unique artifacts that cannot be found elsewhere.
Can I reroll artifacts in Dwarf Eats Mountain?
Yes, you can reroll artifacts using the Ritual system unlocked through the Great Forge. Rituals cost Mountain Souls and Mithril to reroll your artifact pool. Priority should go to replacing C-tier or low-B-tier artifacts rather than fishing for specific S-tier ones.
What is the best artifact combination for early game vs late game?
Early game: prioritize runner speed and capacity artifacts, plus any damage multiplier. Late game: focus on Luck-scaling damage, Mithril-generation, and Mountain Soul effects. The Spelunker's Guild unlocks powerful late-game artifact synergies.
About the author
Editor-in-Chief
Founder and Editor-in-Chief of gameguidesbox.com, began surfing the web in the late 19th century. Passionate about movies, coffee, gaming, and life itself. Favorite games include Titanfall 2, Baldur's Gate 3, Metro, PUBG, and CS2.
You may also like
Dwarf Eats Mountain: 10 Mistakes That Cost You Hours of Time
These 10 mistakes cost me roughly 15 hours across my first 6 runs. Runner stun neglect, early Prestige traps, and one upgrade you should never buy before run 4.
Dwarf Eats Mountain Build Order: First Prestige in 3 Phases
Stuck on what to build first? This route covers minute 0 through first Prestige in three timed phases with specific building sequences and upgrade priorities.
Dwarf Eats Mountain: Every Calamity Disaster and Survival Guide
Falling rocks are the least dangerous disaster. Monster nests and goblin raids are the real killers. Every disaster type plus the Flamer Fire Field strategy.
Comments