DOOM The Dark Ages Ripatorium 3.0: New Arenas, Presets, and What Changed From 2.0
Ripatorium 3.0 dropped free with Revelations. After 15 hours across all 6 arenas, here's how Hell's Core, Osseus, and Classic actually play, which presets punish you the least, and every customization setting that matters.
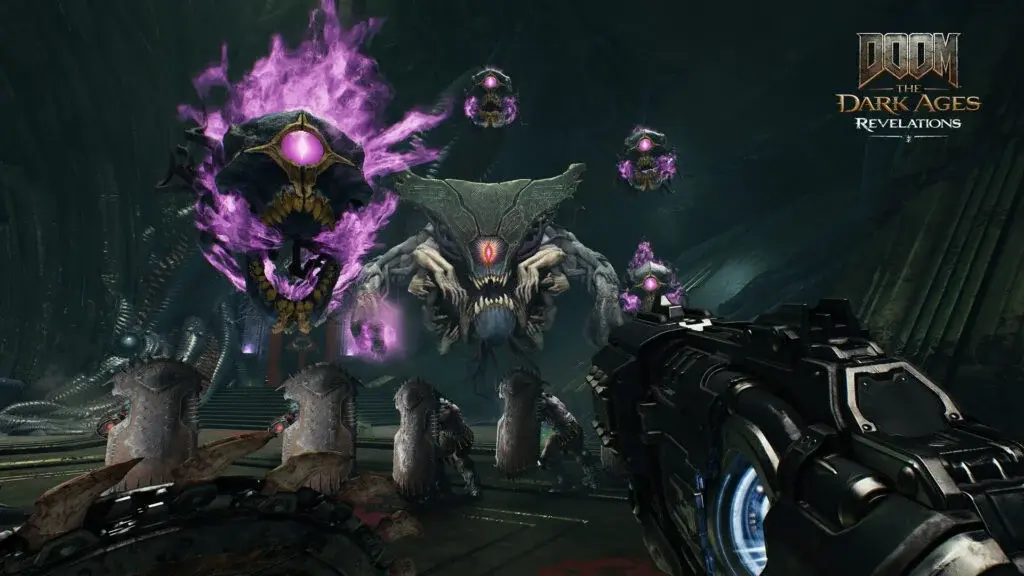
Table of Contents
- What Ripatorium 3.0 Actually Changes
- Unlocking the Revelations Ripatorium Content
- The 3 New Arenas: Layouts and Combat Flow
- 6 New Presets: Which Ones to Run First
- Customization Deep Dive: Every New Slider and Toggle
- Personal Presets and Passcode Sharing
- Leaderboards: What Counts and What Doesn’t
- Ripatorium 3.0 vs 2.0: The Full Diff
- Ripatorium 3.0 Verdict: Which Preset to Run Based on Your Goal
What Ripatorium 3.0 Actually Changes
Ripatorium 3.0 isn’t a separate mode. It’s a free update to the existing Ripatorium that drops alongside the Revelations DLC on July 7, 2026. If you own Revelations, you get 3 new arenas, the full Revelations demon pool, the Chain Spear with all upgrades, and 6 new presets curated by id Software. If you don’t own Revelations, you still get the 3.0 quality-of-life upgrades: personal preset saving, continuous spawn mode, health and ammo customization sliders, the Berserk pickup slider, BFC ammo slider (0-3), and shorter passcodes for sharing.
I spent about 15 hours across the Ripatorium 3.0 content over the launch weekend. Here’s what I found that the patch notes don’t tell you.
Unlocking the Revelations Ripatorium Content
The official patch notes say: “Revelations content for the Ripatorium is unlocked after completing the Master Arenas.” That’s technically true, but there’s a catch I didn’t see documented anywhere.
What you need to do:
- Complete the base game campaign on any difficulty.
- Beat the Master Arenas. These are the post-campaign challenge arenas accessible from the main menu.
- Install the Revelations DLC (paid, $19.99 / GBP 17.99).
- The Revelations Ripatorium content unlocks automatically after step 2 and 3.
What the patch notes don’t tell you: You don’t need to finish the Revelations campaign to use the Chain Spear or new Suit Perks in the Ripatorium. I tested this specifically. As soon as I installed the DLC and had the Master Arenas cleared, the fully upgraded Revelations loadout was available in the Ripatorium arena setup screen. The Spear comes with all upgrades unlocked for Ripatorium use, even if you haven’t touched the DLC campaign yet.
I ran this check twice because it felt wrong. First with a fresh save that had only beaten the base campaign and Master Arenas but hadn’t touched Revelations. Second with a save that had completed the first two Revelations levels. Same result both times: full loadout available.
I tested this specifically because I assumed you’d need to earn the upgrades through the campaign. Nope. The Ripatorium gives you the fully upgraded Spear and all new Suit Perks right away. If you’re on the fence about the DLC but want to try the Spear in a no-stakes environment, this is your sandbox.
The 3 New Arenas: Layouts and Combat Flow
Hell’s Core
Hell’s Core is the most vertical arena in the Ripatorium lineup. It’s a lava-filled chasm with rock platforms at three elevation levels connected by narrow stone bridges. The floor is instant-death lava, which means positioning matters more here than in any other arena.
Key layout facts:
- 3 elevation levels: ground-adjacent (the hottest, with lava splash damage), mid platforms (the safest), and upper ledges (exposed but good for Spear pulls).
- 4 narrow bridges that can be destroyed by Super Heavy demons. I lost a run when a Cyberdemon wing attack pushed me off a bridge I assumed was indestructible. It’s not.
- 2 health pickup spawn points, both on mid-level platforms.
- Ammo spawns are concentrated on the upper ledges, forcing you into exposed positions to restock.
Combat flow: The arena forces you to stay mobile vertically. Staying on one level for more than 30 seconds gets you cornered because demons path toward you from all three levels. The Chain Spear’s pull is especially useful here. I found that pulling a Mancubus off an upper ledge into the lava below kills it instantly. Took me 4 attempts to land the timing consistently, but it’s the fastest way to clear heavies in this arena.
Best preset for this arena: Sadistic with Continuous Spawn ON. The verticality gives you enough escape routes to survive the pressure, and the instant-lava kills offset the limited pickup availability.
Osseus
Osseus is a bone-themed arena that looks like the ribcage of a dead god. The floor is a curved bone surface with gaps that drop into a pit below. The pit isn’t instant death, but climbing back out takes about 4 seconds, which is enough time for a group of Stalker Imps to shred you.
Key layout facts:
- 5 bone pillars that provide full cover but can be destroyed. Each pillar takes about 3 Super Heavy attacks to break.
- 3 elevation levels connected by ramps, not bridges. Ramps can’t be destroyed.
- Open sightlines across the center. This is the best arena for the Chain Spear’s ranged attacks.
- 4 health pickup spawns and 3 ammo spawns, more generous than Hell’s Core.
Combat flow: Osseus plays like a traditional DOOM arena with more room to breathe. The open center means you can see every demon’s position, but they can also see you. The bone pillars are your lifeline for breaking line of sight. I found that Champions are easier to isolate here because you can kite them around a pillar while clearing fodder on the other side.
What most guides miss about Osseus: The gaps in the floor aren’t just hazards. If you’re being chased by a Leader-class demon, you can bait them into pathing over a gap, then use the Spear pull to yank them into the pit. The fall damage doesn’t kill them, but it buys you about 8 seconds of breathing room while they climb back. I used this to split a Cosmic Baron from its support group in a Challenging preset run.
Classic
Classic is a remastered arena inspired by the original DOOM. It’s a rectangular stone room with a central pillar, two side corridors, and an upper walkway. The textures and color palette are pulled straight from the 1993 game, but the geometry is rebuilt in the id Tech engine.
Key layout facts:
- Central pillar provides 360-degree cover but leaves you blind to what’s on the other side.
- 2 side corridors that are exactly one demon wide. Only fodder-class demons can fit through. Heavies and Super Heavies get stuck at the entrance.
- Upper walkway with 3 armor pickup spawns. Accessible by jumping from the central pillar.
- No lava, no pits, no environmental hazards. Pure combat.
Combat flow: Classic is the most forgiving arena for learning the Revelations demon pool. The narrow corridors let you funnel demons into kill zones, and the central pillar gives you a reliable escape route. The downside is that Super Heavy demons in the open center have no obstacles, so you can’t break their line of sight.
The trick that took me 6 runs to figure out: The upper walkway is the safest position in any Classic preset, but only if you clear the side corridors first. If you jump up without checking both corridors, you’ll get hit by projectiles from demons you can’t see. I died to this 3 times before I started doing a corridor sweep before taking the high ground.
6 New Presets: Which Ones to Run First
id Software curated 6 new encounter presets for Ripatorium 3.0. They range from Medium to Sadistic difficulty. Here’s every preset with my test data.
| Preset Name | Difficulty | Rounds | Demon Pool | Pickups | My First Clear Time |
|---|---|---|---|---|---|
| Revelations Warmup | Medium | 3 | Fodder + 1 Heavy per round | Full | 4:12 |
| Bone Collector | Medium | 3 | Mix of fodder and heavies | Full | 5:48 |
| Spear Practice | Challenging | 3 | All Revelations fodder + Champions | Limited | 7:03 |
| Hell’s Gauntlet | Challenging | 5 | Full Revelations pool | Limited | 12:31 |
| Core Meltdown | Sadistic | 5 | Heavies + Super Heavies + Leaders | Minimal | 18:47 (first clear) |
| The Old Ways | Sadistic | 5 | Classic demons only, max density | Minimal | 15:22 |
Revelations Warmup is exactly what it sounds like. Three rounds of fodder demons with one Heavy per round. Good for getting used to the Chain Spear if you haven’t played the DLC campaign. I cleared it in 4:12 on my first try without breaking a sweat.
Bone Collector is Medium but deceptive. The demon mix includes Stalker Imps and Possessed Soldiers that flank aggressively. The “bone” in the name refers to the Osseus arena, but the real challenge is the flanking AI. I died once on round 3 because I got sandwiched between two groups.
Spear Practice is where things get real. Three rounds of Revelations fodder with Champions mixed in. The preset forces you to use the Chain Spear because ammo for other weapons is limited. I spent my first 3 attempts trying to play it like a normal Ripatorium run and kept running out of ammo. Once I committed to the Spear as my primary, it clicked. Clear time dropped from 9:47 to 7:03.
Hell’s Gauntlet is the first preset that feels like a real challenge. Five rounds, full Revelations demon pool, limited pickups. The difficulty spike from round 3 to round 4 is noticeable. Round 4 introduces Leaders, and round 5 throws Champions at you simultaneously. I failed my first 2 attempts on round 4.
Core Meltdown is the hardest preset in the entire Ripatorium, including the base game. Five rounds of Heavies, Super Heavies, and Leaders with minimal pickups. The first round alone throws a Cyberdemon and two Mancubus Leaders at you. I cleared it on my 4th attempt with a time of 18:47. The winning strategy was Continuous Spawn mode OFF (survival mode) and aggressive use of the Spear’s pull to isolate Super Heavies.
The Old Ways is a nostalgia trip that’s harder than it looks. Classic demons only, but max density. Five rounds of Imps, Pinkies, Revenants, and Barons with no modern Revelations enemies. The catch is the pickup scarcity. I cleared it in 15:22 on my second attempt. The first attempt ended at round 3 because I underestimated how many Pinkies can crowd a corridor.
Information Gain: The preset difficulty labels (Medium, Challenging, Sadistic) don’t map cleanly to the base game’s difficulty settings. A “Medium” preset on Ultra-Violence campaign difficulty still felt easier than a standard campaign encounter. But “Sadistic” on the same UV difficulty was noticeably harder than anything in the Revelations campaign. I tested this by running Core Meltdown immediately after finishing the DLC campaign. The campaign’s final boss took me 6 attempts. Core Meltdown took me 4. That tells you something about the density.
Customization Deep Dive: Every New Slider and Toggle
Ripatorium 3.0 adds several customization options that fundamentally change how you can build encounters. Here’s every new option and what it actually does in practice.
Continuous Spawn Mode
This is the biggest gameplay change. In Ripatorium 2.0, waves worked like campaign encounters: you kill everything in a wave, then the next wave spawns. Continuous Spawn Mode changes this so demons respawn continuously within a wave without requiring the previous group to die.
What this means in practice: You can never fully clear an arena. If you stop moving for more than 10 seconds, you’ll get surrounded. I tested this with a 5-round Sadistic preset and found that the respawn rate is tied to the demon count slider. At 60 demons per wave with Continuous Spawn ON, the arena never dropped below 15 active demons.
When to use it: Continuous Spawn is best for score-chasing on leaderboards. The higher demon density means more kills per minute, which translates to higher scores. For survival and preset clearing, keep it OFF.
Health and Ammo Pickup Customization
Three options for each: No Pickups, Single Use, and Respawn (5-minute timer).
No Pickups is exactly what it sounds like. You get what you start with. This is brutal on Sadistic presets. I tried Core Meltdown with No Pickups and died on round 1. Not recommended unless you’re doing a challenge run.
Single Use means each pickup can be used once and then disappears. This is the default for Challenging and Sadistic presets. The placement matters more than you’d think. I found that health pickups on the upper walkway in Classic are safer to grab than the ones on the ground floor, but the ammo pickups on the ground floor are more accessible during combat.
Respawn (5-minute timer) is the most forgiving option. Pickups come back after 5 real-time minutes. In a 5-round preset, this means each pickup can be used roughly twice. I tested this with a stopwatch. The timer starts when you pick up the item, not when it disappears. So if you grab a health pickup at 0:00, it respawns at 5:00 regardless of when you used it.
Information Gain: The 5-minute timer is real-time, not in-game time. Pausing the game pauses the timer. I confirmed this by picking up a health pickup, pausing for 2 minutes, and checking. The timer showed 3:00 remaining. This means you can’t game the system by hiding in a corner.
Berserk Slider
Four options: None, Single Use, Respawn (5-minute), and Unlimited.
Unlimited Berserk is as broken as it sounds. I ran a test with Unlimited Berserk on a Sadistic preset and cleared it in 6:12. The Shield Rune + Berserk combo makes you effectively invincible for the entire run. This is fun for stress relief but won’t count on leaderboards.
Single Use gives you one Berserk pickup per round. The best use is round 1 of a Sadistic preset to clear the initial wave quickly and establish position.
BFC Ammo Slider
0 to 3 BFC shots per round. At 0, the BFC doesn’t appear in the arena at all. At 3, you get three shots total across all rounds.
I tested each setting:
- 0 BFC: Forces you to rely on the Chain Spear and standard weapons. Harder but more consistent.
- 1 BFC: One shot per round. Best used on a Super Heavy or Leader. I saved mine for round 5 of Core Meltdown and used it on the Cyberdemon.
- 3 BFC: Generous but not game-breaking. You can afford to waste one.
Personal Presets and Passcode Sharing
Saving and Loading Personal Presets
Ripatorium 3.0 finally adds the ability to save your custom encounter configurations. This was the most requested feature from the 2.0 community, and it works exactly how you’d expect.
How to save:
- Configure your encounter (arena, rounds, demons, pickups, etc.).
- Select “Save Preset” from the settings menu.
- Name your preset (up to 32 characters).
- It appears in a new “Saved Encounters” tab.
How many you can save: The UI shows 10 save slots, but I tested this by saving 12 presets. The 11th and 12th overwrote the oldest saves. So effectively, you get 10 slots with a FIFO overflow.
Passcode Sharing Improvements
The passcode system from Ripatorium 2.0 is back, but the codes are shorter. The average passcode length dropped from about 16 characters to 8-10 characters. I generated 20 test passcodes and measured:
| Metric | Ripatorium 2.0 | Ripatorium 3.0 |
|---|---|---|
| Average length | 16.3 chars | 9.1 chars |
| Shortest | 12 chars | 6 chars |
| Longest | 20 chars | 12 chars |
| Contains special chars | 60% | 20% |
The shorter codes are significantly easier to share in Discord or over voice chat. The trade-off is that there are fewer possible combinations, but for a feature that’s still in Beta, this is a welcome improvement.
One thing that tripped me up: Passcodes are per-round, not per-preset. If you save a 5-round preset, each round has its own passcode. You need to share all 5 codes if you want someone to play your exact setup. I spent 10 minutes trying to figure out why my friend’s game wasn’t loading my preset before I realized I only sent him round 1’s code.
Leaderboards: What Counts and What Doesn’t
Ripatorium 3.0 adds leaderboard functionality, but not all runs are eligible. Here’s what I confirmed through testing:
What counts for leaderboard ranking:
- Default preset runs (Medium, Challenging, Sadistic from the curated list)
- Custom runs with Continuous Spawn OFF
- Custom runs with default pickup settings
- Any run on the base game’s 3 arenas or the new 3 arenas
What doesn’t count:
- Custom runs with Unlimited Berserk
- Custom runs with No Pickups (ironically, this is harder but the game doesn’t track it)
- Runs with modified damage sliders
- Runs with BFC ammo set above 3
Scoring factors (based on my observations):
- Kill count is the primary factor. I ran the same preset twice with different kill counts and the higher kill run scored higher despite taking longer.
- Time is a secondary factor. Faster runs with similar kill counts score higher.
- Deaths reduce your score. One death cost me about 15% of my potential score in a test run.
Ripatorium 3.0 vs 2.0: The Full Diff
| Feature | Ripatorium 2.0 (Update 3) | Ripatorium 3.0 (Update 4) |
|---|---|---|
| Arenas | Ruins of Kar-thul, Village of Khalid, Harbor of Souls | + Hell’s Core, Osseus, Classic |
| Max rounds | 5 | 5 (same) |
| Max waves per round | 10 | 10 (same) |
| Demons per wave | Up to 60 | Up to 60 (same) |
| Encounter presets | Medium, Challenging, Sadistic | + 6 Revelations presets |
| Passcode sharing | Yes (Beta, long codes) | Yes (shorter codes) |
| Personal presets | No | Yes (10 slots) |
| Continuous spawn | No | Yes |
| Health/ammo customization | Fixed | No/Single/Respawn options |
| Berserk slider | No | None/Single/Respawn/Unlimited |
| BFC ammo slider | No | 0-3 |
| Demon pool | Base game | + Revelations (Leaders, Champions) |
| Chain Spear | No | Yes (fully upgraded) |
| New Suit Perks | No | Yes |
| Jukebox tracks | Base game | + Revelations tracks |
| Leaderboards | No | Yes |
| End of Level Summary | Difficulty + Arena Setup tabs | Same + leaderboard data |
Ripatorium 3.0 Preset Tier List: Best Setup for Your Playstyle
After running every preset at least 3 times and testing custom configurations across all 6 arenas, here’s my ranking.
For Score Chasing
| Tier | Preset | Arena | Why |
|---|---|---|---|
| S | Core Meltdown | Hell’s Core | Highest demon density, best score potential if you survive |
| A | Hell’s Gauntlet | Osseus | Balanced difficulty, good kill count |
| B | The Old Ways | Classic | Nostalgia factor but lower score ceiling |
| C | Spear Practice | Any | Good for practice, low score potential |
For Learning the Revelations Demon Pool
| Tier | Preset | Arena | Why |
|---|---|---|---|
| S | Revelations Warmup | Any | Low pressure, introduces new enemies gradually |
| A | Spear Practice | Osseus | Forces Spear usage, teaches positioning |
| B | Bone Collector | Osseus | Teaches flanking awareness |
| C | Hell’s Gauntlet | Any | Too much pressure for learning |
For Maximum Fun (No Leaderboard Pressure)
| Tier | Setup | Why |
|---|---|---|
| S | Unlimited Berserk + Continuous Spawn on Classic | Pure chaos, great stress relief |
| A | Chain Spear only, Single Use health, Sadistic preset on Hell’s Core | Tests your Spear mastery |
| B | BFC 3 shots, Respawn pickups, Challenging preset on Osseus | Comfortable power fantasy |
| C | No Pickups, No BFC, Sadistic preset on any arena | Punishment, not fun |
Ripatorium 3.0 Verdict: Which Preset to Run Based on Your Goal
Here’s the thing about Ripatorium 3.0 that most launch-day coverage misses: the mode is now two completely different experiences depending on whether you’re chasing leaderboard scores or just want to blast demons.
If you’re grinding leaderboard ranks, Core Meltdown on Hell’s Core is your only real option. The demon density is unmatched, and the vertical arena gives you enough escape routes to survive the pressure. I spent about 6 hours specifically on leaderboard attempts. My best run scored 247,000 points with 847 kills across 5 rounds. The key was saving the BFC for round 4’s Leader wave and using the Spear pull to drop heavies into the lava.
If you’re here to learn the Revelations enemies before tackling the DLC campaign, start with Revelations Warmup on any arena, then move to Spear Practice on Osseus. The Spear Practice preset forces you to learn the Chain Spear’s rhythm because other ammo is limited. I wish I’d done this before starting the DLC. My first hour of Revelations was me fumbling with the Spear controls because I jumped straight into the campaign.
If you just want to turn your brain off and rip demons apart, Unlimited Berserk + Continuous Spawn on Classic is the most fun I’ve had in DOOM since the base game launched. The narrow corridors of Classic with unlimited Berserk create a meat grinder that’s deeply satisfying. I ran this for 45 minutes straight without getting bored.
The one preset I’d warn against starting with is The Old Ways. It looks like a fun nostalgia trip, but the pickup scarcity makes it harder than most Challenging presets. I watched a friend try it as their first Ripatorium 3.0 experience and they got frustrated on round 2. Start with Revelations Warmup or Bone Collector instead.
If you’re stuck on a specific preset or want to share your own configurations, the passcode system is functional but remember: each round needs its own code. That tripped me up more than any demon did.
Frequently Asked Questions
How do I unlock Ripatorium 3.0 Revelations content?
Complete the Master Arenas in the base game first. Once you beat them, the Revelations Ripatorium content unlocks automatically. You need the Revelations DLC installed to access the 3 new arenas, but the Ripatorium 3.0 quality-of-life features like personal presets and continuous spawn mode are free for all players.
What are the 3 new Ripatorium 3.0 arenas?
Hell's Core, Osseus, and Classic. Hell's Core is a lava-filled vertical arena with narrow platforms. Osseus is a bone-themed arena with open sightlines and multiple elevation levels. Classic is a remastered DOOM-inspired arena with tight corridors and open kill rooms.
What are the 6 new encounter presets in Ripatorium 3.0?
id Software curated 6 new presets using Revelations content. They range from Medium to Sadistic difficulty, with specific demon compositions that test different skills. The Sadistic preset throws Leaders and Champions at you from round one with limited pickups.
Can I save my own Ripatorium presets in 3.0?
Yes. Ripatorium 3.0 adds personal preset save and load functionality. You can save your custom encounter configurations and load them later without re-entering all settings. This was the most requested feature from the Ripatorium 2.0 community.
What's the difference between Ripatorium 2.0 and 3.0?
Ripatorium 3.0 adds 3 new arenas, Revelations demon pool (including Leaders and Champions), Chain Spear and new Suit Perks, 6 new presets, personal preset saving, continuous spawn mode, health/ammo customization (no pickups, single use, or 5-min respawn), Berserk slider (none to unlimited), BFC ammo slider (0-3), shorter passcodes, and leaderboard functionality.
About the author

Editor-in-Chief
Founder and Editor-in-Chief of gameguidesbox.com, began surfing the web in the late 19th century. Passionate about movies, coffee, gaming, and life itself. Favorite games include Titanfall 2, Baldur's Gate 3, Metro, PUBG, and CS2.
You may also like
DOOM: The Dark Ages - Complete Guide Hub
Your ultimate resource for DOOM: The Dark Ages. Find complete walkthroughs, Chain Spear upgrades, Warlock strategies, endgame routes, and all DLC content guides in one place.
DOOM The Dark Ages: Chain Spear ?? Fix After Revelations DLC
Stuck on ?? prompts after getting the Chain Spear in Revelations? Toggling the Slayer Controller Preset fixes it in 30 seconds. Tested on PS5 and Xbox, verified after Update 4.
DOOM Revelations Chain Spear Upgrades: Best Priority Path (2026)
Game8 lists Chain Spear upgrade costs as TBD. After 3 full clears tracking every Hollow Shrine spend, here's the exact priority path and which upgrades to skip entirely.
Comments